
Copyright © 2023 Balmoral Software (http://www.balmoralsoftware.com). Portions copyright © 2013 Kheops Studio. All rights reserved. Republication, redistribution or conversion is expressly prohibited without the prior written consent of Balmoral Software.
The game's Play Mode is set to Adventure. Some of the directions in this walkthrough assume the 360° Free View setting is off. All mini-games and puzzles are played in Normal mode.
Re-enter the elevator and move the pass card from your inventory into the slot per the instructions. Before reaching your destination on Floor 13, you'll need to repair the elevator. Select Floor 20 and exit the elevator to face a swimming pool. Turn around and click on the double doorway overhead to discover the Elevator Machinery Room. Turn back to the pool, look down and remove the pool ladder with your bare hands. Turn around and put the ladder onto the hooks on the wall in order to reach the room above.
Inside the machinery room, open the cabinet and try to remove the motherboard. Take the middle one of the 5 red-handled screwdrivers from the blue pegboard. Use the screwdriver on each of the four corners of the motherboard. Zoom in on the motherboard and solve the HOG for 25 components:
Remove the 9 cumbersome objects indicated by cursor hotspots, then put the motherboard onto the table. Solve the jigsaw puzzle: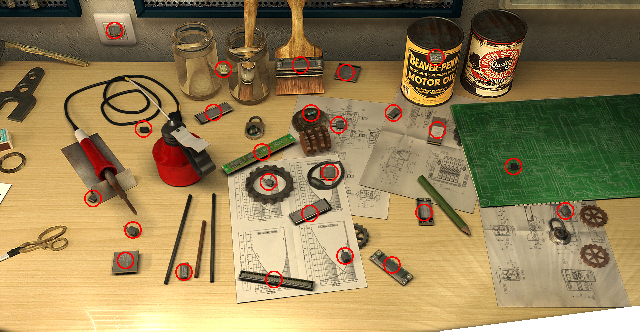
Zoom in on the motherboard, then plug the soldering iron into the wall outlet and get a shock.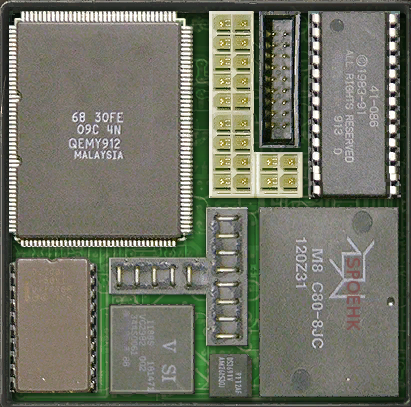
Back out, return the motherboard to the cabinet and use the screwdriver on the corners again. Close the cabinet and pull its large red handle to illuminate a green light, indicating that the elevator is repaired. Return to the elevator and go to Floor 13.
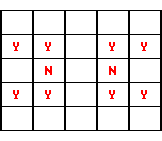
Note that a neighbor count does not include the button pressed, so it can vary from 0 to 8, with fewer possibilities for buttons at the corners and edges.
the shortest solution is:
H E D G H E B A DRotate right three times and click on the wall map. John's reference to spiders is from a room explored in Chapter 1. Click on the 6 spiders while they are rotating.[DEL]
A B E H G D E H I
When completed, the office map is accessible using the Map button at the bottom of the screen. This map also shows the active surveillance cameras.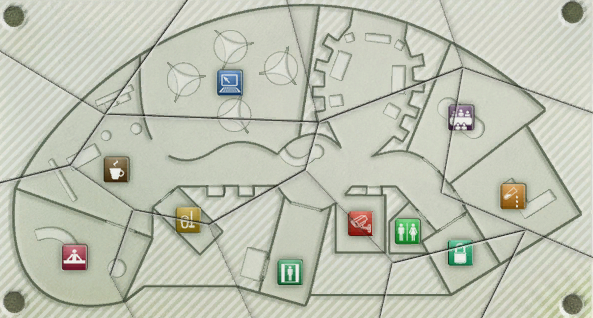
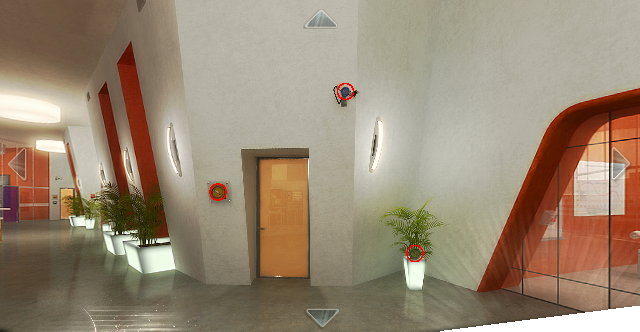
Enter the red door into the Video Surveillance Room and zoom in on the control console beneath the six video screens. Click on the defective digital recorder in the USB-4 slot at right. Solve the HOG for 20 recorders:
Click again on the defective digital recorder at right to remove it. Move each of the three digital recorders in your inventory to the USB-1, USB-2 and USB-3 slots at right. Checking the office map, the least obtrusive camera that can be left on is probably #1 (Computer Room). Click on the grey buttons for Cam-1, USB-1, USB-2 and USB-3 to turn the associated red lights to green. Press the green GO TO LIVE button at the bottom. A check of the map shows that all other video cameras have been disabled.
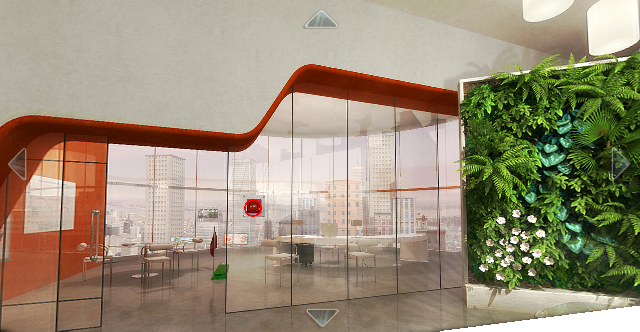
Back out twice and approach the yellow door to the Laboratory. Click on the access panel to the left of the door. Note the interesting pattern of repeating symbols on the Meeting Room window at left. These are the Morse Code symbols for A, C, O and M, which can spell "coma". Perhaps a clue to what's going on?
Use the map to help you navigate to the Storeroom.
Define a move as sliding a piece in the indicated direction as far as it will go, unless specified otherwise.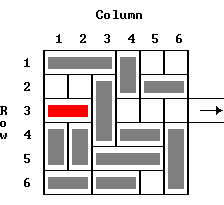
A solution in 30 moves is:
1. Column 4 downBack out and enter the Top Management Office at right. Press the switch on the red column.
2. Row 1 right
3. Column 6 up
4. Row 6Right right
5. Row 6Left right
6. Column 1 down
7. Column 2 down
8. Column 3 up
9. Row 4 left
10. Column 4 down
11. Row 2 left
12. Column 6 up
13. Row 5 right
14. Column 3 down
15. Row 2 left
16. Column 3 up
17. Column 4 up
18. Row 4 right
19. Column 1 up
20. Column 2 up
21. Row 6Left left
22. Column 3 down
23. Row 1 left
24. Column 4 up
25. Row 3 (recorder) right
26. Column 3 up
27. Row 5 left
28. Row 6Right left once
29. Column 6 down
30. Row 3 (recorder) right
Press the red button to hide from the passerby.
(Dark green) Orange Brown Light green Red Green Blue Yellow
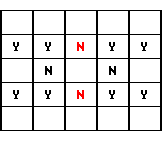
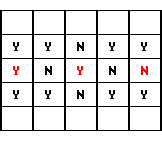
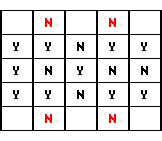
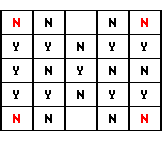
Back out from the puzzle and click on the control panel of the safe under the desk to disclose a larger version of the neighbor puzzle seen in Reception. Click on the 5 x 5 keypad five times until a HOG is triggered. Solve the HOG for 20 reminders: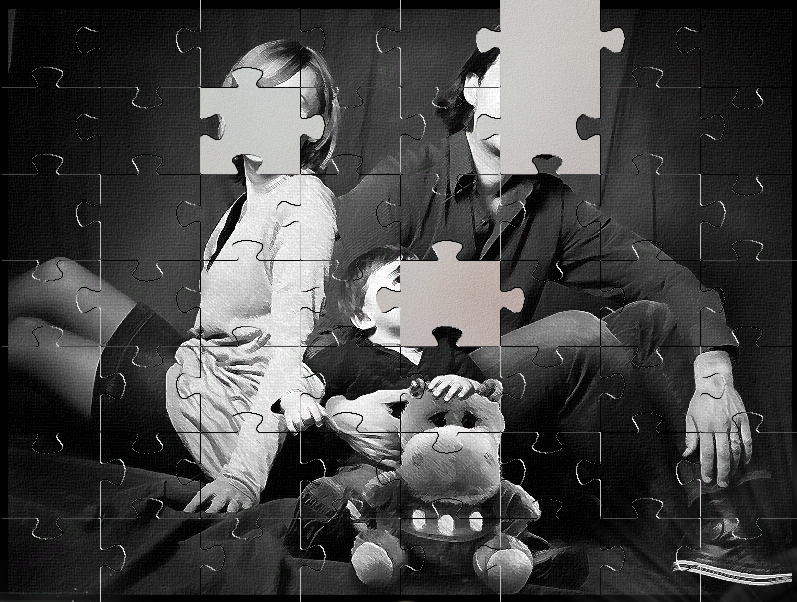
To skip the derivation and jump to the solution, click here. Note that the top and bottom halves of the pattern are mirrored. It follows that the button presses on the keypad have the same symmetry.
A solution in 12 moves is: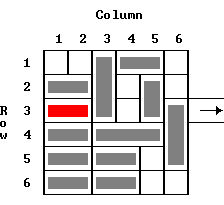
1. Column 6 upThe Row 2, Row 4Left, Row 5Left and Row 6Left pieces are not moved.
2. Row 4Right right
3. Row 5Right right once
4. Row 6Right right once
5. Column 3 down
6. Row 1 left
7. Column 5 up
8. Row 3 (paper) right
9. Column 3 up
10. Row 4Right left
11. Column 6 down
12. Row 3 (paper) right
Back out and return to the Top Management Office. Zoom in on the desktop and use the Tracing paper and pencil on the check. Make your way back to the Laboratory door. Move the signature from your inventory onto the door access screen. Use the stylus to trace "J. Spoehk". The red color indicates which letter should be traced. Not sure why this isn't the same process used in the office on the tracing paper. You may find the Easy version of this puzzle easier (or even possible) to complete, depending on your manual dexterity.
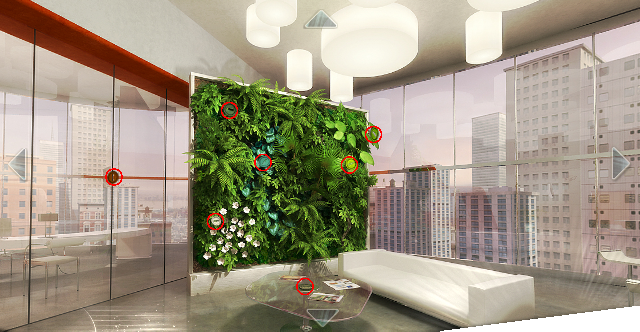
Enter the Laboratory and click on the small red button to the right of the interior windows to discover the Secured Room. Exit the Laboratory and return to the Storeroom. Click on the air conditioning grille to learn that you need a map and a flashlight before trying to navigate the ducts. Back out and return to the Reception area. Enter the Waiting Room, rotate left twice and click on the yellow scroll to identify it as the Diamond Sutra. Could this be the reference earlier in J. Spoehk's checkbook? Click on the placard below the scroll to obtain the surveillance room safe combination: 204-565.
Optional activity: If desired, you can repair the broken statue in this room. More on that much later.
Return to the Video Surveillance Room, zoom in on the video console and insert the digital recorder in your inventory into the empty USB slot. Click on the grey buttons for USB-1 to USB-4 and press the green GO TO LIVE button to turn off all video cameras.
Back out and pick up the flashlight at left. Click on the safe at lower right and enter the combination 2 0 4 5 6 5 V. Take the map of ducts from the safe. Return to the Storeroom and try to enter the open duct through the falling snow.
Take the elevator down to parking level P2. Exit the elevator and click on the locked gate to learn you'll need a way to open it. Return to the roof on Floor 20 and enter the Elevator Machinery Room. Solve the HOG for 15 cutting tools:
Take the elevator back to Level P2 and use the Cutting pliers to open the gate. Enter the cage and click on the cabinet.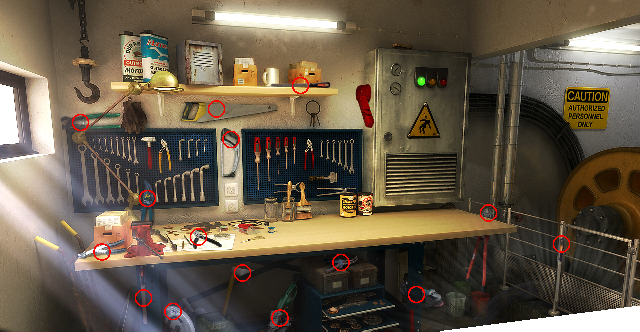
			Fuse tab
		 A	 B	 C	 D

		-2	-1	-2	+1
	Fuse	-2	-1	+1	+2
	values	-1	+1	+2	-2
		+1	+2	+1	+2
		+2	+2
		--------------------------
	Totals	-4	+3	+4	+3
Next, identify the current and desired settings for each dial. The goal is to set the dials at the midpoints of the red "warm" regions:
						Dial
					 A	 B	 C	 D
	Current setting			-6	+6	+5	+5
	- Change from fuse removal	-4	+3	+4	+3
					--------------------------
	Baseline setting		-2	+3	+1	+2
	- Desired setting		+2	 0	-3	-2
					--------------------------
	Net change needed		+4	-3	-2	 0
In the computer, we can simply test each permutation of the 10 fuse values into the 10 sockets to see if the desired changes are made. It turns out that there is only one solution:
To obtain this arrangement, make the following 5 swaps: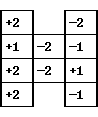
Exit the cage and use the elevator to return to the Storeroom on Floor 13.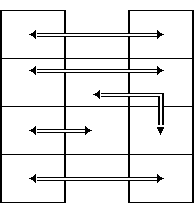
F: Click forward as many times as possible until blocked ahead by a wallthe following move sequence is the quickest and simplest path through the duct maze:
R: Click on the exit at right
L: Click on the exit at left,
F R L F R* F L* F L R F R F R*Click twice on the vent opening to enter the Secured Room.*: A vent can be seen on the opposite side
Select the five correct prints using the sticky tape on each one. This is a difficult puzzle since little information is returned about which 5 of the 15 prints should be chosen. In the absence of any other information, there are 3003 different sets of 5 prints (126 in the Easy version of the puzzle). While examining the angles of prints wasn't fruitful, the correct prints are generally of about the same size (i.e., small and large prints don't seem to be mixed), as indicated by the single clue provided for the puzzle. Note the sideways print at lower center that seems to be thumb-shaped. However, beware of a comment about having prints for the same hand, as that hand does not seem to be the one being sought. After a fair amount of trial and error, the correct solution is
Move the dark print set from your inventory to the row of circles on the security panel. Of the 5! = 120 possible orderings, the following transfers should be made: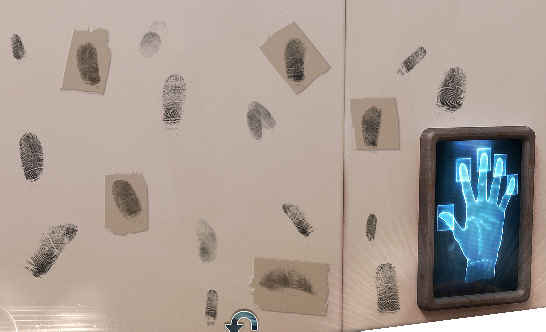
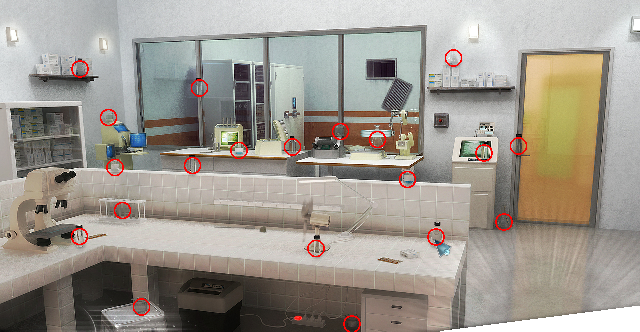
Open the cabinet and solve the HOG for 20 digital media:
Finger 1 2 3 4 5 Move Fore-
finger to
position 2Move Middle
finger to
position 3Move Pinkie
to position 5Move Thumb
to position 1Move Ring
finger to
position 4
Pick up the X88 Component from the middle shelf. Back out and return to the Storeroom via the open vent. Use the map to find your way to the Computer Room nearby. Approach the printer at left center.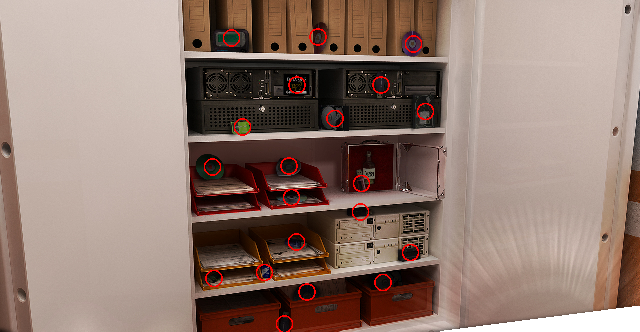
Move the Key data in your inventory to the USB port at upper left. Open the upper drawer of the printer to see that it's out of paper. Return to the Storeroom.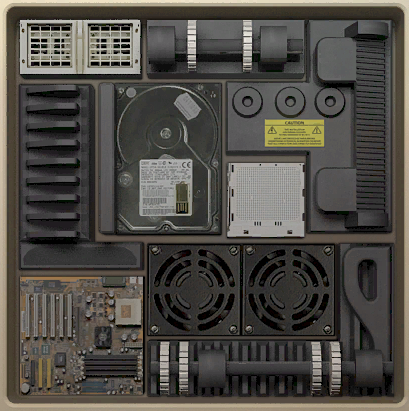
A solution in 19 moves is: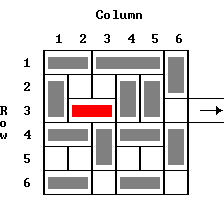
1. Column 6Top downThe Row 4Left and Row 6Left pieces are not moved.
2. Row 1Right right
3. Row 1Left right
4. Column 1 up
5. Row 3 (paper) left
6. Column 3 up
7. Row 4Right left
8. Row 6Right left
9. Column 5 down
10. Column 6Bottom down
11. Row 4Right right
12. Column 3 down
13. Column 4 down
14. Row 3 (paper) right
15. Column 1 down
16. Row 1Left left
17. Row 1Right left
18. Column 6Top up
19. Row 3 (paper) right
Return to the Computer Room and move the paper from your inventory into the open printer drawer. Close the drawer and press the glowing green button.
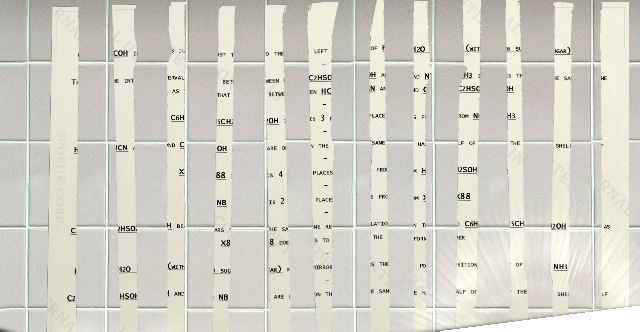
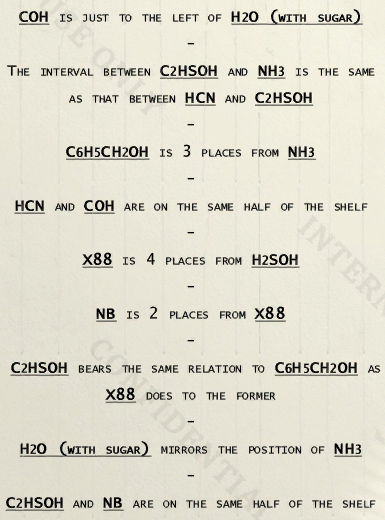
Apply the Sticky tape to the formula and return to the Laboratory. Zoom in on the lab bench and try using the formula from inventory. Plug the lamp cord into the dark outlet at right. Solve the HOG for 20 strips of paper:
Again apply the Sticky tape to the formula. Solve the HOG for 20 chemist's utensils:
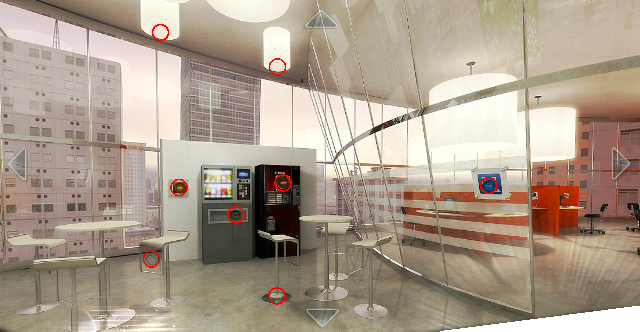
Move the X88 component from inventory to the beaker at position 7. Back out and use the map to go to the Lounge. Zoom in on the vending machine there. Click on the coin slot, then back out and rotate around to solve the HOG for 20 tokens:
Return to the vending machine.
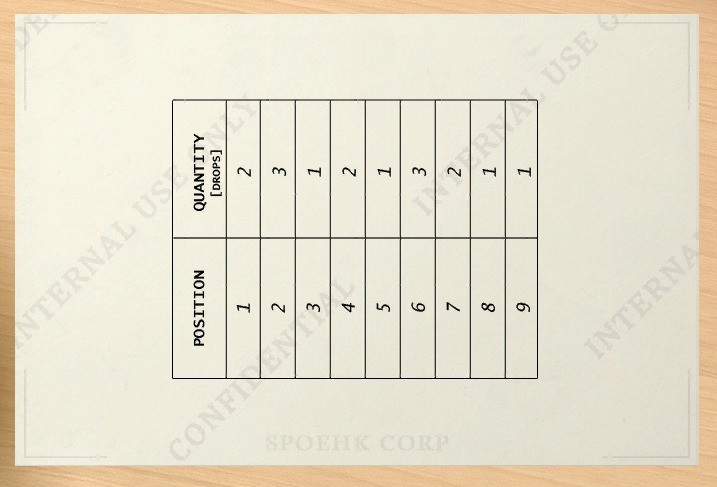
8 tokens: 1 token: 7 tokens: 1 token: 3 tokens:
4 x 4 x 6 + 4 produces 100Return to the Laboratory. Zoom in again on the bench and transfer the Sweet drink from inventory to the beaker in position 2. Using the pipette on the table, transfer drops of each liquid (one drop at a time) to the large Erlenmeyer flask according to the formula (16 drops total). Use the stopper on the table to seal the flask and store it in your inventory.4 x 4 x 9 + 1 produces 145
4 x 9 x 9 + 9 produces 333
4 x 6 x 9 x 9 produces 1944
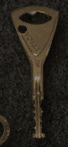
Back out and go to the elevator to find out you cannot reach the roof. Return to the Video Surveillance Room and zoom in on the box of keys at upper right. Remove 14 matching pairs of keys until the odd one is identified. Return to the elevator and insert the Elevator master key in order to reach Floor 20. Exit the elevator and walk to the right to reach a glass balcony.
Click on the cradle and watch the endgame sequence. The glass flask containing the formula (whatever that is) would ostensibly be shattered in the fall. A blurry version of the Chapter 3 starting point is then shown:
More to come in The Fall Chapter 3: Revelation...
Copyright © 2023 Balmoral Software (http://www.balmoralsoftware.com). Portions copyright © 2013 Kheops Studio. All rights reserved. Republication, redistribution or conversion is expressly prohibited without the prior written consent of Balmoral Software.


