Copyright © 2023 Balmoral Software (http://www.balmoralsoftware.com). Portions copyright 1996-2014 by Presto Studios, Inc. All rights reserved.
Press [Esc] for the main menu, and Alt-Enter to toggle full-screen and windowed display modes. Necessary keystrokes for the game interface include keypad 7 to display and select inventory, keypad 9 to display and select biochips, and T to toggle the inventory/biochip description in the lower central window. A few video cutscenes can be skipped with [Esc], but most cannot.
Saved games are listed alphabetically rather than chronologically, so you may want to include a sequence number in the saved-game name. The list can be scrolled using a mouse wheel. The last game restored is left at the top of the display, ostensibly to facilitate replaying a sequence.
The following movement abbreviations are used in this walkthrough:
F: Move forward (keyboard up arrow)Note that forward motion is often interrupted for announcements, animations or other game events. In particular, the next control keystroke may not be recognized after passing through a doorway until the sound of the door closing behind you has been heard. Unlike the later games of the trilogy, there is no way to look up or down other than occasionally zooming in on a hotspot.
B: Back out from close-up (keyboard down arrow)
L: Rotate left (keyboard left arrow)
R: Rotate right (keyboard right arrow)
Fn indicates moving forward and/or opening doors using exactly n keystrokes; otherwise, F indicates moving continuously until you are blocked or stopped (with a grunt)
If an asterisk is appended to F or Fn, at least one doorway is passed through
Some arbitrary scoring is provided at the end of the game, but you cannot see your progress except by dying in one of the several dozen ways that can happen (most of which are documented here). Many of these deaths are encountered during the numerous timed sequences in the game, some of which are reasonably challenging. It may help during these timed sequences to pause the game using the [Esc] key. Some of the particular deaths are almost like easter eggs, in that they aren't triggered unless there are many minutes of inactivity at particular points in the game.
Inventory items are shown in bold text in the walkthrough. Note than an inventory icon changes (usually becoming brighter) when it's in the viewport position at which it's to be used. There are only 9 slots to store inventory items, and extraneous items are automatically removed if space is needed.
This walkthrough provides a minimum path through the game.
Prehistory
The demo of the game begins hereSelect the Pegasus Biochip
If you mistakenly move F2, you'll die
Instead, move R2 F L F L F R F R F
Click on the device's handle to activate it
B R F L F4 R F4
If you then mistakenly move L F3 L F over some eggs, Barney's green cousin will get you
Instead, move R F L
Click on the console at left to extend a bridge over the chasm
F
Use the Journeyman Key on the 3 red circles and retrieve the Historical Log
The game demo ends here
If the steering is incorrect, such as pressing R as the first choice or not responding in time, you'll take a wrong turn
Click on 2310 date | JUMP
YES, remove the projectile
If you select NO or take more than 11 minutes to find an antidote, you'll be
poisoned
R2
Put Tranquilizer Dart into Compound Analyzer
Click on computer screen
L2 F1 R
Click on screen
BUILD THORAZINE MOLECULE
PROCEED
For each of three molecules, you'll need to select the correct sequence of 6
components, with the process restarted if you make a mistake. Unlike the
original game,
this puzzle randomizes each time it's played, so no fixed solution is
possible and you'll have to use trial and error. Picking randomly from the
decreasing set of possibilities, you can expect an average of 8.5 guesses
(23.5 screen clicks) to get each correct sequence. If no mistake is made
during the selections, no more than 16 guesses (41 screen clicks) will be
necessary to find each answer. The following grids may be useful:
L2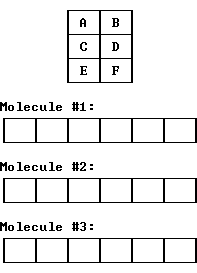
Click on 2112 date | JUMP
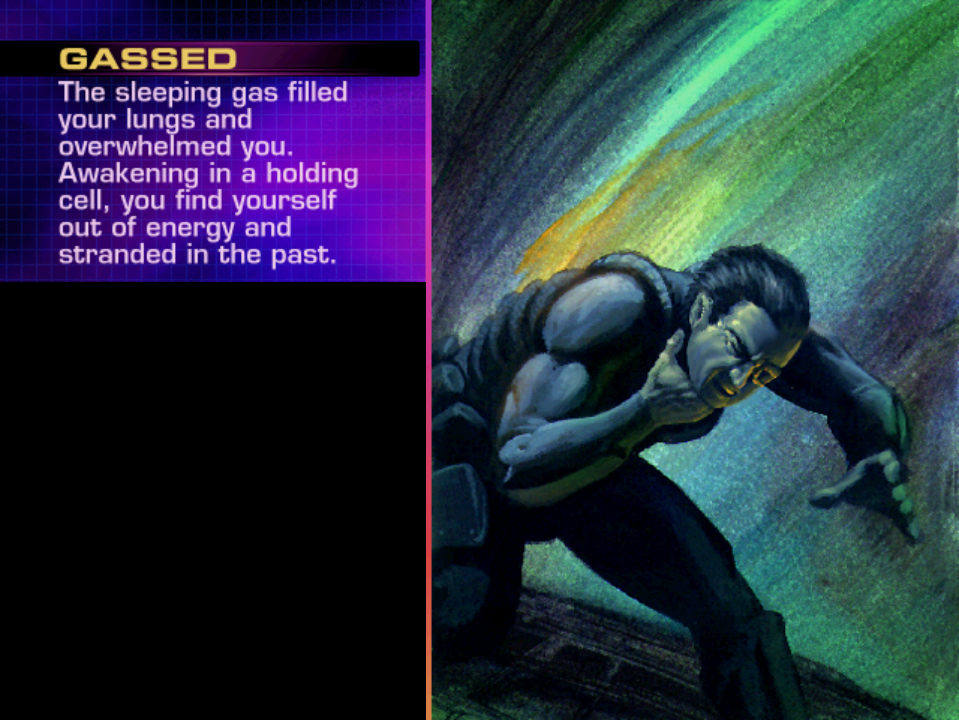
You have about 75 seconds to find another way to breathe before you are
gassed
R F
Wait for the display to stabilize, then take Gas Canister
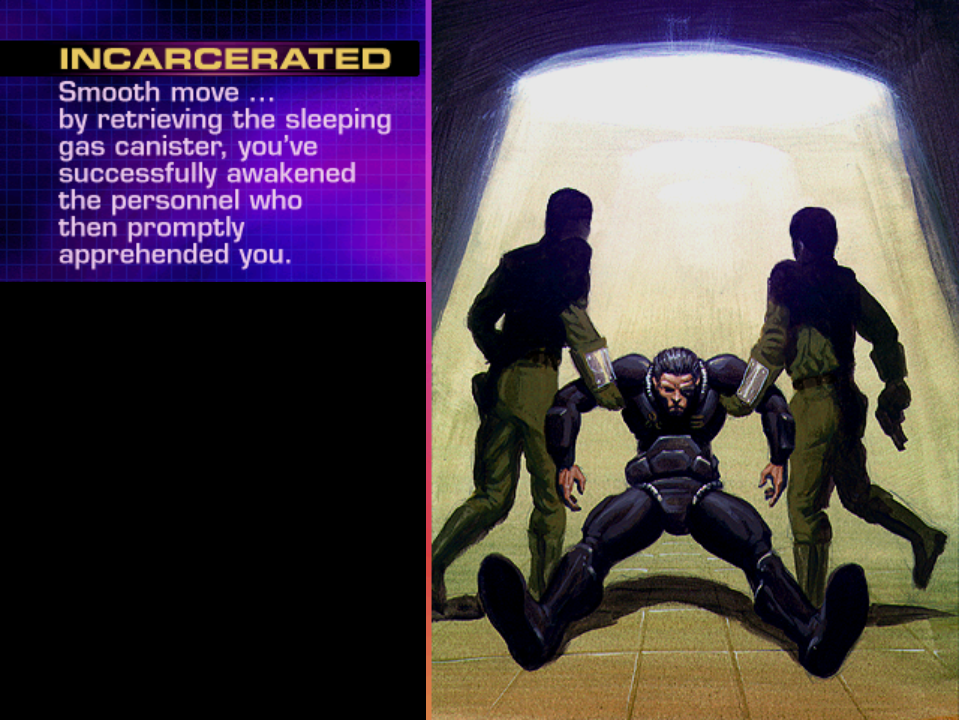
You've disabled the sleeping gas, but if you try to explore now, you'll be
incarcerated
Put Nitrogen Canister onto receptacle
Select DISPENSE MODE | N
Take Nitrogen Canister (charged)
Put Oxygen Mask onto receptacle
Select DISPENSE MODE | O
Take Oxygen Mask (full)
Click on the O2 box at lower center to turn on its air filter
Attach Gas Canister to receptacle
Select INTAKE MODE
B L F* L F*
Zoom in on the door's central panel
Press and hold the down arrow to equalize pressure
F R F
Click on the elevator down button
B L F* R F R F
LAUNCH PREP
B R F L F2* L F R
F
Click on blue screen
At the 5 top-of-screen <STEER> prompts, separated by video transmissions
and exploding torpedoes, press
If you don't get it right, you're sunk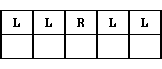
This interface for finding global locations is much improved over the original game. You can pause the game with the [Esc] key if you need time to research a location. Svortalsk ("blasphemous" in Dutch) is apparently a fictional city in Russia, and is the uppermost of the two red dots north of China.
Location Time limit Honolulu, Hawaii 2:00 Dublin, Ireland 1:50 Adis Ababa, Ethiopia 1:40 San Antonio, Texas 1:30 Bangkok, Thailand 1:20 Bonn, Germany 1:10 Seoul, Korea 1:00 Reykjavik, Iceland 0:50 Svortalsk, Siberia 0:40 Madrid, Spain 0:30
Click on 2185 date | JUMP
L F3 R F6 L F R F3* L F R
Put the Access Card into the red vertical slot
At the 4 <STEER> prompts that will be shown on the bottom of the viewport,
press
L F R F3* L and a robot will appear
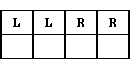
Detonator Puzzle
Each of the three Detonator Circuit Link puzzles is a successively more
difficult Jotto game in which you try to determine a hidden sequence of
colors by making guesses and receiving a score for each guess. Each possible
solution consists of three selections drawn from a set of 3, 4 or 5 colors,
depending on the puzzle level. Scoring is one point for each correct color
in the proper position. A color appears no more than once in a sequence, so
there are 6, 24 and 60 possible patterns at puzzle levels 1, 2 and 3,
respectively.
The Detonator Circuit Link puzzles randomize each time they are played, so no fixed solutions are possible but you can use the built-in solver below. Instructions: In the game, click on "Attempt circuit link to detonator" to begin the puzzles and start a 4-minute timer in which you must finish all three puzzle levels. This time limit is considerably more challenging than the 7 minutes allowed in the original game. If you are unable to determine the hidden color pattern in 6 moves or less, the puzzle will reset to the previous puzzle level.
Step 1: Click on the "Possible color synapse nodes" to match the starting guess below for the current puzzle level. After the last color is entered, a numerical score will be displayed at right.Continue this back-and-forth process until a solution is reached in the game and the hidden pattern is highlighted in white. At that point, you can progress to the next level by toggling the puzzle level button immediately below.Step 2: Back on this webpage, select that score below using one of the buttons in the group at right.
Step 3: Press the "Find next guess" button below, and the best choice for the next guess will be displayed in the column at left. Back in the game, repeat Step 1 using the new row of colors.
If correctly used, the solver is guaranteed to find a solution in 6 or fewer guesses, with about 4.4 being the average number of guesses at level 3. The grids below may be of help in recording the next guess to transfer into the game:
LOWER DIAGNOSTIC SCREEN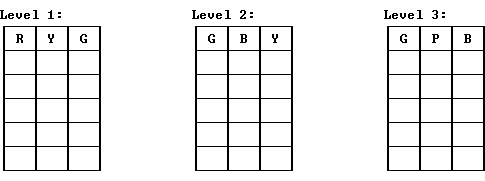
North is at the top of the map, and you can determine the direction you're facing by referring to the compass at the top of the game's viewport. In the map above, the green line indicates the primary path through the maze. The purple lines indicate pairs of alternate paths that are taken depending on the randomized open/close state of the doors in white. To avoid backtracking, you can save your game at the branch points indicated by purple squares. The two orange doors would offer significant shortcuts, but always seem to be locked. The save point in white is about halfway through the maze and may be a convenient place to save your progress. Be careful of the mining droids at the positions indicated by the red lines, or you'll get pulverized.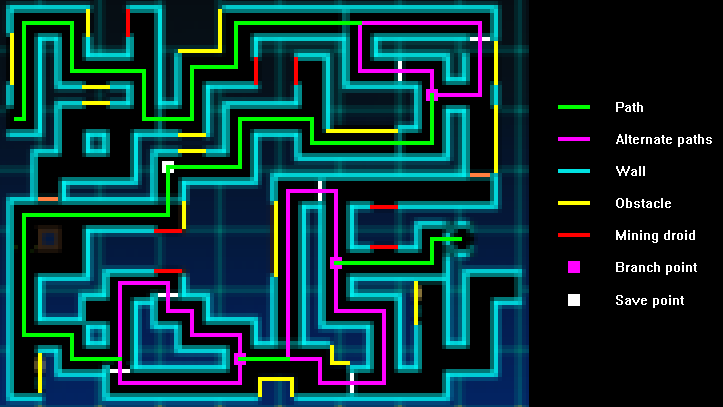
If you fail to steer correctly and on time, you'll crash & burn
EXIT
R F2 L F L F2 R F* L F4 L F10
Put Card Keyring into slot at left
Select Caldoria Hts. Apts. (The other destinations get you
assassinated)
F1 R F R F1 L
Click on elevator button 1
F L2
Click on the top hotspot (R for Roof)
F R F L
Be sure your Shield Biochip is active
Put the Card Bomb onto the door panel and wait about 10 seconds for it to
blow a hole in the door
If you didn't have your Shield Biochip active, you'll
die
If you move F R F L and wait a few seconds, Sinclair will
shoot you
F L F R F2
Select Stun Gun in inventory
R
Immediately use the Stun Gun on Dr. Sinclair (if you fail, you'll be
assassinated)
L F
The objective of the next 6 progressively-harder puzzles is to trace out a
Eulerian path through
the network by traversing each line segment exactly once. The nodes at the
ends of the line segments can be visited as many times as necessary. A red
dot indicates the last node you visited, so your next node is one connected
to the red node by a light blue line segment. If the graph contains two
nodes with an odd number of connected line segments, the puzzle can be solved
by starting and ending at those nodes (the puzzle is unsolvable if there are
more than two such nodes). If you fail, you'll have to start the level over.
If you take more than 10 minutes to solve all 6 levels, you'll be
nuked. Partial progress cannot be saved, but the
countdown timer can be halted using the [Esc] key to pause the gameplay.
These puzzles have multiple solutions; in the ones given below,
compass notation
indicates the direction to the next node. Move the indicated number of
nodes, or as far as possible if no number is specified. It's usually of
more concern to make sure that no errors are made following the path, rather
than trying to finish as fast as possible.
Level 1
Starting at the middle node at far left, move
N E S W N1 E1 N E S W N2 E
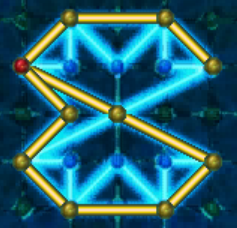
Level 2
Starting at the leftmost of the two bottom nodes, move
N E NW S NE NW W S E S SW W NW N NE
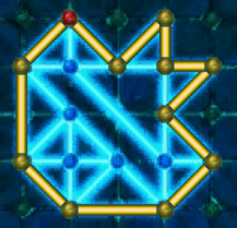
Level 3
Starting at the topmost of the two nodes at far right, trace a counterclockwise path around the outside of the figure by moving
NW W SW SE SW SE E NE WNW,then follow a path around the inner nodes by moving
E N SE NE S E WSW E S NE SE N E
Level 4
Starting at the node in the notch at upper right having 5 connected line segments, trace a mostly-clockwise path around the outside of the figure by moving
E S W1 NE W S W N W N E1 SW E N E S,then follow a clockwise path around the inner square by moving
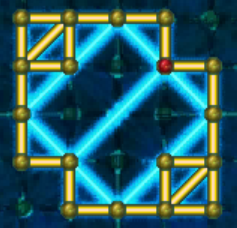
SE SW NW NE SE1 SW
Level 5
Starting at the leftmost of the two top nodes, trace a clockwise path around the outside of the figure by moving
SE NE S1 E SW SE SW W NW N NE,then connect the interior nodes by moving
S E2 S2 NW W SE2 W NE S NE SE N E
Level 6
Starting at the top center node, traverse the perimeter of the octagon in a clockwise direction by moving
E SE S SW W NW N NE E1Next, trace out an interior square by moving clockwise:
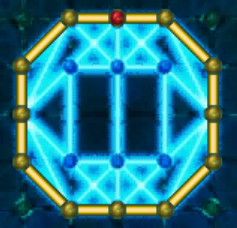
SE SW NW NEThe remaining untraveled outer line segments are lit up by moving clockwise:
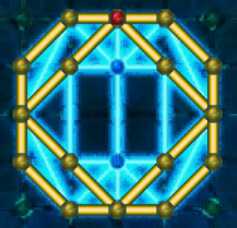
S1 NE SSE SSW NW SW NNW NNE SEFinally, trace out the innermost square by moving clockwise:

E S W N E1 Sand the endgame sequence plays
Shortest-route score:
Copyright © 2023 Balmoral Software (http://www.balmoralsoftware.com). Portions copyright 1996-2014 by Presto Studios, Inc. All rights reserved.
