Copyright © 2026 Balmoral Software (http://www.balmoralsoftware.com). Portions copyright © 2022 by Littlefield Studio. All rights reserved.
Atlas is predominantly a puzzle game like the previous one, mostly single-threaded but with a limited hint system and the option of skipping a puzzle if needed. Puzzles start out being fairly easy, but gradually get more challenging in later chapters. Many of the puzzles seem to be unique to this game, and several are very satisfying to figure out.
Movement abbreviations used in this walkthrough are:
The game begins where the previous game Machinika Museum left off, in a spherical escape pod that has landed on Atlas, a moon of Saturn. Although Atlas is a real place, we'll have to suspend our disbelief for the purposes of the game. A tutorial starts, explaining the basic game interface. An animation shows the route the spaceship took from Paris, and depicts Atlas as having an irregular shape that is more grounded in reality. You'll obtain a key that you can configure in the inventory window. After using the key a couple of times, you can click on the floating sphere to enter the spacecraft.
Press the green button on the walkie-talkie repeatedly to exhaust the dialog segments. Pick up a sparking metal rod lying on the floor near the central pedestal. Zoom to a sparking light on the opposite side of the room and use the stick to pry open the light cover. Pick up a round box inside. Examine it in the inventory window and unscrew its top to find a blue crystal inside.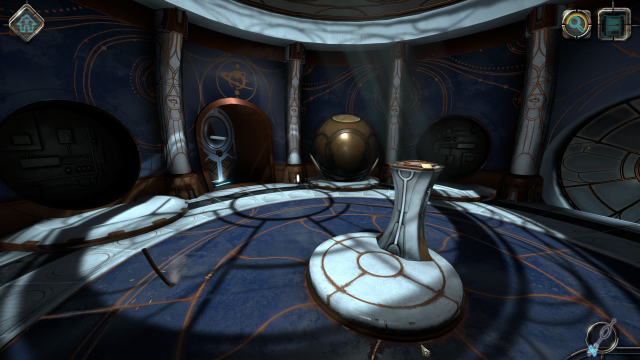
Zoom to the left side of the central pedestal. Pull the vertical piece down and the horizontal piece right to release a mechanism. When the mechanism comes out of the pedestal, follow these steps:
Configure the rotors to match the mirror image in the shadows on the case lid: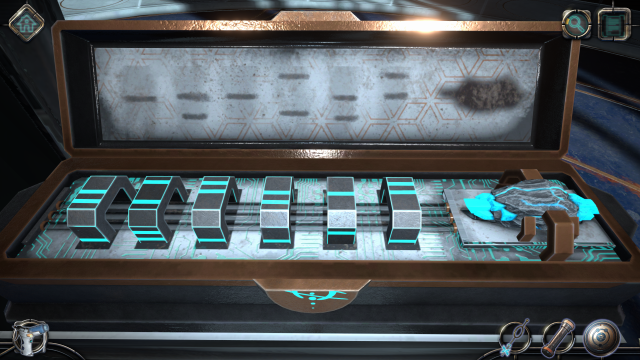
On the top of the pedestal, read Letter #01 from your predecessor. Rotate the blue handle on the top of the pedestal CW one turn to activate a scroll. Click on the large red X on the scroll to disclose some gears under a floor plate. Press the large gears in the order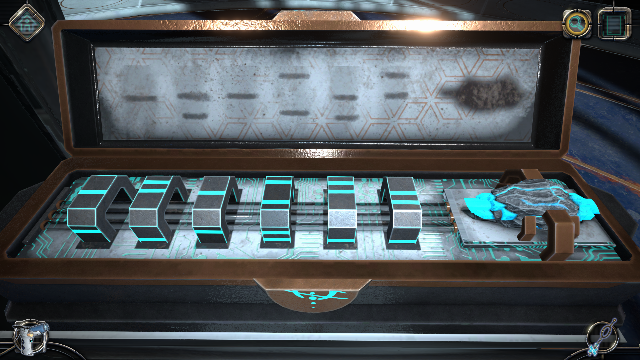
Left Right Left Left Rightto reveal the next puzzle:
Clean the stains off with the air duster. The diamond shapes can be rotated and the rectangular shapes slid to create a network connecting all four terminals on the two sides. A solution is: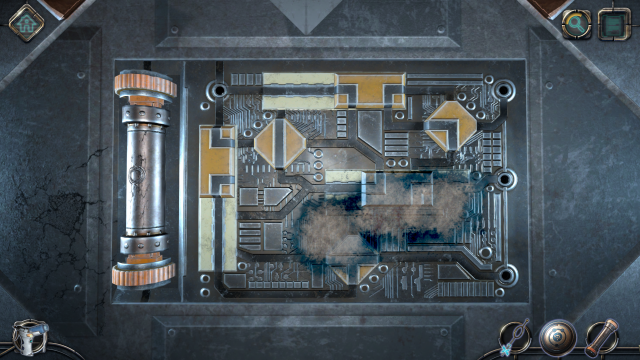
Rotate the orange dials to remove the defective energy rod and replace it with the one in your inventory. You are returned to the top of the pedestal to solve the next puzzle: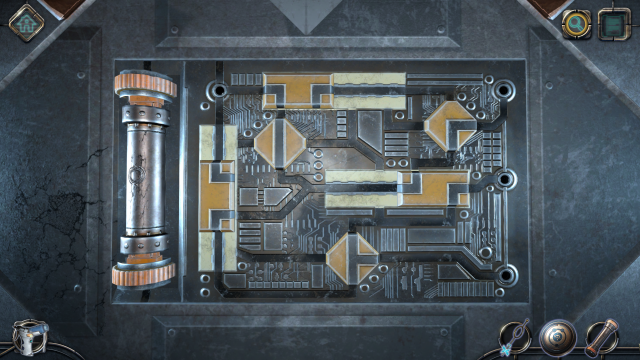
The objective is to create a continuous circuit connecting the two terminals marked with red X's at W and NW. There is only one orientation of the outer ring that connects both terminals at W and NW. Similarly, there is only one orientation of the second-largest ring that connects the path ends so far at NE and W without creating a dead end. For the outer edge of the third ring in from the outside, we need to make connections at N and SE and again there's only one orientation that will suffice. The last ring is slowly rotated until the puzzle is solved: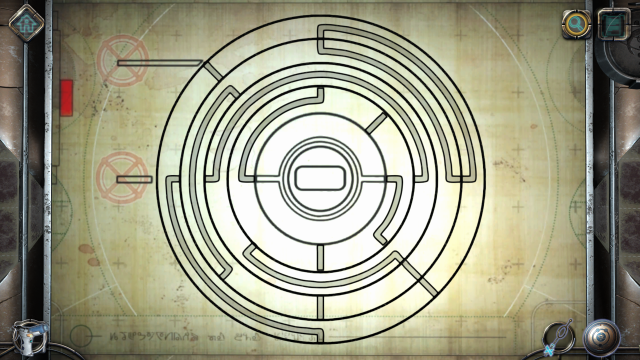
To open the door and exit the room, insert the disk into the receptacle with the four lights. Rotate the disk until 3 lights can be seen through the holes. A holographic "keyhole" is produced, which you can open using the key in inventory after its slider has been moved to the left.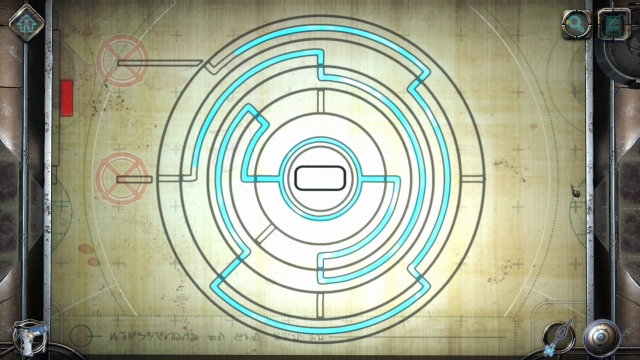
Back out from this pedestal and zoom to the pictures of aliens on the left wall. Tucked into the border of the middle picture is Letter #02. Open the other pedestal and click on five of the picture segments to recreate the shape above. A stairway is deployed but it is incomplete. Click on the pattern on the bolt head and you'll get an updated version of your trusty screwdriver from the preceding game. For details on its operation, click here. However, this version autoselects the shapes and instead uses the first rotor to orient its angle. As before, the middle rotor moves the shape either up or down. When the screwdriver has done its job, you'll climb the stairs to a balcony. Open the door into the next room.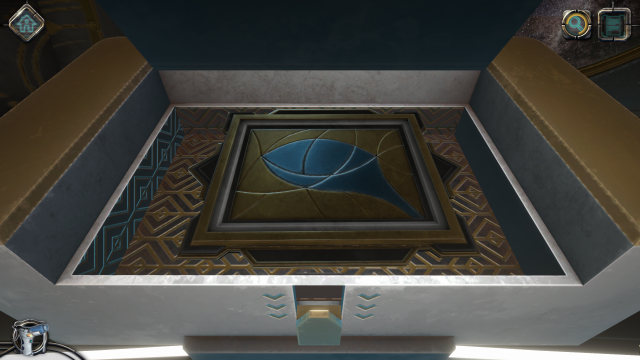
Evidently, we should move the blue plus-sign piece onto the corresponding destination marked in red. Slightly move the blank octagons at the bottom to discover the locations for all three pieces: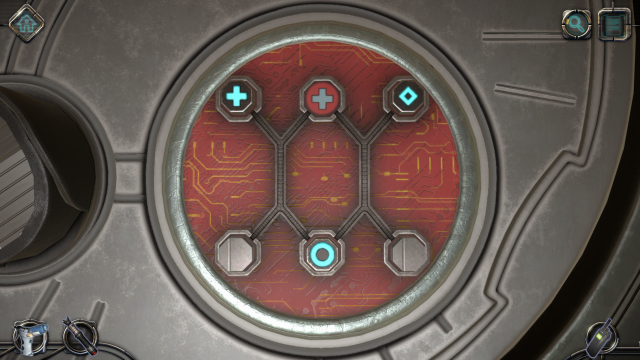
A solution in 6 moves is:
Piece Destination Plus sign Top center Open circle Lower left Diamond Lower right
Put the walkie-talkie into the receptacle, which activates the next puzzle involving the amplitude of a sine wave: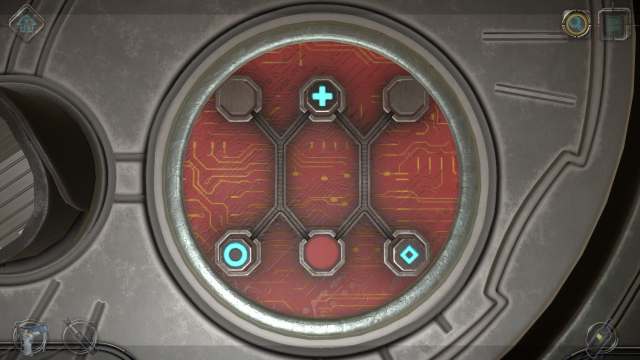
The objective is to alter the waveform to match the animated circle. The bar at the top of the waveform diagram can be used to select one of three sections, and the vertical slider at right adjusts the amplitude amongst 5 different levels on a scale of 0 to 6. A solution is: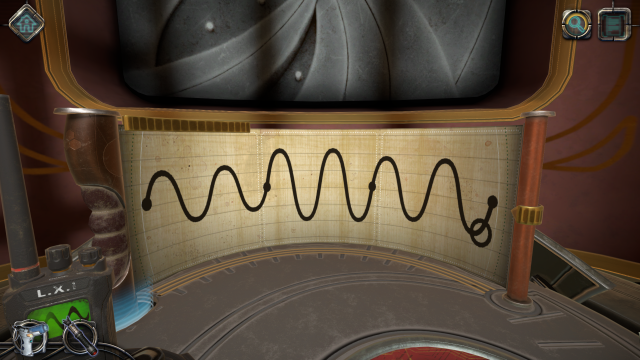
The walkie-talkie then shows that its first level is complete. Pick up the walkie-talkie and transfer it to the receptacle on the organ on the opposite side of the room. Zoom to the left side of the organ, behind the walkie-talkie. Press the small rectangular flat button to display an easy sub-puzzle:
Section Amplitude Left 4.5 Center 1.5 Right 6
To release the vertical bar, move each slider (top to bottom) one square in the following directions: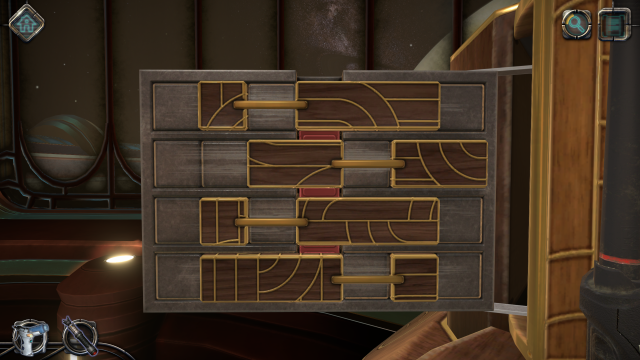
RightMove the red bar up and retrieve a red light bulb. Click on a similar button on the right side of the organ to display another sub-puzzle:
Left
Right
Left
Numbering the columns 1 to 6 left to right, this is a simple warehouse puzzle with solution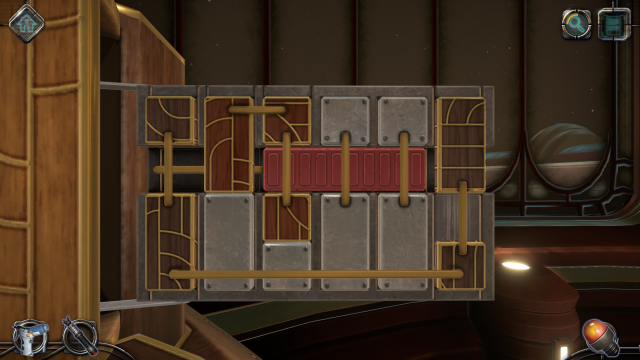
Move Columns 1+6 up onceTake the second red light bulb and zoom to the pink circle on the pillar of the organ opposite the walkie-talkie. Clean off the dirt with the air duster. Rotate the pink circle to raise a planetary symbol and produce a large lever below. Pull the lever to disclose the rest of the organ mechanism:
Move the red bar right once
Move Columns 2+3 up twice
Move the red bar left once
Move Columns 1+6 down once
Move the red bar left 3 times
Zoom to the control panel below the scroll and put the light bulbs into the two open sockets. Starting just right of top center on the circle surrounding the red button, press the red lights to match the up levels of the pattern shown on the scroll. These are at clock positions 1:30, 5:30, 7:30 & 9:00. Press the red button and the keyboard for the next puzzle is extended; pick up a broken key from it that fell to the floor. In inventory, straighten out its bent tooth and align the two orange lines on the knob at one end. An orange circuit pattern lights up when the key is ready. Zoom to the keyboard and install the repaired key. Note the organ pipes above with 1-4 dots. To play these in order, it's a simple matter to trace the pipes through the maze to the keyboard below. Press the following keys in order: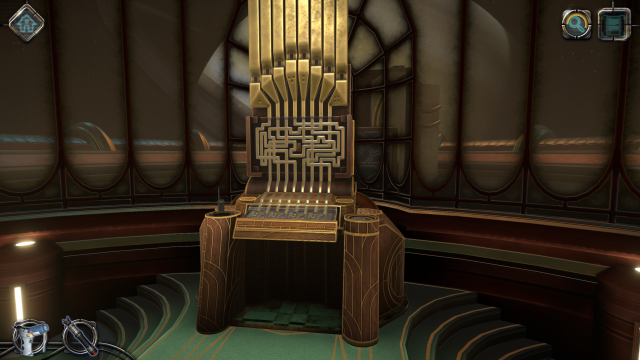
The walkie-talkie shows that its second level is complete. Pick it up and enter the circular elevator down the steps. Put the walkie-talkie into the receptacle and pull the lever to ascend to an observation tower. Turn around and pick up Letter #03.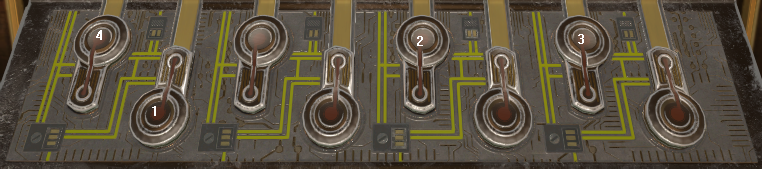
The objective is to identify radio towers on Atlas. The crank at upper left controls the azimuth of the viewpoint and the lever at right controls the elevation. A green sector displays the viewpoint on the small display at lower right, along with the available tower locations that you can select by clicking on them. With the elevation lever at its lowest position and the sector covering about 2:00 to 6:00, you can find a pair of blinking green lights on a hilltop and another set of 4 lights just visible behind a rectangular opening at right. The corresponding tower symbols to press are at about 4:30 and 3:00.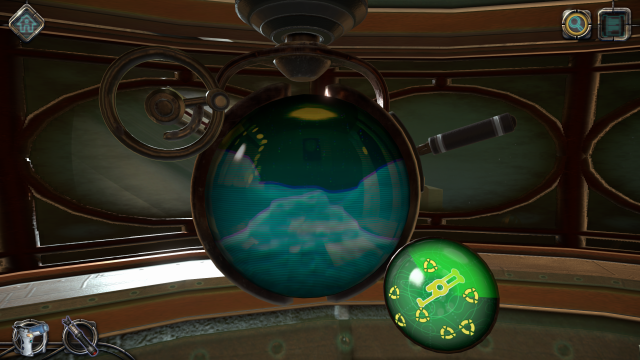
Next, raise the elevation lever to its highest position and move the sector to about 6:00 to 10:00. A single blinking light is just visible behind a hill and with Saturn behind it. The corresponding tower symbol to press is at about 9:00. The walkie-talkie then shows that its third and final level is complete. You can now have a conversation over the walkie-talkie with someone at the Atlas base.
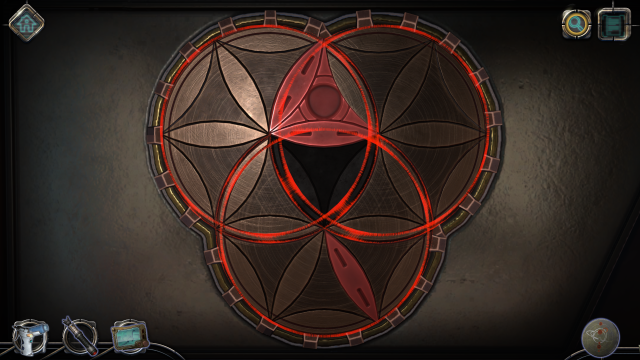
This is the first of the more challenging puzzles in the game. The objective is to combine all four red pieces in the center. The overlapping areas of the circles can be rotated by any circle sharing that space. One strategy is to put the triangular piece just outside a circle and then move a lens in that circle so that it joins the triangle. Identify the circles as Left Circle, Right Circle and Bottom Circle. The turning angles are: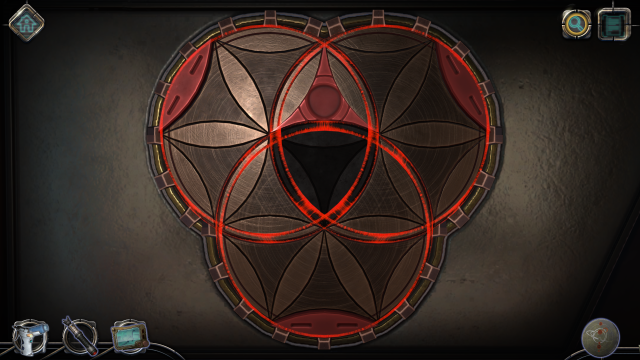
Here's a solution in 10 moves:
60 degrees: 1/6 of a circle 120 degrees: 1/3 of a circle 180 degrees: Half turn of a circle
In the inventory window, orient the circles of the planetary seal to match what's on the device: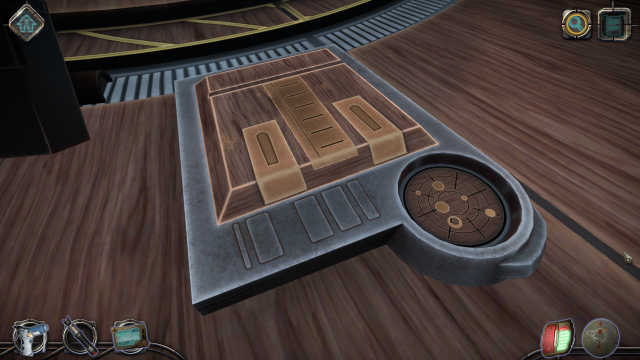
- Rotate the larger planet on the inner circle to the WPut the configured planetary seal into the receptacle and retrieve a grid puzzle. Examine the grid in inventory and rotate the pieces to create a continuous path:
- Rotate the open circle on the middle circle to the SW (approximately)
- Rotate the larger planet on the outer circle to the SE
Zoom to the blank screen on the table and attach the grid to its left side. Press the yellow symbols on the screen in the same order as the grid's path from one end to the other. A spherical device is deployed on the conference table, guarded by a robot arm. Return to the other side of the table and use the drone in the hole in the left side. Navigate the drone through a left turn and then take the left fork. Fire the laser to get through the barrier of red lines, then continue forward to a sparking red target. Fire the laser at it until the drone tablet disappears. Zoom to the top of the sphere on the table and open its zippers. Move the four red circles outward to get through the next spherical layer. Move the red gears to the left and the gray rods to the right for the final iteration, reaching the next puzzle: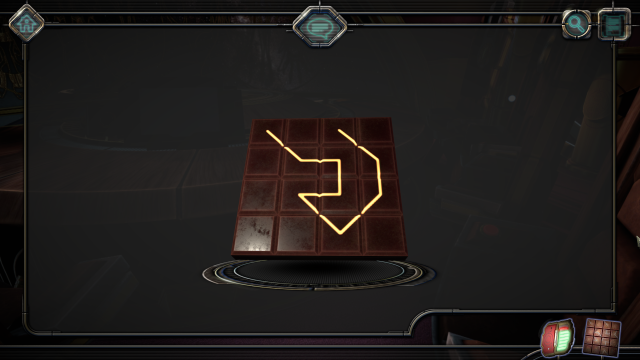
Discard the damaged battery and replace it with your own. Orient the 8 baseballs so that power is applied to each blue circle: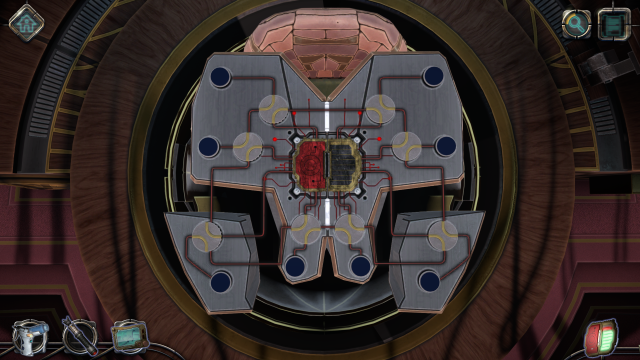
In the final puzzle of this chapter, simply drag the floating blue pieces to join the green one. Exit through two doors.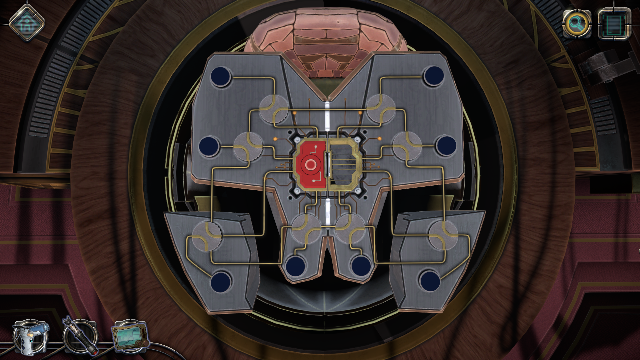
Match this pattern using the 3 sets of superimposed symbols. If you need to see the target pattern again, then rotate the outer ring. When the pattern is correct, the door opens automatically. Inside the elevator, press the four dirty keys in any order. Exit through the door into a hibernation chamber.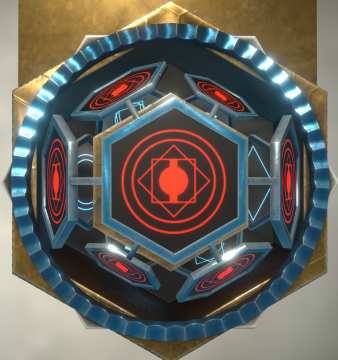
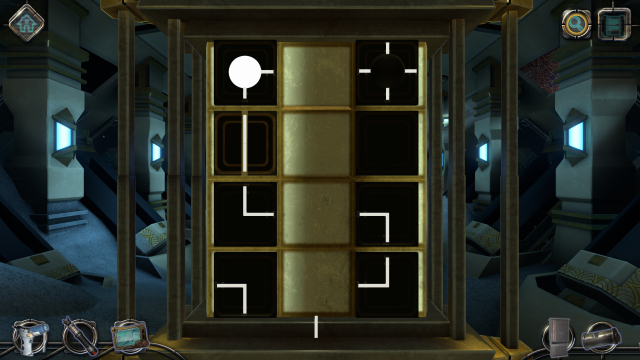
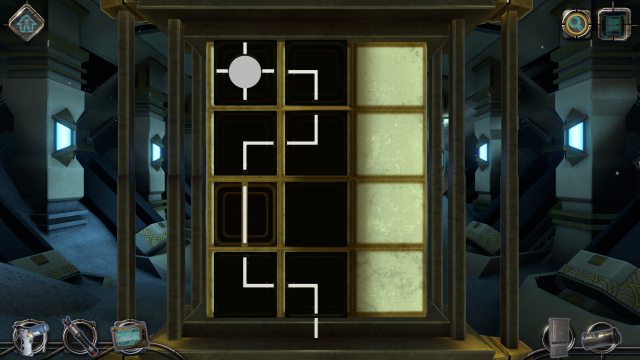
The objective of this three-part puzzle is to use all the tiles to create a path from the bottom center to the location of the white circle, with the final piece being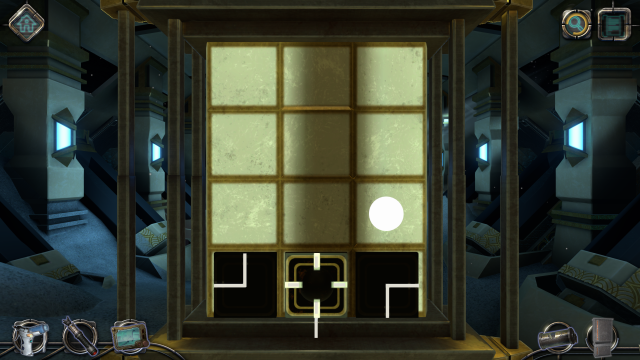
 . Unsupported
pieces fall to the bottom. For the first part, there are 3 tiles. A solution
in 3 moves is:
. Unsupported
pieces fall to the bottom. For the first part, there are 3 tiles. A solution
in 3 moves is:
 to the white
dot
up and right
to the white
dot
up and right
 left
left
Visualizing the final path with 5 tiles, the four corner pieces are in the lower left or lower right quadrant of the grid. A solution in 3 moves is:15-73
to the white
dot
on top of
the white dot
 right
right
To skip the derivation and jump to the solution, click here.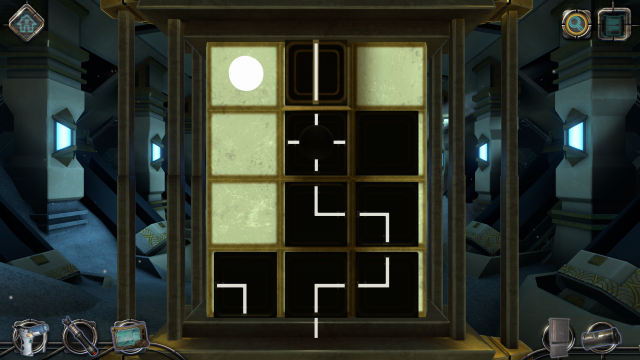
Since ends up in the upper
left corner, there must be 3 tiles supporting it in the left column, leaving 1
tile for the entrance at bottom center and 3 other tiles completing the path.
- If only 1 tile is in the middle column, then the 3 tiles in the right column would be inaccessible or a dead end.
- If 2 tiles are in the middle column, then 2 are also in the right column and
the tile below the white circle would have to be
 . That leaves only a corner
tile for the entrance, which in turn means the tile above it would have to be a
horizontal line, which is unavailable.
. That leaves only a corner
tile for the entrance, which in turn means the tile above it would have to be a
horizontal line, which is unavailable.
- If 3 tiles are in the middle column, then the only tile in the right column
is  or else a dead end would
be produced. However, that means
would have no location along
the path since it would have to be adjacent to one or two blanks.
or else a dead end would
be produced. However, that means
would have no location along
the path since it would have to be adjacent to one or two blanks.
Therefore, there are 4 tiles in each of the two left columns. There are 3 solution paths that are feasible; the one described below is achieved by the fewest number of moves.
Here's a solution in 10 moves:
 left
left
up and right
to the white
dot
to the right,
dropping the left column into position
to the white
dot
left so it
drops into position
up and left
up and left
right, up and left into
position
left
left
up and right
to the white
dot
to the right,
dropping the left column into position
to the white
dot
left so it
drops into position
up and left
up and left
right, up and left into
position
Slide the blue button downwards to turn it red to open the portal. Move forward twice and fire the laser at the red target until the ceiling lights turn green. Angle right, then move the slider up to blue to open the door ahead. Move forward and fire the laser at the red target until the ceiling lights turn green. Move back and turn right to a closed door outlined in red. Move the slider down to red and then move forward twice. Turn right and move forward. Turn right and position the laser aiming point on the edge of a red panel ahead. Fire the laser until the ceiling lights turn green.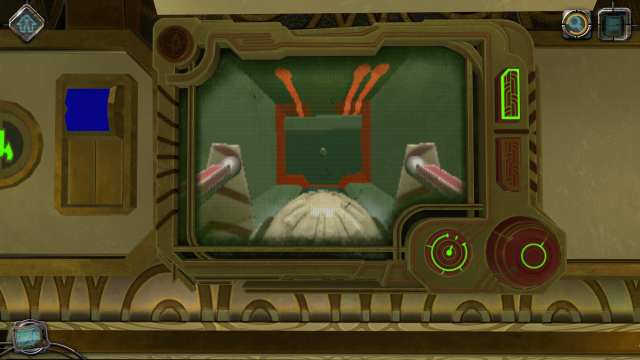
Examine the mysterious cylinder in inventory. Look at the symbols on the faces of the 3 small cylinders inside. You'll have to rotate the object to see all four faces. Match these symbols by clicking on the TV screen:
The TV screen indicates that the hibernation pod is locked. Back out and zoom to the pod. Use the screwdriver to open the panel: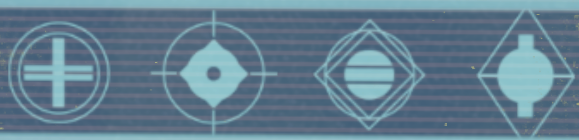
Put the metallic item into the framework at the top. Move the lozenge from it into the upper octagon. The objective is to send each lozenge into one of the receptacles on the sides of the box, but they can only go in arrow-first. If a lozenge is in the upper octagon arrow-first, it can be reversed by transferring it to the lower octagon. After the pod is unlocked, you'll be returned to the TV screen. Simply rotate all the Pac-Mans so they can eat the white rectangles.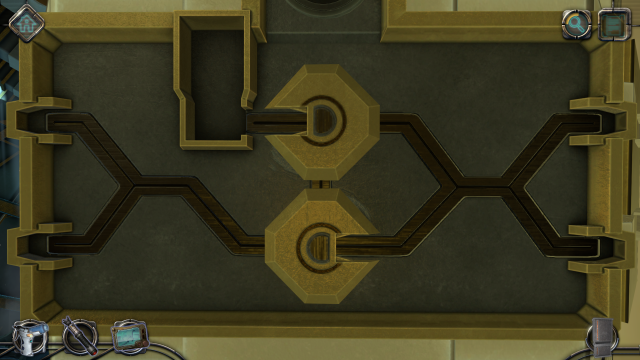
Next, you must release the alien from her prison, which consists of five 4-sided rings. The objective is to synchronize the rings so that all of them are lit. The yellow and blue arrows move a gap separating two sets of rings. The yellow and blue circles rotate one set of rings one way and the other set the other way. Here is one of the 16 solutions having the minimum number of steps: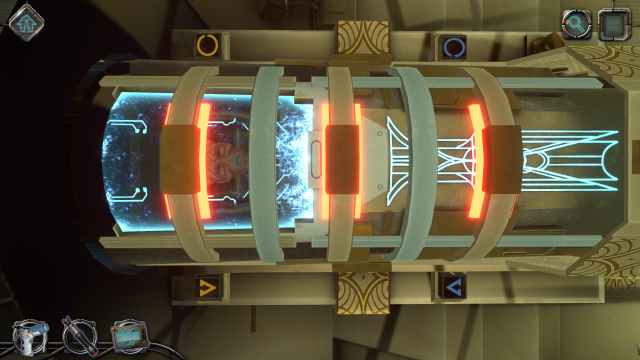
The objective of this puzzle is to move the spot of light along the rectangular path, visiting each corner an odd number of times. Start by moving the light around the upper rectangle (in either CW or CCW direction) until all its corners are unlit. Then depending on which side of the rectangle you're on, travel CW or CCW until all the rectangle's corners are lit. Move to the rightmost corner and then to the lower right node. Continue around the lower rectangle until all lights are lit. Push handle forward to move the tram into another part of the spaceship. Exit through the door and into a chamber holding an icosahedron.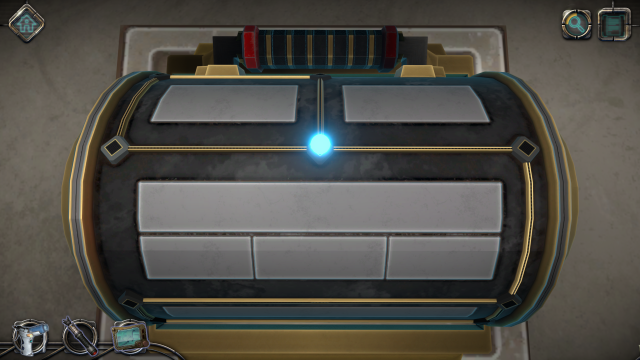
Zoom to the three bluish floating panels at left and pick up a lightbulb. Zoom to the small yellow rectangle at left to read Letter #07. Zoom to the multicolored puzzle: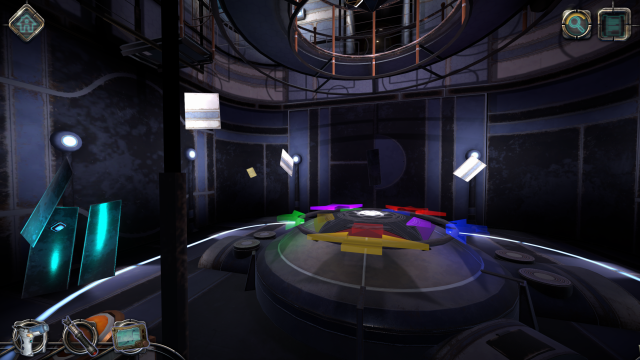
Follow these steps to solve this simple puzzle: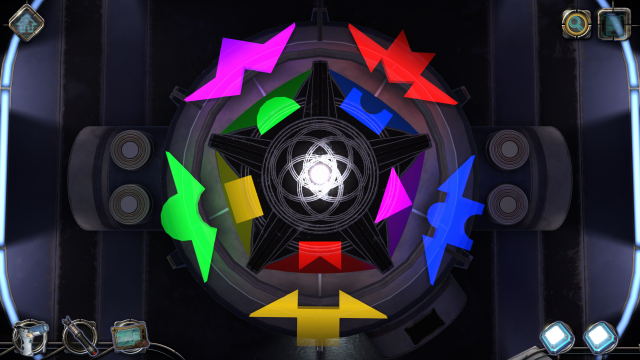
All rings have 8 positions. The objective is to move the three outlined pieces to the bottom (6:00) position simultaneously. Movement of a piece can be blocked by a red X. The upper left button rotates all non-blocked rings CW. The lit one of the right buttons swaps the positions of the X's with the ones having diagonal lines. The lower left button is not used in this 7-step solution: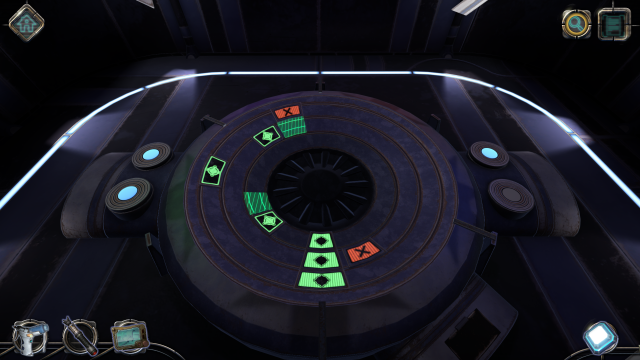
Pick up both lightbulbs from the panel. The objective of this puzzle is to light all corners of the network using the three available lightbulbs in your inventory. Each lightbulb illuminates its own location and all points that are one segment away. Therefore, you can probably reach the most segments from a T-intersection. This is generally true except for the single point at the end of the "peninsula" at left. Place the lightbulbs on the network as follows: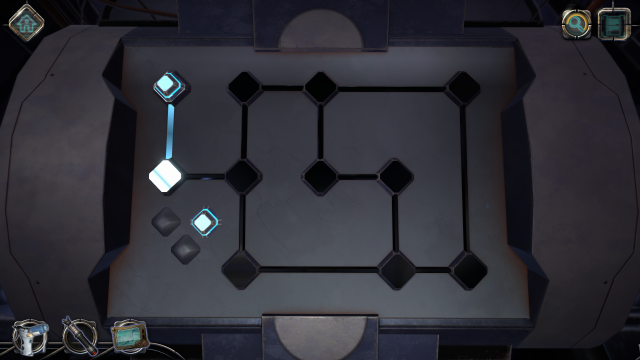
Click on the black panel to obtain a mechanical device. Examine it in inventory and rotate the ring so that the blue lights are vertical. Move the whitish vertical bar down to make a cross. Rotate the ring 1/8 of a turn to align it with the background. Back out to the movable platform and press its right button.
Zoom to the partially-open hatch with a blue outline. Lift up its cover and insert the mechanical device.
Click the button at lower right to reverse the rotation of the inner ring. When it lines up with another ring, press the button again to lock them together.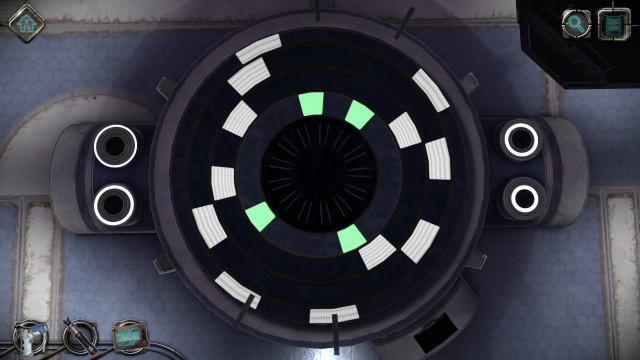
Click the button at lower left to reverse the rotation of the next ring. When it lines up with another ring, press the button again to lock them together.
Click the button at upper left to reverse the rotation of the outer ring. It will eventually line up with the other rings and the puzzle will be solved.
This challenging puzzle requires manipulation of a 32-point star polyhedron based on a truncated icosahedron with its 12 pentagonal and 20 hexagonal faces surmounted by shallow pyramids. The objective is to match up all the open line segments (legs) extending from the pentagonal pyramids by rotating them in place on the surface of the polyhedron. The viewpoint of the entire polyhedron itself can also be rotated around. The white pyramid provides a reference point. There is also a non-functional black pyramid opposite the white one. When changing the viewpoint of the polyhedron, be sure to carefully click outside it to avoid inadvertently rotating a previously-placed pyramid.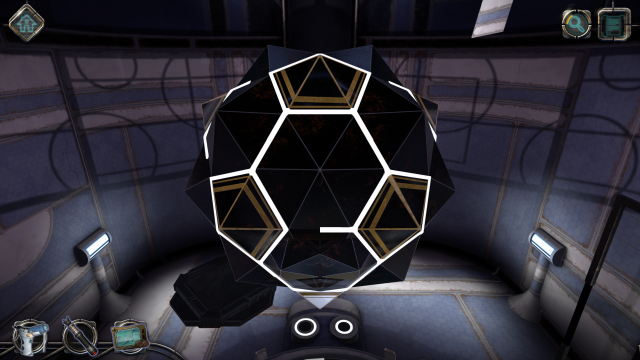
Starting from the initial state of the puzzle, face the white pyramid head-on with two brown circles in the background at the top:
The white pyramid's five legs must be connected to each of the five pyramids surrounding it. Using compass notation for the surrounding pyramids, proceed in a CCW direction: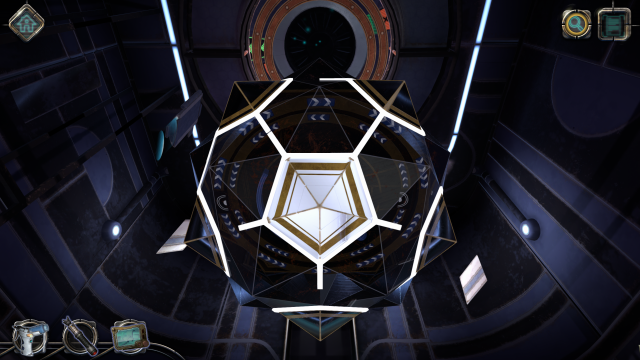
Obviously, none of the five surrounding pyramids can connect to the black one. Proceed in a CCW direction as follows: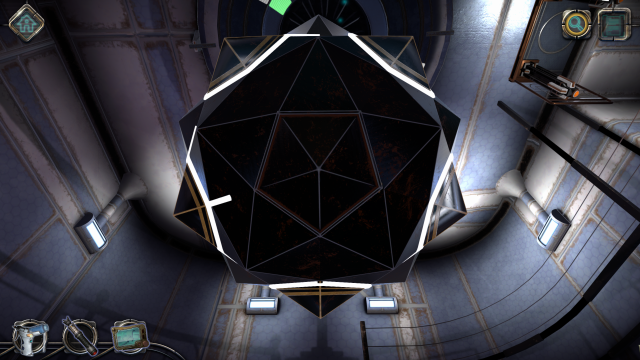
The objective of this three-part puzzle is to use the searchlights on the inner and outer rings to turn both white circles green. A searchlight can disable the blue obstacles by shining on a blue ball.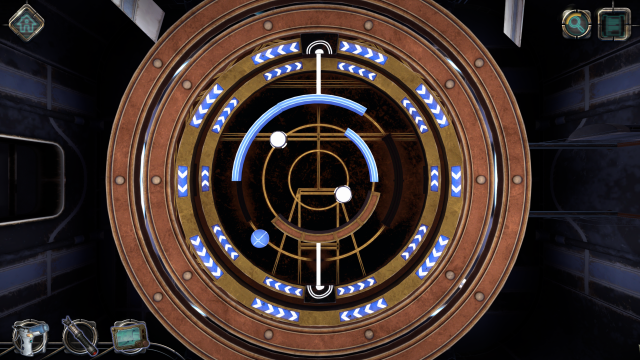
Round 1:
Move the inner ring searchlight to SW to shine on the blue ball and turn off the
obstacles. Move the outer ring searchlight to NW to turn both white circles
green.
Round 2:
Move the inner ring searchlight to E to turn off the obstacles, then to SE to
turn a white circle green. Move the outer ring searchlight to SW to turn a
white circle green.
Round 3:
Move the inner ring searchlight to SW to turn off the obstacles. Move the outer
ring searchlight to NW to turn a white circle green and keep the obstacles
disabled. Move the inner ring searchlight to SE to turn a white circle green.
It must be an incredibly heavy spacecraft to require such a lot of energy to take off from a tiny moon with near-zero gravity! Finish the dialogs on the walkie-talkie.
Repeat the process to enter the red portal, then just fire your laser directly at the small target to the right of the gears until the drone tablet is put away. Rotate the small and large wheels clockwise, then click on the big door to enter the engine room.
- Move the slider in row 3 to the right to see that the column 1 symbol is in row 3Set the corresponding levels using the knobs at right:
- Move the slider in column 2 up to see that the column 2 symbol is in row 1
- Move the slider in row 4 to the right to position its window over column 4, then move the slider in column 4 up to see that the column 4 symbol is in row 4
Move the red lever down three times to energize a crystal and start up some machinery. Facing a gap in the metal walkway, look down and to the right to pick up a loose gear. In inventory, rotate its red knob CW to extend all the gear teeth. Insert the gear into the receptacle at right and press the right and left red buttons to fully extend the walkway.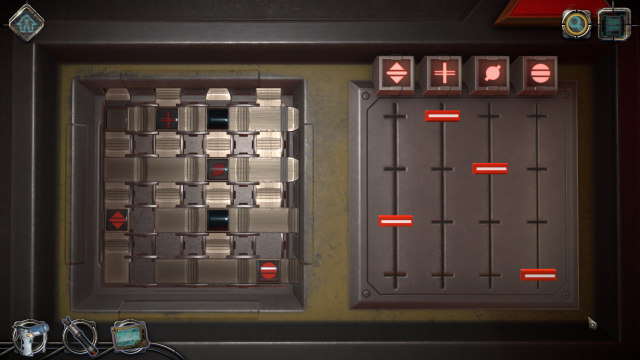
Go to the end of the walkway and pick up a pulley lying there. In inventory, rotate one of the red knobs so that the tabs are facing outwards. Put the pulley into the back of the complicated chair mechanism. Use the screwdriver on the pulley to activate the chair. Zoom to the three fans at left. Set the left slider to its maximum value and then move the middle slider until the upper red dial reaches its target level. Move the right slider until the lower red dial reaches its target level.
Sit in the chair and zoom to its control panel at lower left. Click on the four corners of the 4 x 4 grid to turn off all the lights in the column at left. A second puzzle is displayed:
Click on the following squares: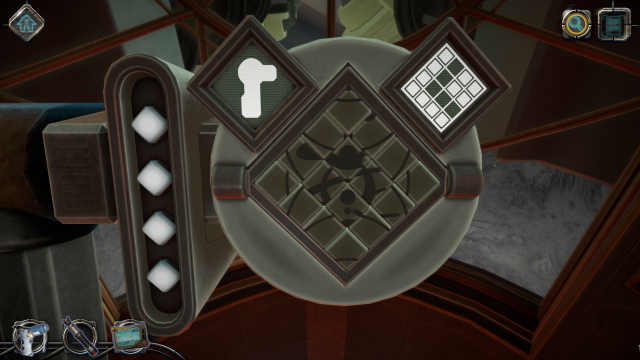
Zoom to the right side of the control panel. The objective of this puzzle is to group together the pins of the same color. Both inner and outer rings can be rotated, and the three buttons in the center rotate the four pins at that location. Here's a solution: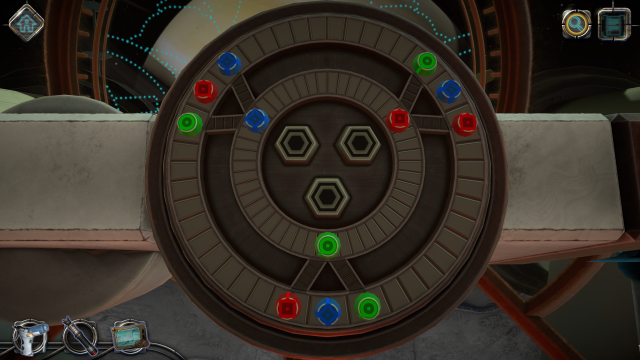
First make sure the selector on the bottom of the yellow dial is to the right, then follow these steps: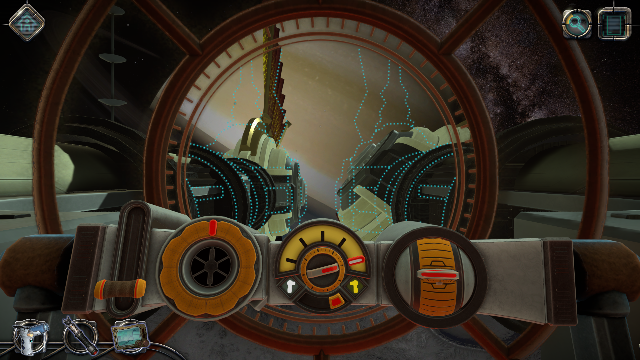
Set the red pointer up on the yellow dialMove the selector to the left and repeat the same steps for the left panel (the wheel should increase from 3 to 6 white sectors). Exhaust the dialog on the walkie-talkie to learn that you must activate the ship's forcefield by entering the security command center.
Set the left lever to its halfway position
Rotate the wheel next to the lever CW until three additional sectors of its center are white
Set the lever at right to its halfway position
The objective of this puzzle is to rotate the tiles to create a continuous network between the two access points on the edge of the puzzle. Since no paths will touch the edge of the puzzle at any other points, we can begin by working around the periphery setting the edge tiles when known. Also, no path can lead to a blank tile. Connect the loose ends in the interior portion to reach the final layout: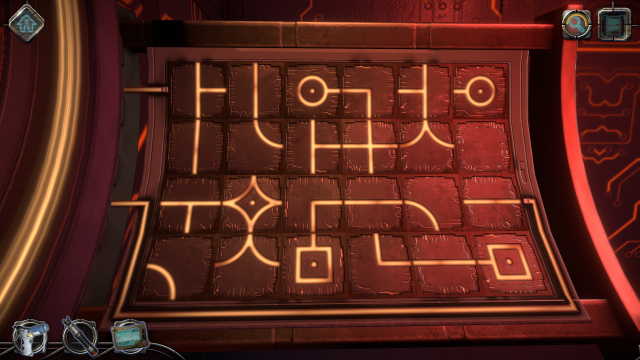
Move the arc on the 3-dots symbol down until a panel opens: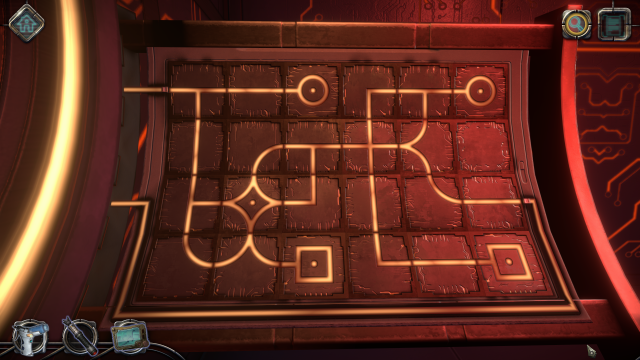
The same approach can be used to solve this puzzle, resulting in: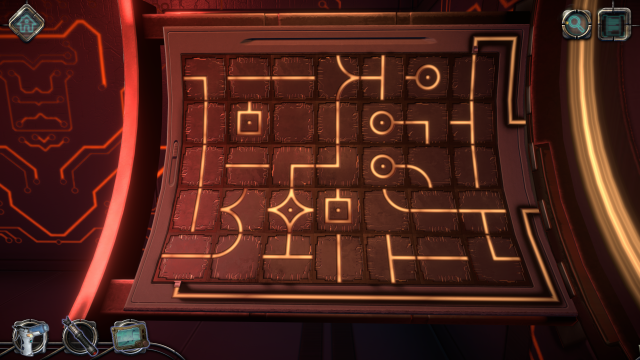
A desk is extruded from the floor.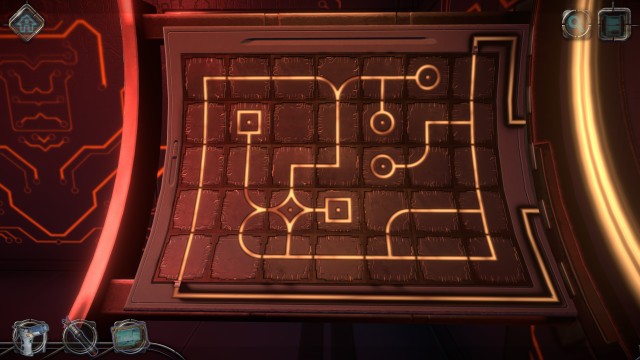
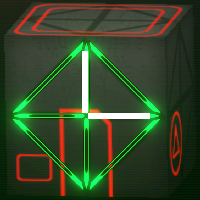
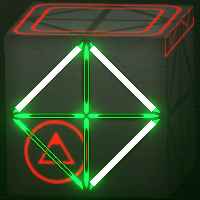
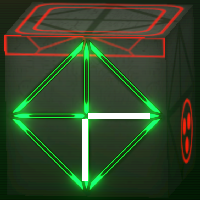
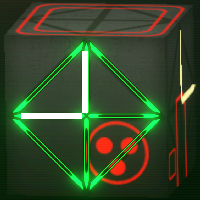
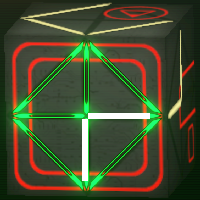
Zoom to the video screen and slide the switch at upper left. The cube on the video screen can be rotated using the buttons at left. The cube on the screen has similarities with the symbols in the cube-shaped room, such as the triangle and 3-dots symbols. We can also see a doorway and access hatch on the video cube, so it's evident that the video cube represents an exterior view of the security command center. Looking around the room, you can see distinctive lines of light on all six surfaces. The objective of this puzzle is to recreate those lines on the video cube. The principal challenge is reconciling the exterior views of the video cube with the interior views of the room. The following transparent representation of the security room may help. In this view, the desk and window are in the back and you are facing in roughly the same direction as when you're at the video screen: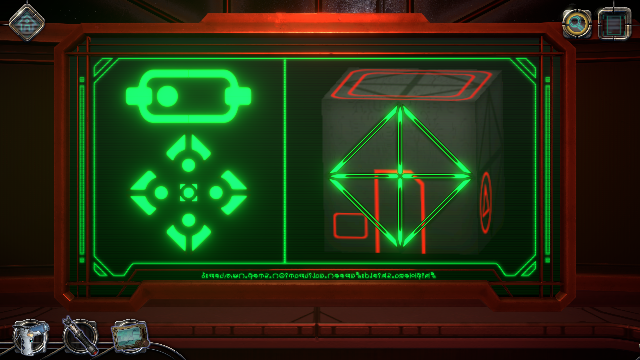
Configure the lines on each face of the video cube as follows (read left to right):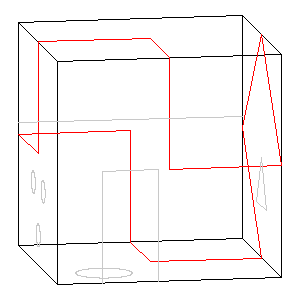
Zoom
Pick up the monitor screen from the floor. In inventory, restore the position of the Y shape on the back and press the red buttons to extend all three tabs. Attach the screen to the right side of the desk.
Press right arrow Press right arrow Press right arrow Press up arrow Press up arrow twice
Using movement abbreviations, here is a 15-move solution: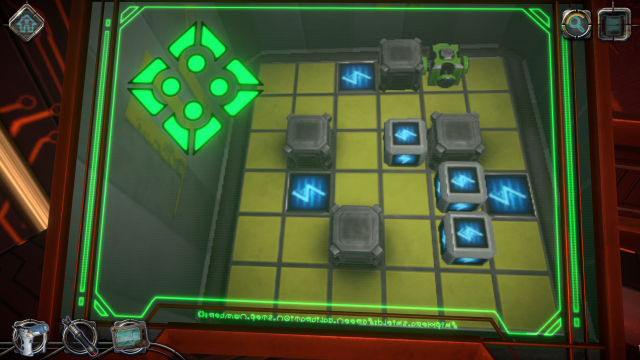
Move R D3 L3 to the first destinationZoom to the right screen on the desk.
Move U2 to the second destination
Move R D2 R2 U to the final destination
Here is a 24-move solution: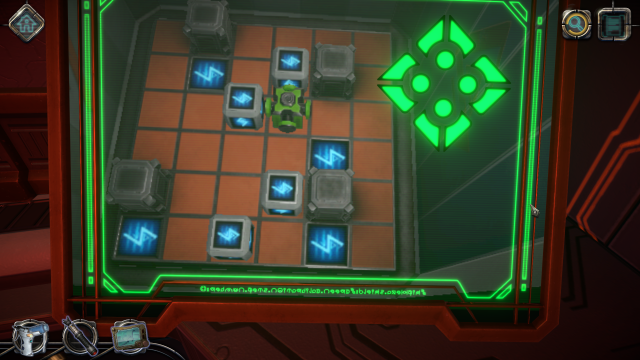
Move R2 D3 via the first destinationWhen the tray pushes onto the table, pick up three projectors from it. Turn around and zoom to a colorful puzzle on the opposite wall.
Move L4 to the second destination
Move U3 R U D4 R to the third destination
Move U L2 U2 to the final destination
An arm comes out of the wall and deposits a platform on the floor. While zoomed to the platform, face the hole the platform came out of: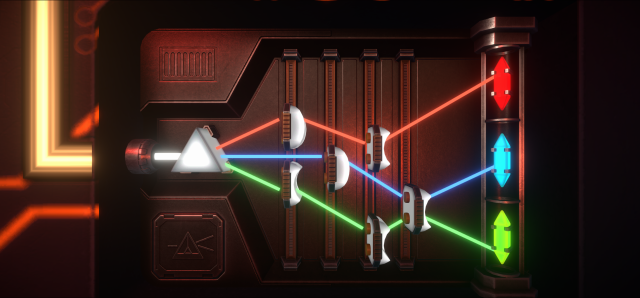
There's a dark, extremely easy to miss hotspot just behind the right edge of the hole that you can click on to read Letter #09. If you miss it, it'll remain accessible until you move forward to Chapter 8. Your last chance is at the Chapter Complete message, where you can select Back to Menu and access the letter before completing Round 3 of the hexagon puzzle below.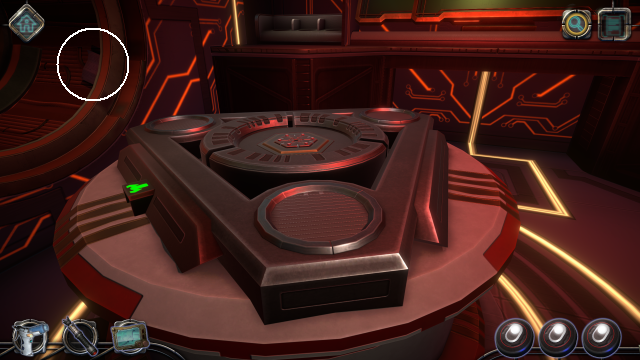
Zoom
Use the drone tablet on the hole below the green light on the raised platform. Move forward, angle left and shoot the red target with the laser. Angle back and continue forward. Angle right and shoot the laser again. Angle back, move forward twice and view upwards to see the underside of the hexagonal switchplate at right. Following the guidance on the tablet, move the switchplate sliders inwards in the following order:
		4

	2		1

	3		6

		5
This activates three receptacles on the platform for the projectors you have in inventory. Click on the hologram to activate another puzzle.
The objective of this challenging puzzle is to get all triangles the same color on each of the three sides of the triangular pyramid (tetrahedron). The target color of each side is identified on the apex of the pyramid. Each of the three horizontal layers underneath it can be rotated independently, and the entire pyramid can be rotated using the rings on the circular platform. To avoid inadvertent changes, be sure to drag only the gray slanted edge of a layer when moving it. There are buttons on the top and bottom layers of each side that cycle the three top or three bottom triangles as a group. The bottom cycling button rotates CW and the top one CCW. There is also a circle on each side that can be rotated to swap the two triangles in it. To skip the background and jump to the solution, click here.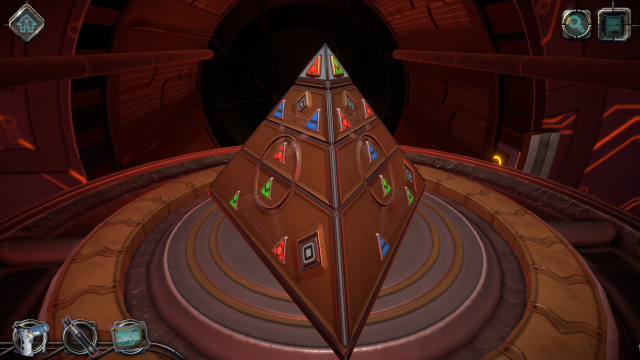
Rotation of a circle will cause the two triangles in it to change their orientations between point up and point down, but the solution does not require that triangles on each side all be in the same orientation. We begin by rotating the top layer to match the apex colors since they already have uniform colors on each side. Next, note that each side has two identical triangles in the bottom layer that don't match the side color. Visualizing the view looking down from above, the colors of these unmatched triangles are in the same order as the sides: Red, Blue, Green in a CW direction. Therefore, it's a simple matter to use the circle to swap them one at a time into the middle layer and then rotate the middle layer to increase the number of matching triangles on each side. This requires that each move is repeated for each side before proceeding to the next move.
To summarize, here are the steps for a solution:
In this smaller version of the rocket engine puzzle in the previous game, the objective is to light up only the glowing hexes at left. Clicking on any hex reverses its on/off (blue/yellow) status along with that of each of the adjacent hexes. For the first round of the puzzle, just click on the center hexagon of the group that is glowing. For the second round, separate groups of hexes must be illuminated. Click on the following hexes: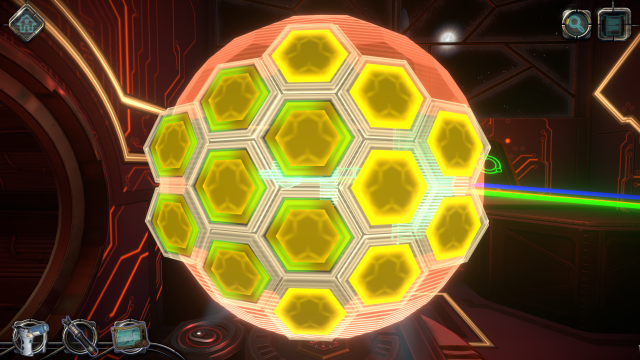
For the third round, click on the following hexes: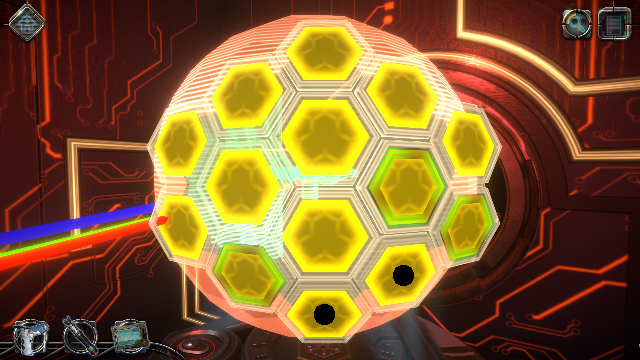
An effective forcefield is deployed, after which you get further instructions from the bossy alien.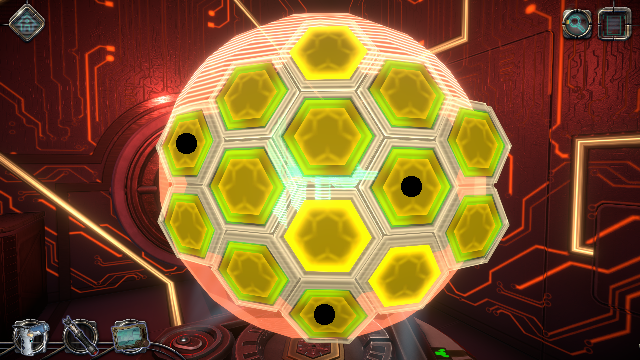
The next cube inside has three sides with circles that need adjustment to make an unbroken path: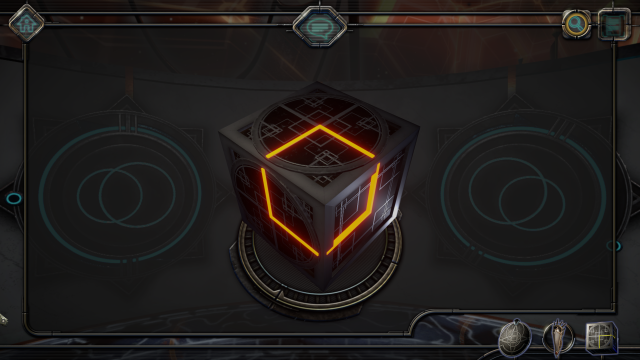
Finally, a sphere embedded with stars is produced. Return to the pedestal and click on the upper right green area. Back out from the raised cabinet, turn left and click on Letter #10, the final one to be found. Zoom back to the curved console and move the two horizontal bars to the sides. Rotate each of the blue disks a quarter turn to reach the next puzzle.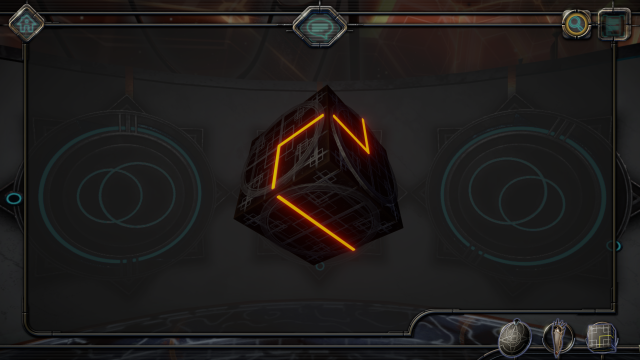
The objective of this puzzle is to get the three gold hexagons onto the light-colored spaces. All hexagons on a line move simultaneously when an arrow control for that line is used. Here's a solution in a dozen moves: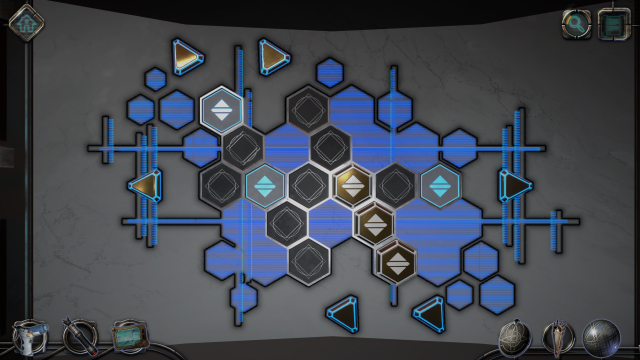
The objective is to illuminate all 8 lights by moving each one to the dark spot on its track. The knobs on the inner and outer circles act like magnets that repel the lights. When both knobs occupy the same angle the light is moved to a midway position on its track. Here's a solution in 4 moves: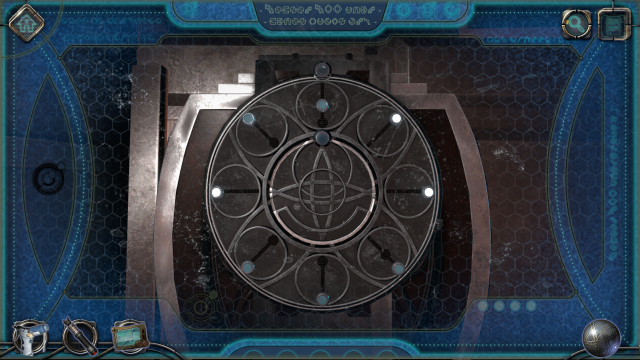
The objective is to rotate the sphere so that the white stars within occlude the fixed blue targets. One of the stars remains fixed at the center of the sphere and is already covering its target. A fixed white spot at upper left is actually the reflection of a light source shining on the sphere and should be ignored. The other 4 stars can be moved around to match up with the 4 targets. The star that is farthest away from the center, identified here as "X", must occlude the target that is farthest away. Also, the line stubs must align to form a connected constellation.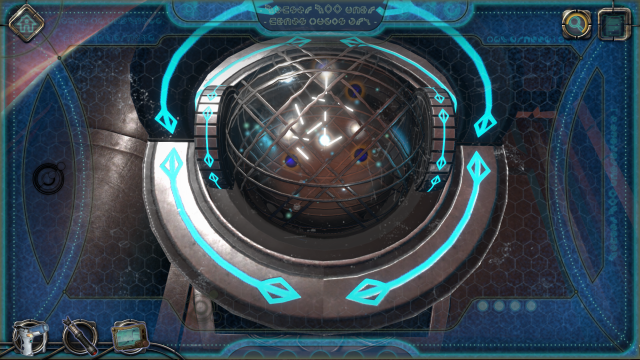
Note that the blue target for X is directly over the center. Start by using the large blue arcs to orient the sphere so that X is in a vertical plane and can be rotated with the side wheels to match up with its target. Then slowly move the arcs while maintaining X in its position to get the other three stars close to their targets, which form a right triangle:
You're in the right area if the constellation lines start to combine. When you've got it, the stars glow and you can move on to the puzzle at the top of the apparatus.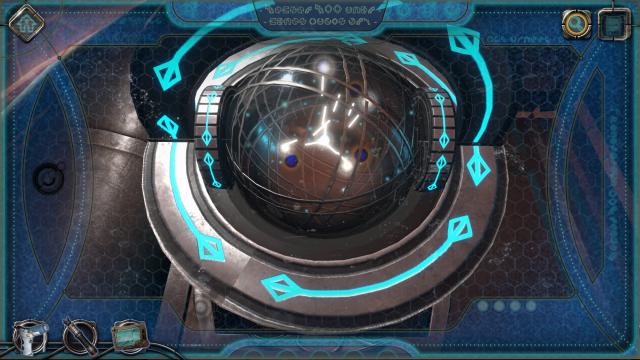
The objective is to shift the background to find 5 stars to line up with the targets in the viewport. The right slider rotates the targets and the left slider changes their size and separation. It's not too difficult to find 5 stars clustered within the circle of the viewport. Looking around, the densest concentration of stars is to the upper right of the distant galaxy near the winglike structure on the left side of the spaceship. This cluster has two stars at the top and three at the bottom, and the right slider can be used to rotate the targets to match it: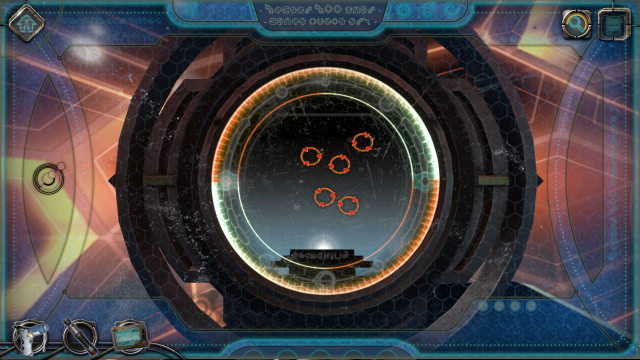
When it gets close, use the left slider to expand the targets until the puzzle is solved and the animation starts. Back out to the bridge for the next puzzle.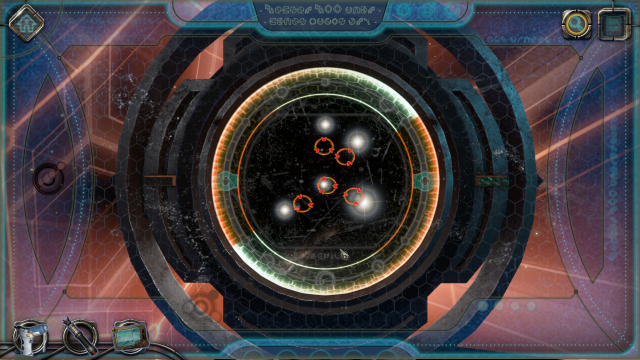
Zoom to the ship's wheel at left. Hold down the vertical wheel to move the viewpoint up or down and use the arms on the wheel to move left or right. Move to one of the encircled stars with broken black arcs surrounding it. The stars are fairly close together and are oriented in a right triangle like the blue targets in the preceding puzzle. The objective of this three-part puzzle is to use the three arms on the wheel to rotate the colored black arcs around the star to match up with the stationary blue arc to complete a circle. When complete, the assembled black circle expands to the foreground. Find the next star and repeat the process two more times.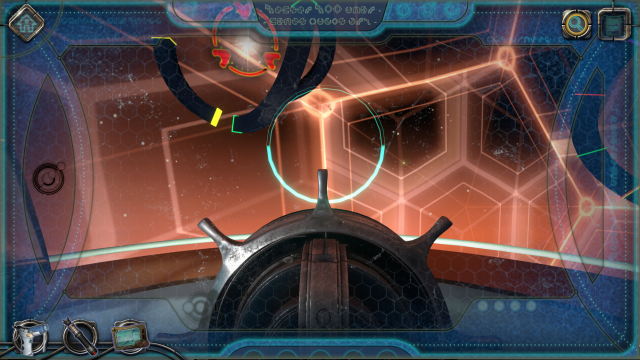
The endgame sequence plays, in which your alter ego decides to travel with the alien to her planet since he's so unpopular at home:
The credits play for about 70 seconds and cannot be skipped. In the main menu, you now have access to the individual chapters.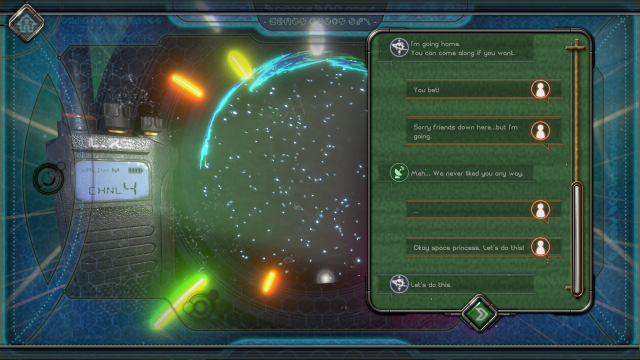
Zoom
Letter Chapter Location 1 1b On top of the central pedestal of the bridge 2 2a In the frame of a picture in Corridor 1 3 2b In the observation tower 4 3b On a pedestal in the conference room 5 4a In a pedestal in Corridor 3 6 4b On a pile of sand in the hibernation chamber 7 5b Floating in the icosahedron chamber 8 6b In a drawer in the engine room 9 7b In a large hole in the security command center 10 8b On a raised console of the bridge
Copyright © 2026 Balmoral Software (http://www.balmoralsoftware.com). Portions copyright © 2022 by Littlefield Studio. All rights reserved.