Copyright © 2026 Balmoral Software (http://www.balmoralsoftware.com). Portions copyright © 2022 by Littlefield Studio. All rights reserved.
Puzzle resets: Many of the solutions presented in this walkthrough rely on the puzzle starting in its initial state. If you've made any change to an unsolved puzzle, you can reset it by returning to the main menu and selecting Resume. This occasionally requires completing some initial tasks again before reaching the puzzle. The message about your progress being saved when you go to the main menu refers to your overall position in the game, rather than within the current puzzle.
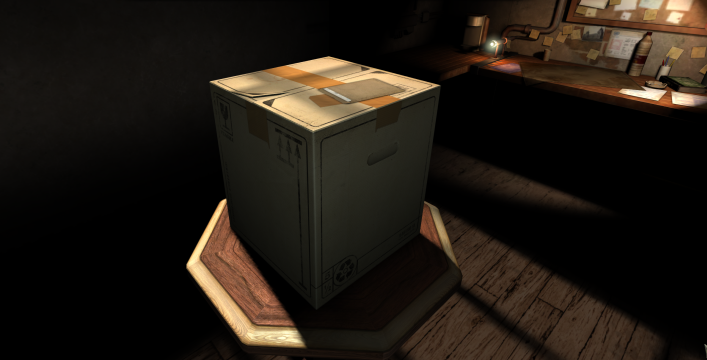
Select Start at the main menu. A cardboard box is presented and a mandatory tutorial runs, in which you'll read a letter stating that the lock code is the serial number 1078. As instructed, pick up the scissors and open the cardboard box.
Your next task is to get the 3D printer working. Zoom in on the center of the yellow stripes and enter the combination 1078, then press the green button. Open the clear cover and remote the battery inside. On the right side of the printer, rotate the circle at right so you can open the hatch. Put the battery inside and press the red power button. Following the indication on the front panel, zoom in on the left side of the printer and rotate the circles to open the hatch there. Click on the lower metal cover to remove the old material cartridge so you can replace it with one of the "ink cartridges" in back.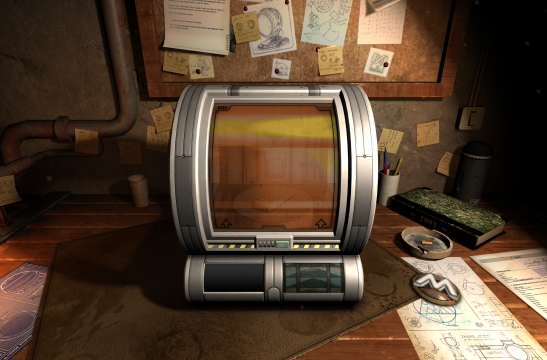
Go back to the right side of the printer and rotate the circle next to the power button to expose the printer controls on the front panel. Pick up the object with the white letter M from the table and put it into the printer. Close the cover and press the blue button on the front panel to scan the museum emblem. Remove the emblem from the printer and close the cover. Press the red button to perform the duplication. Pick up the emblem and you'll be provided with a printer icon at the left of the screen that can be used to quickly duplicate an inventory item just by moving the item over the icon. This completes the chapter.
Pick up the letter and turn it around to see some clues on side 2. Look at the right side of the wooden crate and pull out a tiny corner of a piece of paper to see the code 359 written on its reverse side. Go to the front of the crate and remove the square slider at left. As suggested by the clues, duplicate the metallic pin using the printer icon at left. Put both of the pins back into the sliders and move them down so you can turn the knob and expose a numeric number wheel. Enter 359 to unlock the crate so you can open it.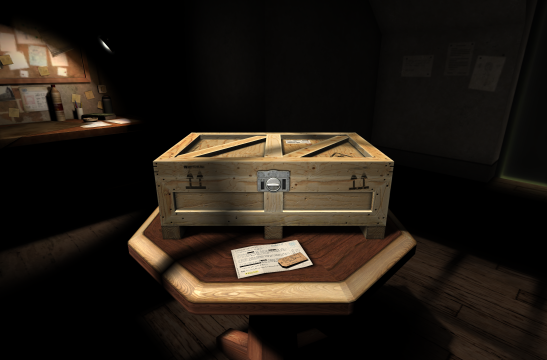
Zoom in on the back of the alien device where a stubby arm is sticking out vertically. Move the arm to either side and pick up a purple brace that was hidden underneath. Zoom to the right side of the alien device. Pick up a metallic object, then open a hatch using the sliding switch. Take the strange key and green brace from inside. Zoom to the left side of the device and move the two slides. The holes exposed look like they might fit the key you have, so first duplicate it in the printer, then insert both and turn them to open a hatch. Raise the lid to see a set of four glass tubes inside. Press the gold button in the back to disclose a silver box on the back side. Look at the top of the box for a code. The circles evidently refer to the knobs below, and since there are 3 large circles and 4 small ones, the upper knobs must be for the larger ones. Set up this pattern: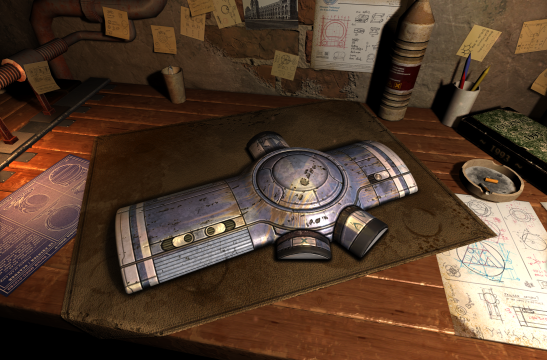
This activates the glass tubes and reveals a set of 7 levers below them.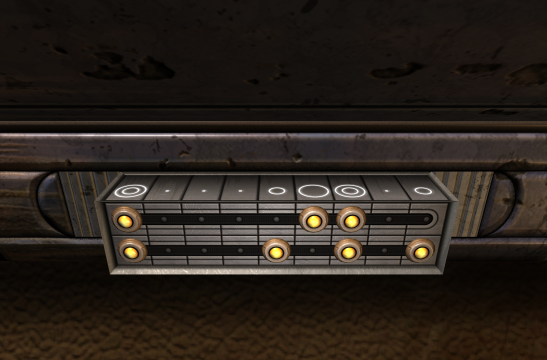
Pick up the blue brace at right. Put the lever from inventory into the gap between the levers. This triggers your alter ego to provide you with an endoscope, which you will use at several points in the game. Use its lit green arrow to move forward so you can see a red push-pin that's causing problems. Press the lever to the left of the scope cable a couple of times to jiggle the push-pin free. Click on the scope icon at left to remove it. Try again to put the lever into the gap.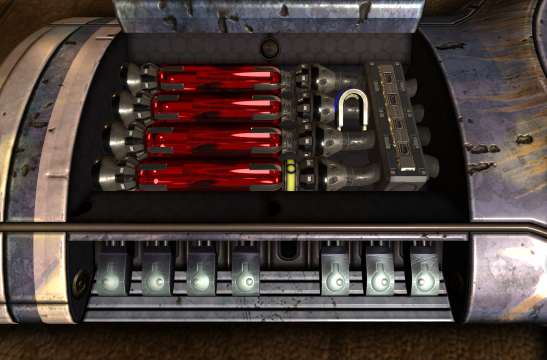
By pressing the levers sequentially from left to right, you'll note that each controls a holder at the left or right side of a tube, with the side indicated by the position of the circle on the lever. Numbering levers from 1 to 8 left to right and the tubes from 1 to 4 top to bottom, here is what you can discover:
Armed with this information and the fact that the lowest tube (4) has a yellow brace over it, press levers 2 and 8 to release that tube. Rotate the tube until it shows a yellow color and returns into position. Next, move the three braces from inventory over the right edges of the tubes and they will pop into position in a prescribed order. Repeat the previous process to match the other three tube colors with those of the braces:
Lever Side Tube 1 Left 1 2 Right 4 3 Left 2 4 Right 1 5 Left 3 6 Right 2 7 Right 3 8 Left 4
Energy lines are activated over the device, a phenomenon that will be repeated several times in the game. Zoom to the open ring for a relatively-easy Sokoban puzzle in which the objective is to use the yellow arrows to move the green boxes over the dim circles at top and bottom:
Purple Levers 1 & 4 Green Levers 3 & 6 Blue Levers 5 & 7
The stubby arm to the lower right of the ring alternates the yellow arrows between the two levels (unless blocked), and the arm at lower left swaps the positions of the red obstacles unless blocked. The arm at the top moves the arrows. Solving the puzzle is straightforward as long as you don't block the red obstacles from moving out of the way when you need them to. When the puzzle is completed, an anti-gravity machine is activated, which will be used to manipulate several of the alien objects in the game.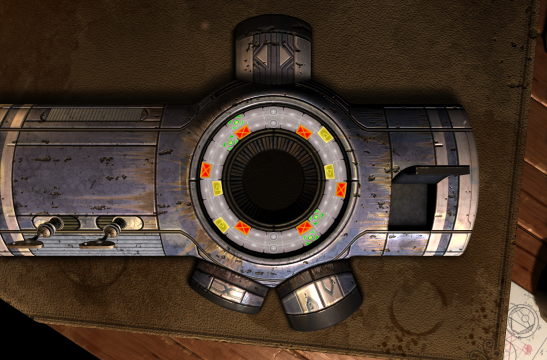
Pick up the keys on top of the crate. Zoom to the narrow side of the crate opposite the side that has dual up arrows ↑↑. There's a keyhole at the top into which you can insert the second key. Turn it clockwise a half turn to release a panel below. Pull the panel down and retrieve a hidden note containing a pattern: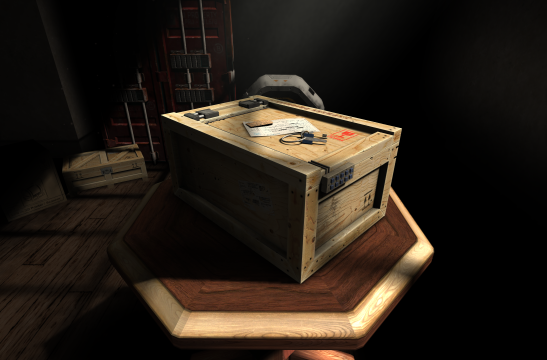
Go to the opposite side of the crate and carefully press the corresponding buttons in sequence according to the pattern above. It doesn't matter whether you start at the A2 end or the D1 end of the connected line above. The buttons light briefly when you press them, but otherwise don't indicate whether or not you've made a mistake. Now that you're zoomed to the top of the crate, duplicate the blue-handled key and use them in the indicated keyholes. Turn both to unlock the crate, then slide the lid open.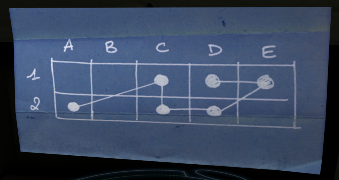
Pick up a pen from the desk. Zoom to the 3 x 3 keypad on the cylindrical device and click the loose button at lower right to remove it. Use the pen to light up this spot. Your task is to find the rest of the code to open the case. To skip the derivation and jump to the solution, click here.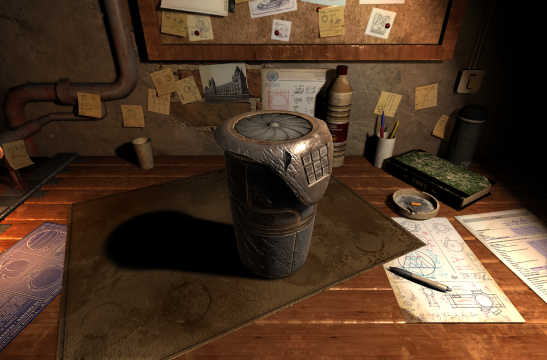
Back out and zoom to the sparking hole on the device. Use the scope there to get a look inside. Use the green arrow key to move forward twice, then use the joypad device on the right side of the scope to view the back side (mirror image) of the keypad:
This view indicates which additional buttons need to be pressed on the keypad, but they are reversed: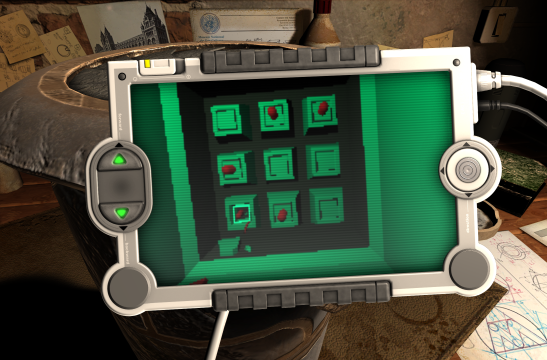
Remove the scope and return to the keypad to press the keys indicated in the right diagram above. The top of the device opens up to disgorge what appears to be a pair of scrolls in a leather case. What are the aliens using for leather? Afraid to ask...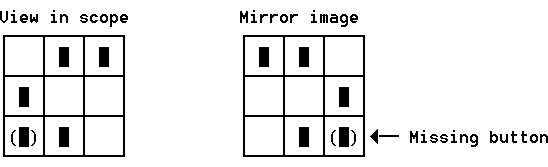
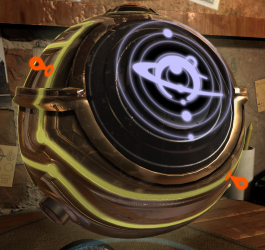
Zoom in on the scrolls and they will reappear in the anti-gravity machine. Click on the blue stacked rings to rotate the artifact without changing your viewpoint. Facing the planetary symbol on the front, zoom to the lower right and pull out a plug there.
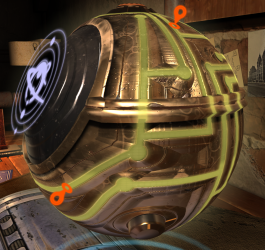
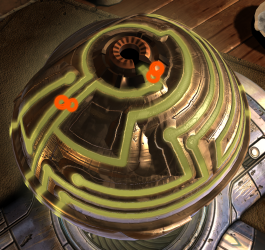
Each side of the rotor has a vertical groove in the metal, which is easier to track if you ignore the bright area of reflection nearby. Initially, it's probably simpler to move the rotors to the left since the visibility may be better if you're looking from the right side as shown above. To skip the derivation and jump to the solution, click here.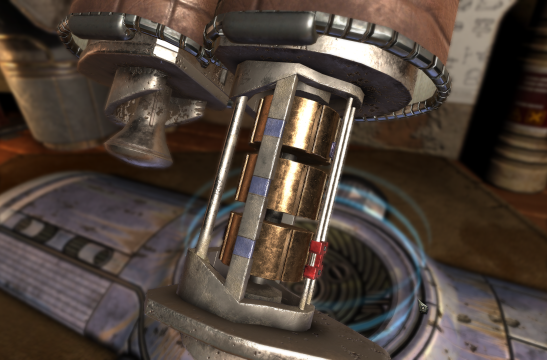
Each rotor has some blue marks on one of its eight sides. Evidently, the objective is to line up the rotor marks next to the column of three blue squares on the rotor frame. Some experimentation with the rotors shows that the following net changes are needed from the initial state of the puzzle:
- The top rotor needs to move left once.This is an aggregate total of nine movements needed for the rotors.
- The middle rotor needs to move left three times.
- The bottom rotor needs to move left five times.
Note that each rotation you perform increments the individual rotor counts by two since you're always moving two rotors at the same time. Therefore, the total rotor movements that you make will always be an even number. It follows that creating a column of blue rotor marks to the right of the frame is impossible since an odd total of movements (9) is required. However, if the goal is to create the column of marks underneath the frame, then each rotor needs to move one more time and the new requirements would be:
- The top rotor needs to move left twice.This is an aggregate total of 12 movements needed for the rotors (6 rotations of two rotors each), which should be doable with some combination of rotor movements. Define the variables
- The middle rotor needs to move left four times.
- The bottom rotor needs to move left six times.
x: Number of movements of the top two rotorsThen
y: Number of movements of the bottom two rotors
z: Number of movements of the top & bottom rotors
Adding up all three equations, we have
Number of movements of the top rotor = x + z = 2 Number of movements of the middle rotor = x + y = 4 Number of movements of the bottom rotor = y + z = 6
2x + 2y + 2z = 12We can subtract the second equation from this to get
x + y + z = 6
Then x = 0 and y = 4, so the solution is: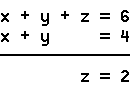
Also note the symbols with the left and right arrows above and below the planetary arrangement. Rotate back to the front of the scroll and zoom to the knob at lower left. Rotate the viewpoint a bit to the left until you can see a bolt head with a tripartite symbol on it: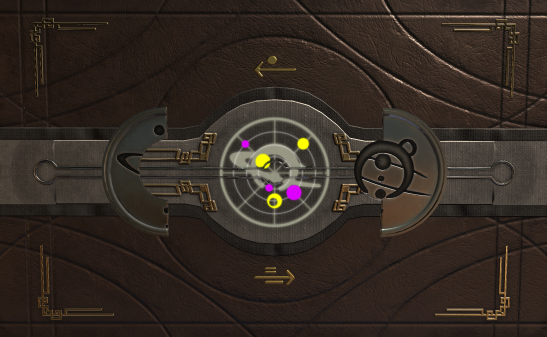
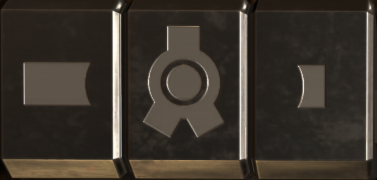
Click on it to get a magnetic screwdriver, which you will use at several places in the game. Each target symbol for the screwdriver consists of two parts, sometimes overlapping.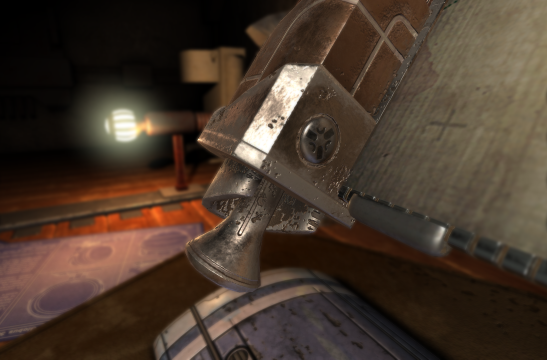
- Top yellow button: Controls which of the two shapes is being selected.So for this shape, follow these steps:- Top striped rotor: Controls which basic shape is selected.
- Middle rotor: Moves the shape up or down into the desired position.
- Bottom rotor: Duplicates the shape in a circle around the center. Continue moving the rotor until all shapes in the target are covered in orange.
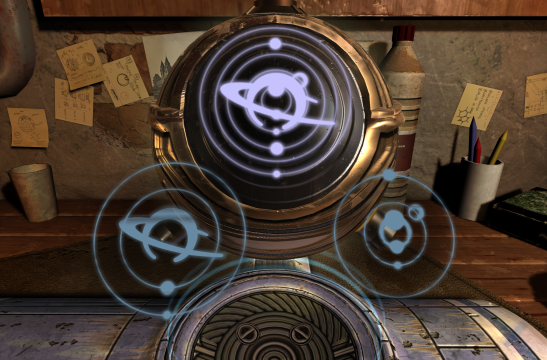
A screen on the scroll activates for the next puzzle. There are dials at the upper left and upper right that control the orientation of the left (yellow) and right (purple) planetary systems. The union of these systems should match the diagram seen on the back of the scroll. Note that the circular and radial lines on the diagram don't match up exactly with what's shown on the screen of the scroll. Solving this puzzle takes a bit of hand-eye coordination, but if you are careful to keep the mouse cursor on the spoked circumference of the control wheel while using your peripheral vision (or glancing back and forth), you should be able to get the planets into the correct position. Note that the control wheel has limits to its rotation. Some slight final tweaks of one side or the other may be necessary before the puzzle is solved.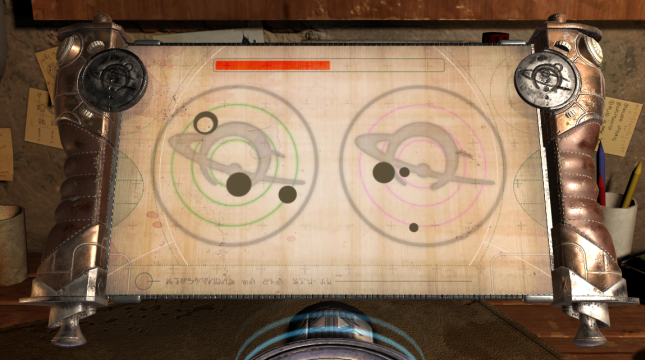
Zoom to the scroll and drag the green arrows to the right to complete the chapter.
Zoom to the right side of the canister and release the hatch with the red switch. Pick up a key inside and insert it into the keyhole in the top of the canister. Turn the key and then turn the can opener device a couple of revolutions to release the lock on the canister lid. Unscrew the lid and pick up a tricolored pyramid and photo inside. Examining the photo and inferring the first digit reveals the combination 237. Zoom to the brass combination lock on the front of the canister and enter this combination. Unscrew the next part of the canister and an alien rock will be disclosed.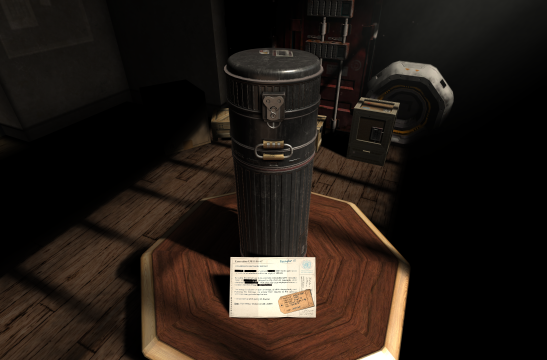
Rotate the rock in the anti-gravity device and zoom to the circular knob next to the raised rectangle. Rotate the hexagons to center their openings and remove the cover. Press the left side of the gold button to start the next puzzle.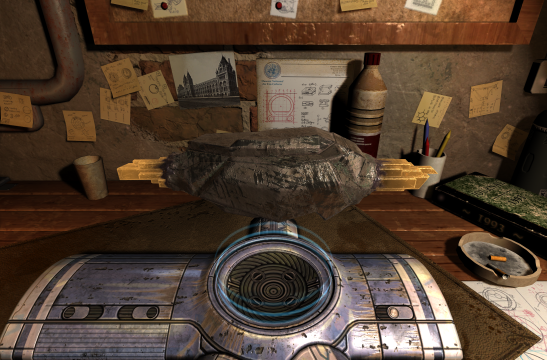
A connection is made if a circle at each end of the path lines up with those directions. On the bottom ring, there's a linkage covering two adjacent sides of the pyramid that will be too short for our use, so this can be ignored. There are no other linkages on the bottom ring that don't involve moving onto the middle ring. All connections on the middle ring connect the bottom ring with the top ring, so the overall path you must find goes from the bottom of the pyramid to the top and then back down.
Now checking the top ring, there is only one linkage that doesn't go nowhere, so this U-turn must be the one used. On the middle ring, there are only two arrangements that connect both sides of the path on the top ring to the bottom ring -- one pair is on adjacent sides of the middle ring and the other pair are three sides apart. These arrangements may be easier to see if you adjust your viewpoint to look down from the upper right. In each case, you can set up the arrangements on the top two rings and align the bottom ring with them to see if the circles are three sides apart (NE to W), in which case you just need to rotate the entire pyramid until the puzzle is solved.
Before the final rotation to the left, the arrangement is:
A rectangle on the rock is partially energized.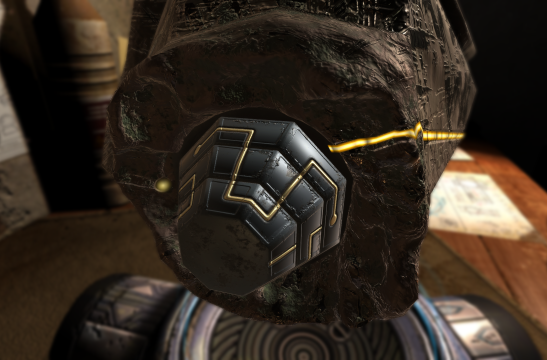
Return to the gold button and press its right side. Place the pyramid from inventory onto the platform. Number the sides of the central triangle 1-3 clockwise from upper right and use compass notation for the gray crystals. To skip the derivation and jump to the solution, click here.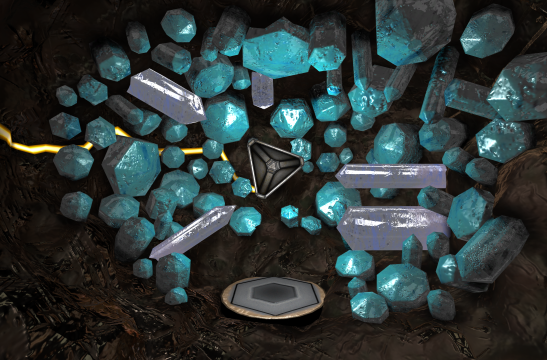
Some experimentation shows that the following light paths are all that can be created:
Logically, Side 1 of the triangle can be lit only by the N crystal, which in turn can be lit only by the E crystal, so the Red portion of the pyramid must point to the E crystal and therefore it cannot light up the SW crystal. Side 2 of the triangle cannot be lit by the E crystal, so it must be lit by the SE crystal, which in turn can be lit only by the Blue portion of the pyramid. Therefore, the Blue portion of the pyramid cannot illuminate the SW crystal, so Side 3 of the triangle must be lit by the NW crystal and the Yellow portion of the pyramid. To summarize,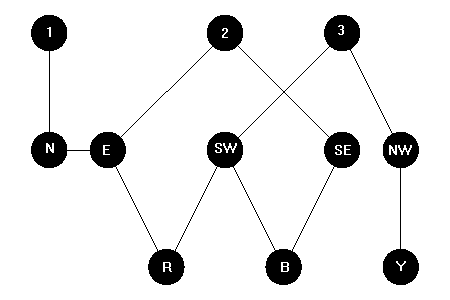
To skip the derivation and jump to the solution, click here.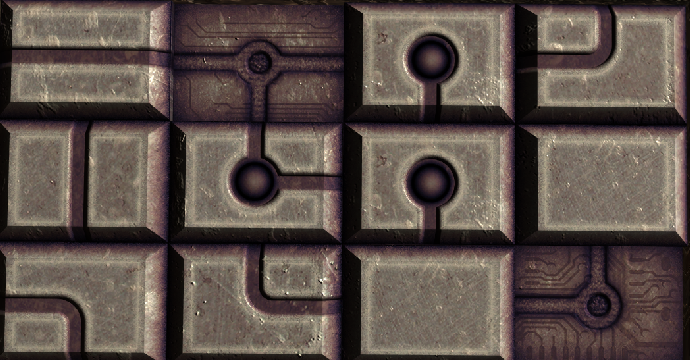
The desired final pattern can be determined by looking at which cells are lit on the background under the pieces:
These three cells must be covered by the three pieces that have unlit lights on them. The lit locations in the top corners have no exit upwards, so each must be the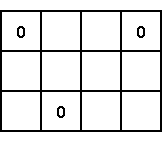
 piece, and so the
remaining lit piece
piece, and so the
remaining lit piece  is in
the bottom row. The diagram so far is:
is in
the bottom row. The diagram so far is:
Position A must have an exit upwards but cannot be the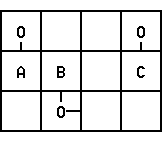
 piece since that would not
permit a connection to the lit location in the bottom row, so A is the other
piece with an exit upwards:
piece since that would not
permit a connection to the lit location in the bottom row, so A is the other
piece with an exit upwards:
 . This in turn implies that
position B is
. This in turn implies that
position B is  . The remaining
piece with an exit upwards is
, which must be in position C.
The diagram so far is:
. The remaining
piece with an exit upwards is
, which must be in position C.
The diagram so far is:
The two remaining pieces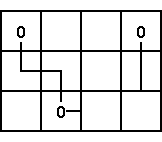
 and
and
 fill out the rest of the
diagram:
fill out the rest of the
diagram:
From the initial puzzle configuration, here's a solution in 28 moves (read left to right):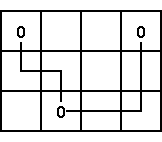
Prepare the rightmost column:
The puzzle so far is:
Down
Complete the pattern: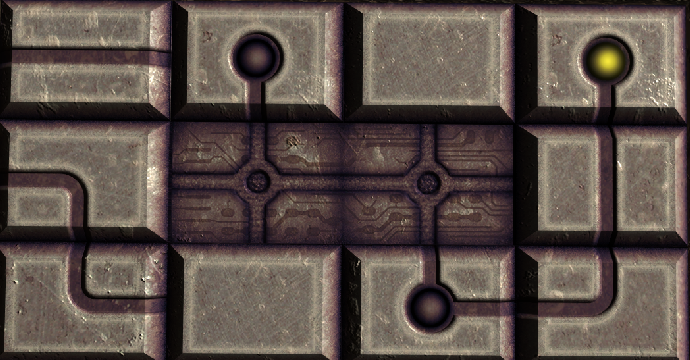
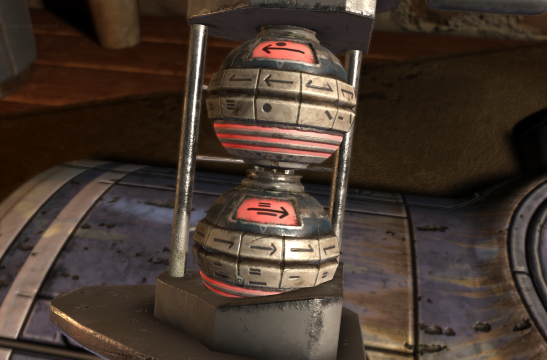
Slide the top of the rock to the left. Move the lower slider to about the middle of its path to align the right screw with its diagonal line. Repeat with the upper slider for the left screw. When the Pillsbury tube opens up, pick up the right-hand metal sphere and duplicate it in the printer. Remove the defective sphere and refill both sides. Examine the bottom of the rock switch cover you've been carrying for some time:
Reading from top to bottom, this symbol indicates the sequence of colors that should be set by alternately rotating the metal spheres accordingly. Note that the last two colors are light blue (cyan). When each color is properly set and you release the mouse key, one of the crystals at the top illuminates. Setting all five colors completes the chapter.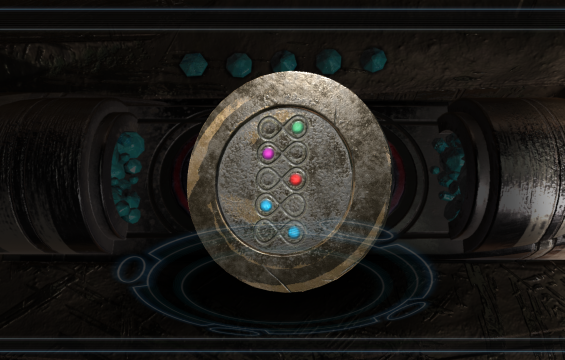
Pick up the letter at the left side of the wooden crate and turn it over to see the code 1359. Enter this code using the keypad on the crate to unlock a drawer. Opening the drawer shows it to be empty. Push the drawer back in as far as it will go. On the back side of the crate, you can pick up a note with the code A7861 written on it. It's upside down but you can get a better look at it by rotating it in your inventory. Go back to the keypad and turn off all the lit numbers, then enter this code so you can open the crate and see some sort of a necklace inside.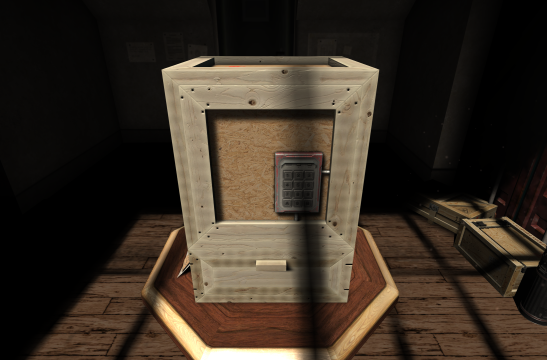
Facing the front of the necklace where the red stone is, examine the upper area to see a symbol there: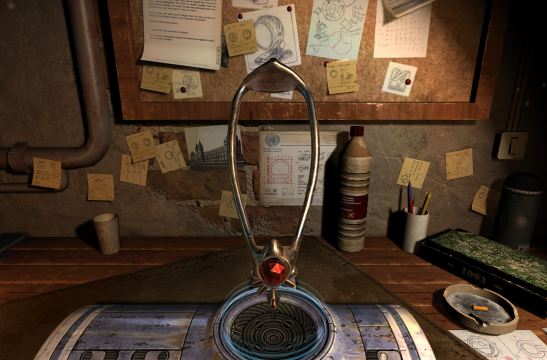
Turn the artifact around in the anti-gravity field and zoom to the gold button at the top. Move the button to disclose a socket for your screwdriver. This time, the two symbols are the tombstone shape and a concave pentagon.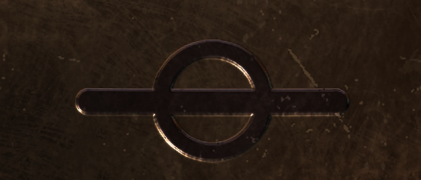
After the bolt is removed, a set of concentric colored rings is displayed. Number the rings from 1 to 4 inside to outside. To skip the derivation and jump to the solution, click here.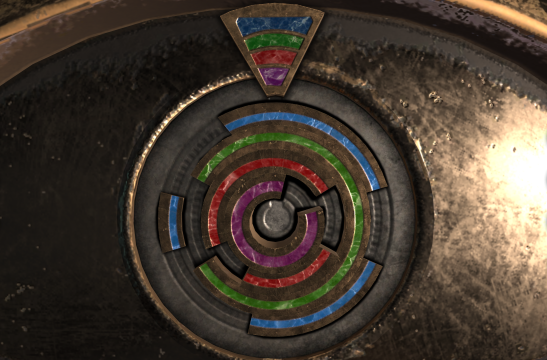
The objective is to align gaps in the ring to accept the wedge shape at the top. Some experimentation shows the following:
An essential observation here is that once Rings 1 and 2 are aligned with each other and the same is true for Rings 3 and 4, then they can be moved into position independently. Also, if Ring 1 is in position, then Ring 2 can be moved without disturbing it by using the green (3) ring. By symmetry, similar remarks apply to Rings 3 and 4. These facts are exploited to determine a 5-move solution:
Ring turned Rings moved 1. Purple 1 2 2. Red 1 2 3 3. Green 2 3 4 4. Blue 3 4
Examine the other side of the artifact and remove the upper right "gold tooth" sticking out. Duplicate it and replace them on the right side. Click on each of the 4 gold pieces to release a key. Pull it down and remove it. Lift up the red jewel and rotate both the gray quarter-circles to the top to allow you to pick up a red disc.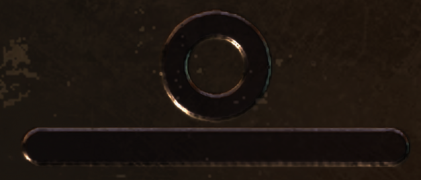
The backside of the jewel opens up and you can insert the stone there, which causes a helmet to materialize. Zoom to one of its earpieces to see a third symbol pulsing there:
Zoom to the yellow stone at the top of the helmet. Click on the stone to disclose another alien mechanism. Add the red disc and rotate it a half-turn. Set the three symbols you saw previously on the three rings: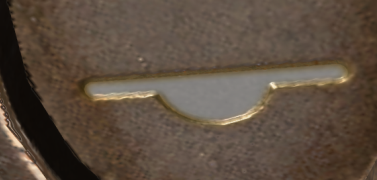
Insert the key here and set its symbols to match the pattern above the keyhole: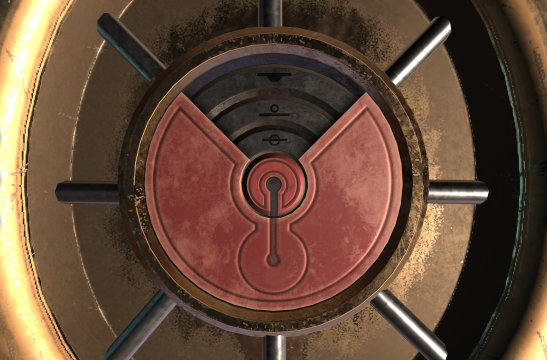
This materializes the faceplate of the helmet, but it's apparently been badly damaged: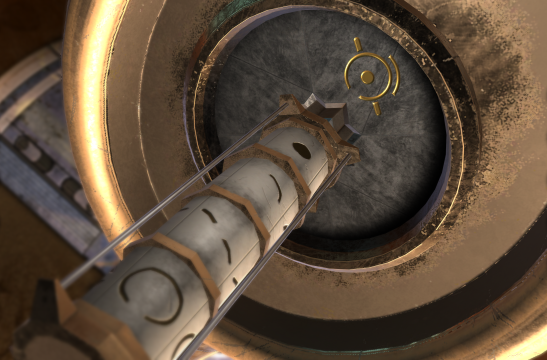
Turn it around and click on the opening to wear the helmet and hear a recording of a space battle.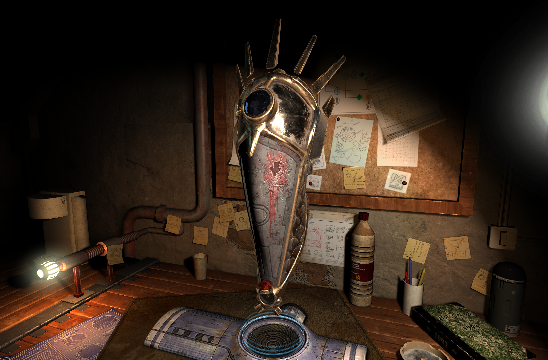
Move to the right end of the container and move both yellow latches outward. Rotate in the indicated direction and take a big screw. Go to the other end of the container and install the screw there. Take the orange handle inside and duplicate it. Zoom to the front of the container and connect the handles to the gray spindles. Lift both handles to open the container. Click on the rocket engine inside.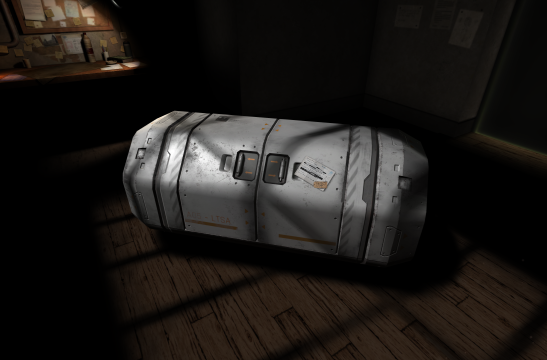
There's an interesting view of the moon overhead. Pick up the pliers leaning on the back of the engine. On each side of the engine, unbuckle a couple of latches. Zoom to a keyhole about halfway up the front side of the engine, which can be opened with your screwdriver. The two symbols are the tombstone and wedge shapes. The engine opens up to reveal another Sokoban puzzle. When it's solved, you'll hear a strange rattling sound and the haunted canister from Chapter 4 will explode to release the energized alien rock that gets inserted into the rocket engine. Before you press the engine's yellow power button, use your screwdriver with the indentation at right. The two symbols are the wedge and small triangle shapes (replicated five times). Use the pliers to extract a radioactive bar. Press the yellow button on the engine to release the two hatches on its sides that you unlatched earlier.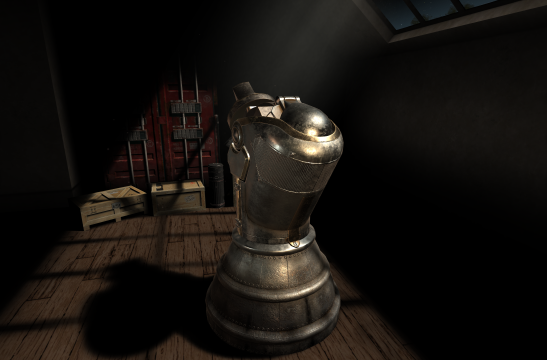
Zoom to the left side of the engine where there are some steaming pipes. Move the left disk so its hole overlaps one underneath. Use your scope there and press the forward button. The two green cylinders represent the two steaming pipes at right. While viewing the scope, adjust the corresponding discs under the pipes until the red lights on the cylinders change from red to yellow. Be sure to release the mouse button after each small movement of the disc. Use the joypad on the scope to view the cylinder for the left disc. The disk will need to be rotated counterclockwise slightly to be in the correct position, but you'll have to do that blindly since the scope is in the way of the rotation. Remove the scope and make small movements of the disc, releasing the mouse key each time, until the puzzle is solved. The correct location of the hole is approximately in line with the bolt to the upper left of the disc. When complete, steam travels through three pipes to the other side of the engine.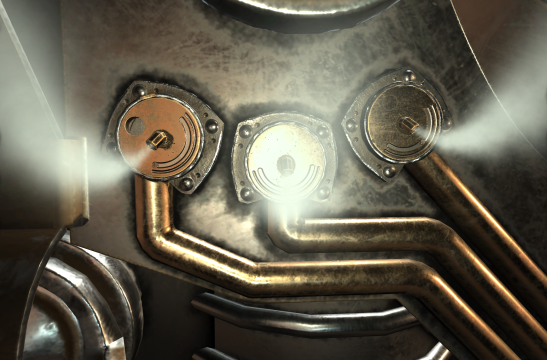
Zoom to the right side of the engine. According to the gauge, the pipes here seem to be off (0) when the slider is down and on (1) when it's up. To skip the derivation and jump to the solution, click here.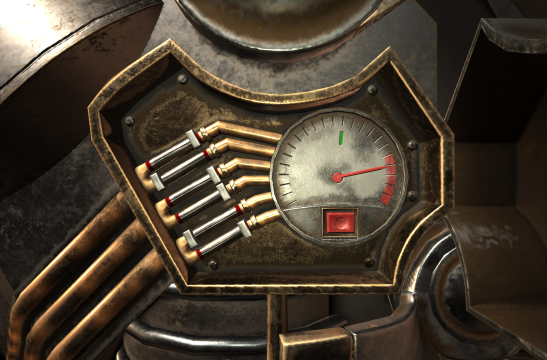
If zero is at the lower left of the gauge, your target is the green line at 12. Note that the pipes are arranged in pairs. Turn off all the pipes and examine the first two at upper left. By trying the four on/off arrangements of them, you can determine the gauge setting produced in each case. The gauge looks a bit worn and seems to register low in the left half of its range, so we'll have to round up in those cases. Repeat the process for the other two pairs of pipes to determine the following gauge readings:
The pipes in each pair are additive within it (i.e., 2 + 4 = 6 for the first pair), and the readings for separate pairs also seem to be additive. So it's just a matter of finding one value from each pair that sum to 12. Here are the two possibilities:
Pattern Left pair Middle pair Right pair 0 0 0 0 0 0 1 2 2 4 1 0 4 9 3 1 1 6 11 7
Interestingly, these patterns are ones complements of each other. When either solution is entered, the dial on the gauge is very close to the green bar; press the red button to release a lever in the back of the machine. To complete the puzzle, pull that lever down and the engine will reconfigure itself to present the next puzzle.
Left pair Middle pair Right pair 0 0 1 0 1 0 0 + 9 + 3 = 12 or 1 1 0 1 0 1 6 + 2 + 4 = 12
Zoom on the hexagonal grid on the front of the engine. Remove the dark-colored damaged bar with the pliers and insert the fresh one you have in inventory. The objective is to turn all the grid cells blue. To skip the derivation and jump to the solution, click here.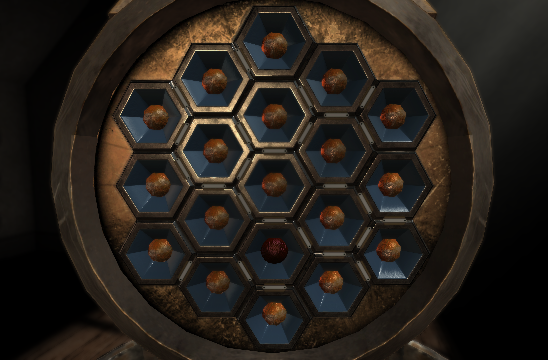
Linkages on the grid indicate which of the 19 cells light up when you press one
of them. Pressing a brown cell turns it blue, but further presses cause an
undesirable red color to appear. Unfortunately, there's no puzzle reset
function except the usual method, in which case
you'll have to replace the radioactive bar again as a preliminary step. The
simplest way of getting all the cells blue is to press only brown cells, zero or
one time each. The problem can be solved programmatically by enumerating the
linkages by cell number, then considering all
There is only one solution, and that's to press only these cells:
The ones to press are almost at every corner of the hexagon. When complete, press the yellow button on the engine again to test fire it.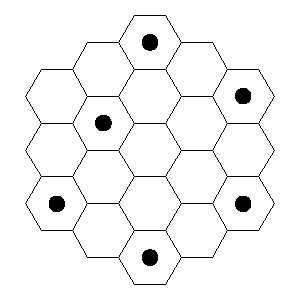
Pick up the letter and turn it around to see the code R14 on side 2. Use the crowbar to break open the padlock, then open the storage case. Zoom to the control panel on the left side and enter R14 to activate it. Note that separate dials on the right are used for the tens and units digits of the code. Individual codes will be needed for each of the colored storage bins in the case, and these are written in a magnetic-ink font on the sides of the corresponding sliding blocks in the control panel. Move the blocks around and adjust your viewpoint accordingly. The white box is fixed in position and its two-digit number is written on separate sides. The blue box is especially challenging since its letter and number continue around corners of the box. Be sure not to read the number code on the dark green box upside down. Here are the correct codes: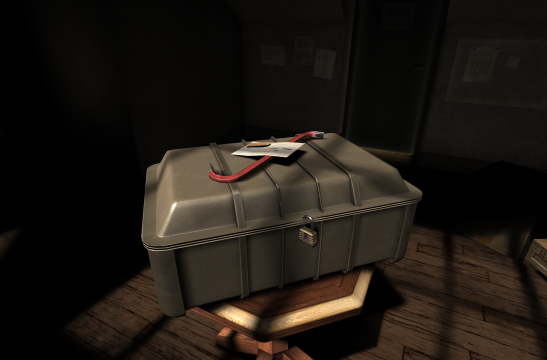
Enter all these codes using the dials to open the corresponding hatches in the box. When all the boxes are open except the black one, raid them for all the inventory you can carry: 4 machine parts and 4 cables. Click on the final object in the black box.
Light green F 73 White E 98 Red P 46 Dark green K 09 Yellow C 67 Blue G 22
Find the machine part that has a power switch on it. Drag it to the metal hook on the corner opposite the single "eyeball" on the table and press its green button. This extends metal guide rods that will be used to attach the other machine parts. Examining them in your inventory window, you can see that each has two or three holes in positions corresponding to the rods: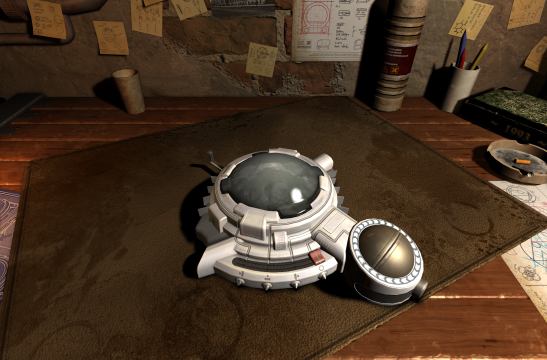
Put each piece at the corresponding place on the table, then drag it all the way along the rods so that it touches the main body of the device and the rods retract.
2 widely-
spaced holes3 holes 2 closely-
spaced holes
Retrieve the 3 metallic eyeballs in the pop-up chamber at lower right. Zoom to the vertical disc of pentagons emitting lasers. The objective is to use the buttons at the top of the disc to rotate it so that the lasers are emanating from three pentagons with the same number of double circles as the dots on the eyeballs in inventory (2, 3 or 4). From the initial state of the puzzle, this is two clockwise turns using the right button. Place the corresponding eyeballs into the centers of the laser pentagons to activate the first (lower right) corner eyeball on the main device.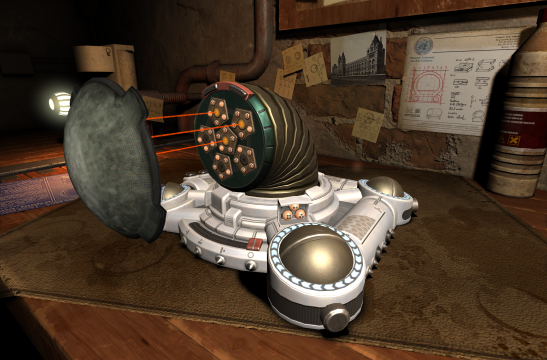
Zoom to the green eyeball and rotate the ring around it in the indicated direction to fully open the eye. When the metal pin extends, attach one of the cables you have in inventory. Zoom to the cable to set its combination to match the pattern in the green eye:
The eye turns yellow and looks urgently for a power source.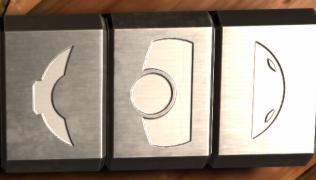
Note that the abacus has five columns -- number them from 1 to 5 left to right. Columns 2-4 correspond to plungers whose depth is indicated by dots and which can be seen in the scope. The depth is controlled by how many red slider segments are directly above the plunger. While observing the scope, manipulate the red sliders until there is only one red segment in Column 2 (leftmost plunger). The scope will indicate a laser beam passing through that plunger, so its final depth should be 1 dot.
Press the forward arrow on the scope and move its joystick to the lower left to see the path of the laser through the other two plungers. The depth of the middle plunger should also be 1 dot to allow the laser to pass through it, and the depth of the plunger in Column 4 should be 3 dots. The final plunger dot configuration of (1,1,3) can be achieved by putting the red sliders into the following arrangement.
Note: The scope must be inserted and the red sliders positioned in order from bottom to top:
Perform the same cable attachment process as before. The cable combination is: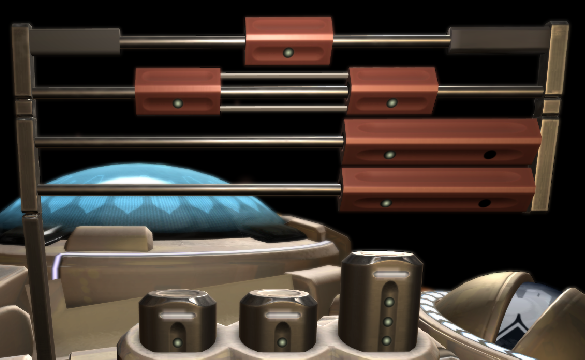
The eye turns yellow and looks around nervously.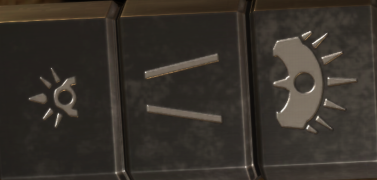
If you are unable to open the green eyeball or attach the cable, you've run into an unpatched bug in the game and may have to restart the chapter.
Perform the same cable attachment process as before. The cable combination is: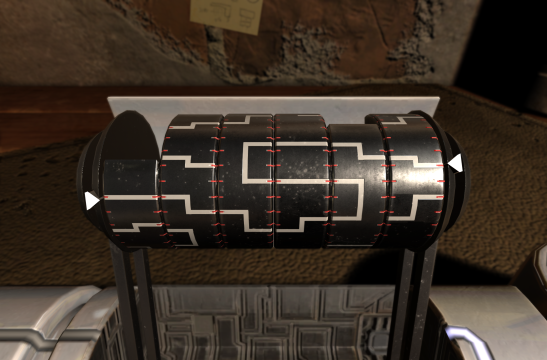
Given that all chips are right angles, there are two solutions:
or the four identical chips (assuming the red line at left is a tunnel):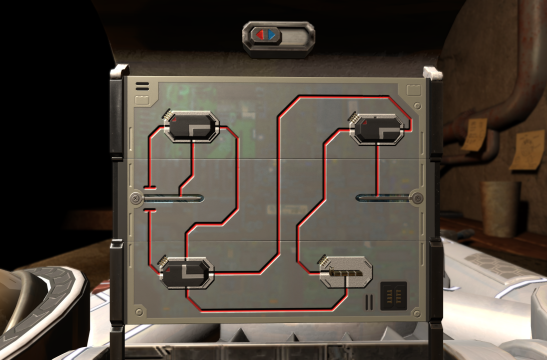
In the second solution, the chip at lower right would be inappropriate in the blue circuit, so only the first solution above is valid.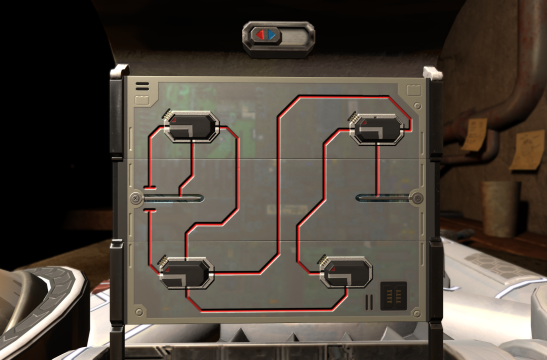
From the initial puzzle configuration, follow these steps:
 and duplicate it in
the printer.
and duplicate it in
the printer.
 and duplicate it in
the printer.
and duplicate it in
the printer.
Perform the same cable attachment process as before. The cable combination is:
The device starts aggressively hunting for power, a reminder of those scenes in The Thing (but less organic). After the lights go out, zoom to the power switch at upper right and pull out the alien cable. Rotate left and zoom to the circuit breaker box with the flashing light. Open its latch and rotate it clockwise to get the door open. Following the photo on the door: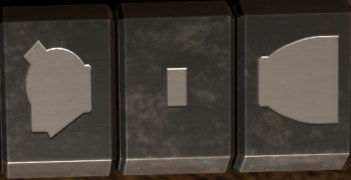
set the switches in the box accordingly, then rotate the orange handle to restore the lighting.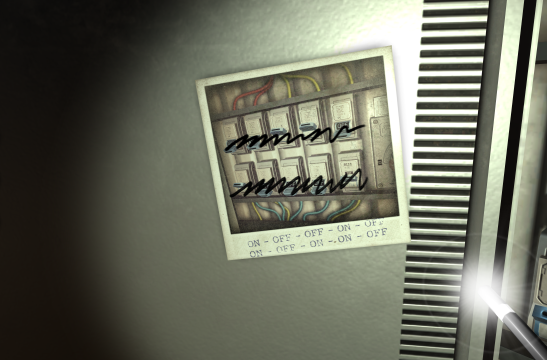
Note that the case is missing a zipper pull. Circle around the case to see that the zipper pull is jammed into one of the side buttons. Zoom in there and drag the button a couple of times to remove it. Pick up the zipper pull and attach it to the end of the zipper. Move both zippers all the way around to the hinge in back in order to open the case. Lift its lid and click on the gold sphere inside.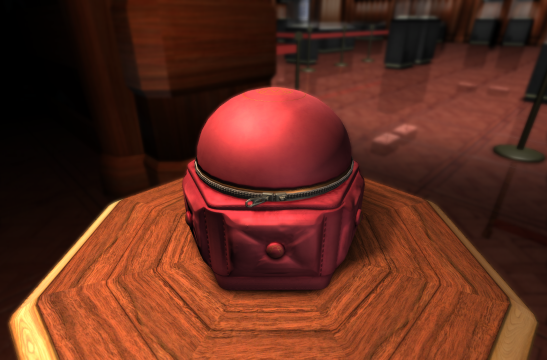
Back in the workroom, the sphere is now floating in the anti-gravity field. Zoom to its big circle and slide it to the left. Rotate the small metal circle to unlock the large copper-colored gear. Rotate the gear counterclockwise until it connects with the metal circle below it, then rotate it all the way clockwise. Zoom to a location for your screwdriver; both of its symbols are the U shape, each replicated five times. The sphere reconfigures itself into a puzzle.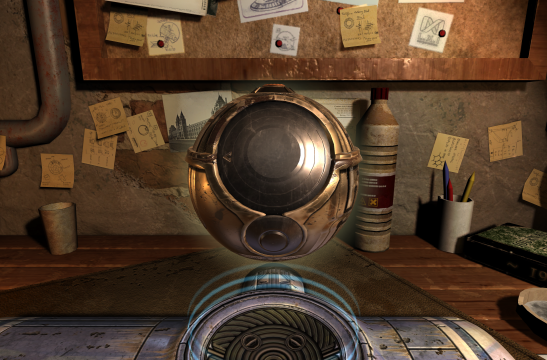
The orange ring on the top of the sphere rises up in acknowledgement.
1. From the starting position in the bottom of the sphere, move up a short distance to a T-intersection and turn right. 2. Go to a T-intersection with a short dead end below it and turn left. 3. Go straight up as far as possible. 4. At the corner, turn left and go through a U-turn. 5. You'll approach the next T-intersection from the left; when you reach it, turn right to go down. 6. Follow the path through a smile-shaped curve underneath the planetary display. 7. You'll reach a T-intersection just above the end of the curve. 8. Turn right there and follow the path to the right and up. 9. Continue straight up past the next T-intersection and on to the top.
Drag the bottom slider to the left to move the blue cover halfway down. Remove the small gear from the end of the curved carrier and move its spindle to the left. Install the remaining large gear there: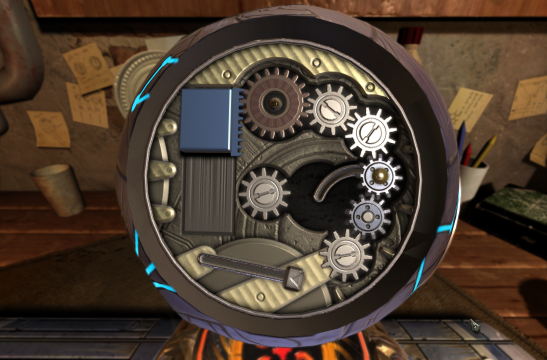
Drag the bottom slider again to move the blue cover the rest of the way down. Pick up the crystal shard and one each of the small and large gears you used.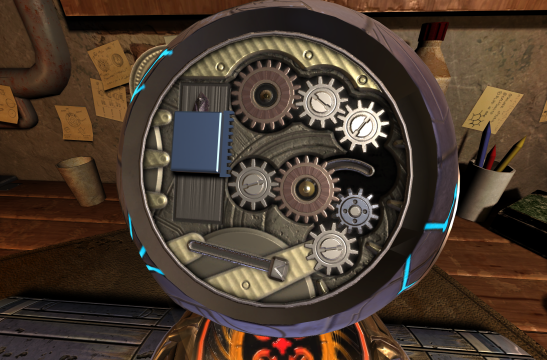
Rotate the sphere in its anti-gravity field and pick up the curved piece of a blue annular gear floating in space. Zoom to the large hole of the sphere and install the curved gear piece. Add a small gear from inventory between the red and blue gears. Move both spindles to the upper ends of their curved guides and install small and large gears in the indicated positions there. Add the crystal shard to the space to the left of the red gear:
Drag the slider at upper left downwards to energize the crystal. Pick up the radiating crystal and put it into the receptacle in the small side hole of the sphere. Rotate the six segments of the sphere to align the constellations. Each rotation is 1/6 of a circle. When finished, the sides of the sphere should look like: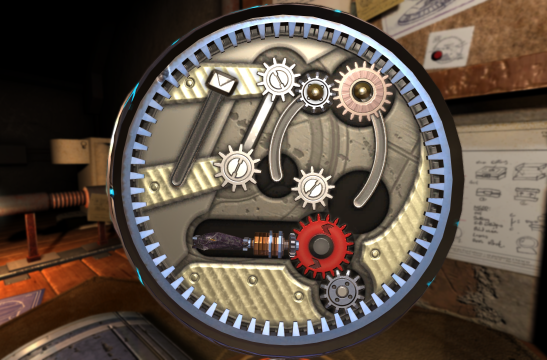
The blue sphere breaks apart and an orange flower floats up.
and
		NW		NE


	W				E


			S
To skip the derivation and jump to the solution, click here.
Move the joystick around fully to see that a colored circle exists in the direction corresponding to each petal. The objective of this puzzle is to orient the planets in the center so that each is in the same sector as the corresponding colored circle. Analogous to the earlier rings puzzle, each press of a flower petal adjusts the angular position of one or more planets:
The single colors make it relatively easy to isolate each of them by following these steps in order:
Petal pressed Planet(s) moved NE Black, Purple E Yellow S White W Purple, White NW Blue, White
Click the five petals once each to illuminate the green background and make it possible to see the Black planet.
Note the four locks marked A-D in reading order on the end of the container. Move to its left side and pick up a letter there. Turn it around to see a decoding chart: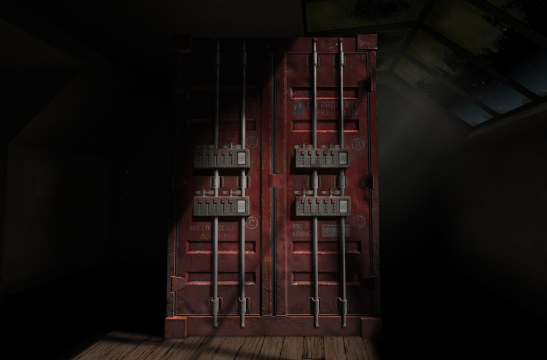
The order of locks on the right side is A D C B, so that is evidently the order in which they will be unlocked. Lock A has code B3, which in the table is the numerical sequence 34512. Go to lock A on the container and enter that sequence. The response A5 appears on the hard-to-read LCD display, which from the chart corresponds to the sequence 14223. Go next to lock D at lower right and enter that sequence, which produces the next code C4, corresponding to the sequence 25214. Go to lock C and enter that sequence, and just when you least expect it, the container explodes and the Last Chapter begins.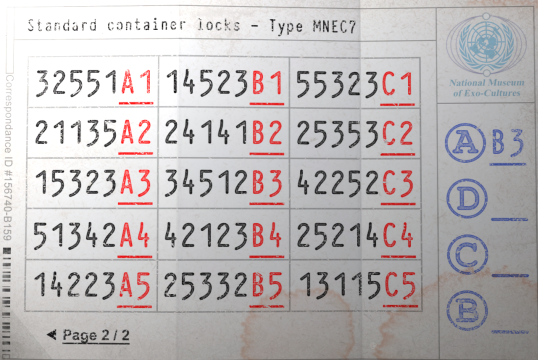
When your vision clears, you're facing a large gold sphere vaguely similar in appearance to the smaller one you saw in the previous chapter. Open a rectangular hatch on the side of the sphere and pull down the red handle inside. Repeat for an identical hatch on the opposite side. Half of the sphere dissolves to reveal a leather(?)-covered chair. Sit in the chair and look into the hole in its right arm. Your alter ego will pick up the scroll case from Chapter 3 along with a sticky note showing the button pattern to open it. Drop the scroll case into the hole and use its keypad to open it up. The status display on the scroll shows that other components from previous chapters are missing. Click on the upper-right blinking green symbol on the scroll and the rest of the sphere disappears. Click on the lower-right green symbol on the scroll and a 3 x 3 sliding-piece puzzle is activated on the other side of the chair.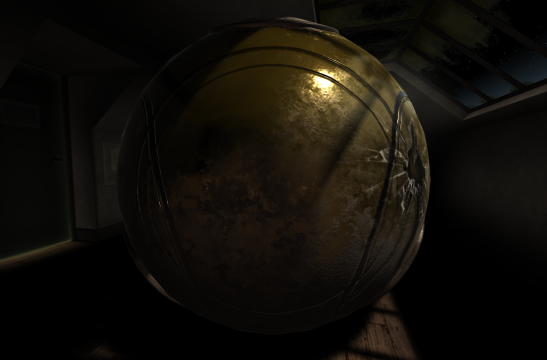
Denote the cell locations by: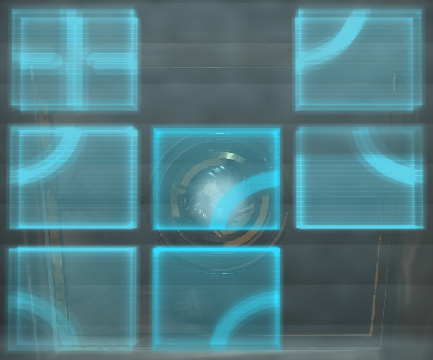
The shortest possible solution is 19 moves (read left to right):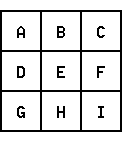
When the puzzle is completed, a hologram of the helmet appears above it. Click on it to get the rest of the spaceship components you need:
E up H up F down E right D right G up I left H left E down D right A down B left E up F left C down B right E up D right A down
Helmet. Transfer the helmet to the hologram and a small gold sphere appears. Move the switch on its side down and rotate the circle above it.
Anti-gravity device. Go to the back of the chair and solve the simple puzzle there by putting the pegs at the intersections of the same symbol. Attach the anti-gravity device to the back of the chair.
Rocket engine. Zoom to the bracket on the lower back of the chair and use the screwdriver to open it up. Its two symbols are the large triangle and the concave pentagon. Attach the rocket engine to the bracket.
Click on the chair to sit in it and begin the final puzzle of the game. Once you do, you'll be trapped in the chair for the duration and won't be able to leave it by right-clicking the mouse. Resetting the puzzle won't change anything, so hopefully you packed a toothbrush...
Clicking each item on the list produces the following information about three symbols amidst all the alien writing: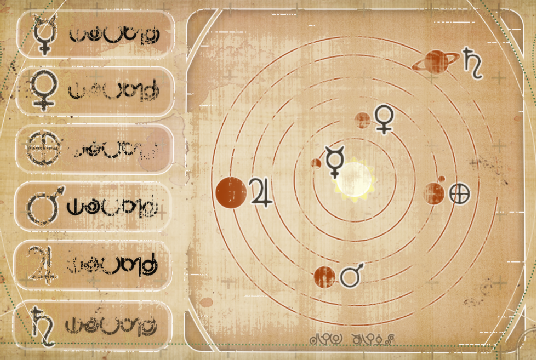
Use the top of the gold sphere to rotate your view of the planetary orbits. Zoom to Venus, Earth, Jupiter and the top of Saturn's moon (Atlas) to change the matching icons from purple to green. To avoid making any inadvertent changes to the icons, be sure to click below the planet to rotate your view.
Planet = ≡ • Mercury Venus ✓ ✓ Earth ✓ Mars Jupiter "4" ✓ ✓ ✓ Saturn "h" ✓
When that's complete, the endgame sequence will play in which you travel through hyperspace in a damaged spaceship to Saturn's tiny moon Atlas where the alien spacecraft is being investigated. This is followed by an indirect reference to a game sequel and then the credits scroll slowly past.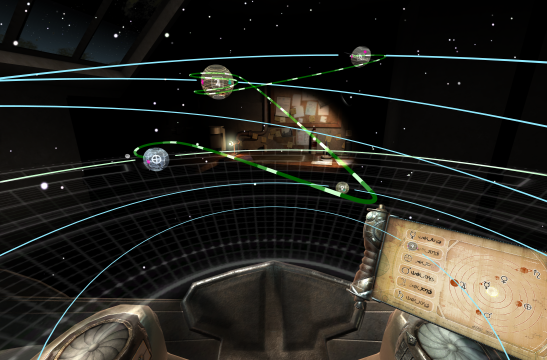
For the purists...
Atlas is a very small moon. Its gravity is 1/6000th of the Earth's, so tiny that you couldn't even stand up without floating off. There certainly couldn't be a functional water tower or other structures built there. The surface is more like powder than solid rock and you'd be constantly bombarded by radiation and stray ring particles from Saturn. A wonderful vacation spot! Cool name, though.
Copyright © 2026 Balmoral Software (http://www.balmoralsoftware.com). Portions copyright © 2022 by Littlefield Studio. All rights reserved.