
Copyright © 2019 Balmoral Software (http://www.balmoralsoftware.com). Portions copyright © 2001 Microids. All rights reserved. Republication, redistribution or conversion is expressly prohibited without the prior written consent of Balmoral Software.
The dialog/inventory window has a different appearance in dream states than in reality
To skip cutscenes or the credits, press the spacebar (spoken dialog cannot be skipped)
Movement abbreviations:
F: Forward (Fn for n repetitions)This walkthrough provides a minimum path through the game; other gameplay sequences and dialog choices can provide additional backstory elements
L: Rotate left
R: Rotate right
T: Turn around
{Cutscene}
Fred Reynolds apparently lives at Radio City Music Hall:
Fred is asleep on board a plane to New Delhi, dreaming about the Taj Majal, as indicated by the cloudy border around the screen
From the Taj Majal entrance, move R F L and pick up the pungi (Indian flute)
Move L F L F L and descend the steps
Move F4 R and pick up the rope
Move T F7 past the steps to the far corner of the mausoleum
Place the rope at the base of the tree
Use the pungi on it to "snake charm" the rope
Zoom in on the oranges in the tree and take one
Move T F4 R past the steps, and give the orange to the monkey there
Pick up the puzzle piece left behind by the monkey
Move R F2 R F up the stairs
Zoom in on the building entrance
Add the missing puzzle piece from inventory
Swap the pieces to solve the puzzle:
Move F2 to enter the Taj Majal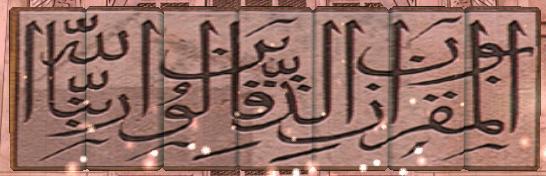
{Cutscene}
Turn around and pick up a stick from the sidewalk
Move T F and talk to Anusha's crying mother
Select any of the responsesAfter she leaves, take a plant from one of the two pots
Move L F4 and talk to the boy
Would you have change for one American dollar?Get 20 rupees for your dollar (about 42¢ in 2001) from the crafty fellow
Close the dialog box
Move R F L F R to the movie theatre entrance
Use the coins in the machine to get a gumball
Move R F R F4 and give the plant to the sacred cow
Move F R F into the alley and pick up a clothes hanger from the ground
Move T F L F3 R F to a magazine store
Zoom in twice on the automotive magazine
Back out, then zoom in on the door at right and use the hanger on the door
Move T F L F4 L F2 R and zoom in on the ATM
Use the United Bank card on the slot to get more cash
Back out, move R F2 R F5 L F and talk to the boy
The store, when does it open?Give money to the boy
Ah, darn! That's just my luck. Listen: there's a magazine in that store that I really need. Can you help me?
Please tell me more.
Close the dialog box
I've done my part, your turn to help me.Move T F5 L and zoom in on the lower area of the gate
All done; now it's your turn.
Combine the stick & gumball in inventory
Use the sticky stick in the crack of the gate to get a key
Use the key to open the gate
Move F3 L F and take the photo
Move L F R F3 R F4 L F4 R and talk to the beggar
I've found out the name of my sweetheart's attacker: it's Dharmesh Shareef. Can you help me?Move forward
{Cutscene}
Lift up the bed and take the banana
Zoom in on the barred window and give the banana to the monkey outside
Take the banana peel
Zoom in on the cell door window
Drop the banana peel through the window
Drop the bed down to make a noise and wake up the guard
Talking to the monkey, observe that he leaves the cell after 5 of your dialog selections, and the actions he takes in the guard's room depend on the dialog choices made:
To have the monkey retrieve the key from the guard's table, talk to the monkey with the following dialog choices:
Monkeyspeak Action taken Eeek! Moves to crates Hoo Hoo Hoo! Moves 1/4 turn to the right Gnee! Jumps Whahaee! Picks up something
Eeek!and get a key
Gnee!
Hoo Hoo Hoo!
Gnee!
Whahaee!
Use the key on the cell door
Exit the cell and take the machete next to the unconscious guard
Open the gate
Move F2 R F2 L F R F R F2
Use the machete on the guard wearing a blue shirt
Turn around and take a key from the unconscious guard
From that position, move R F2 and take the jug
Move T F2 R F3 R F L and unlock the gate with the key
Move F R F R F L F R and zoom in on the open window
Drop the jug on the guard standing below
Move R F R F L F L F3 L and use the machete on the guard wearing a white shirt
Move L F R F2
After exiting the underground chambers, move T F4 L F4 R F R and through a broken fence to an elephant
Free the elephant by cutting his bonds with the machete
Click on the elephant, move forward and click on the wall to exit the Taj Mahal dream
{Cutscene}
From your position facing the same boy you met before, move R F R F3 R F R and take a business card lying on the ground
There is also a necklace at left, but it is not required (picking it up will add it to the Notes section rather than inventory)
Exit the alley, then move L F2 R F3 T
Look down and pick up a feather
Move F2 L and use the feather to tickle the sleeping beggar
Take your wallet from the beggar's pocket
Facing the beggar, move L F R F R F L F and open the door to the astrologer's Apartment 1D (shown on the business card)
Move forward and try to take the photo from the table
Talk to the astrologer
Excuse me. I need some information on Dharmesh Shareef.Turn around and push the door open
Close the dialog box
Move F2 R F L F L F2 R F L F R and talk to the boy:
I have one last favor to ask you: can you please call this number in 5 minutes? It would mean a lot to me.Give money to the boy
Will that be enough?Move R F R F L F2 R F R F L F and open the door
Move forward and take the photo
Turn around and open the door
Move F2 R F L F R F5
Give money to the rickshaw driver
I am going to 14 Rama Road. How much?The driver gives you a price of 50 rupees (about $1.19 in 2001)
{Cutscene}
Move R F3 R and take the log lying at the base of the wall
In inventory, combine the rope & log to make a grapnel
Move L F R F R and use the grapnel on the V-shaped crack in the wall
{Cutscene}
After a one-way trip inside the villa grounds, move F R F R and open the door to a tool shed
Enter the shed and pick up wire cutters from the floor and a screwdriver from the shelf
If you didn't bring a crate with you from New Delhi, pick it up here
Exit the shed and move L F R F2 L F R to the house entrance
Put the crate below the blinking alarm unit, then zoom in on the alarm
Use the screwdriver to open the panel at right
Use the wire cutters to cut the wires and disable the alarm
Move L F2 R F R F L F R and open a side window of the house
Move F2 L F R through the dining room, and open the door
Move forward, then pan slightly right and move forward to a door
Open the door and enter the study
Approach the table in front of the window at left
Save your game at this point
Zoom in on the puzzle box on the table
Press the up arrow to display the front of the box
Press the hotspot in the top (black zigzag) row
Press the hotspot in the middle row
Press the right arrow to display the left side of the box
Press the single hotspot
Press the right arrow to display the back of the box
Press the hotspot in the right-hand portion of the middle row
Press the other hotspot to move down a C-shaped section
Press the right arrow to display the right side of the box
Press the hotspot that is anywhere on this side of the box
Press the down arrow to display the top of the box
Press the red circle part of the design to open the box
Retrieve a key
Exit the study and go upstairs
At the top of the stairs, move L F and use the key to unlock the door
Enter a bedroom, move R F and speak to the woman in red
Select any of the responses{Cutscene}
Move L F L F4 and take a stained-glass window with a blue design at the top
Move L F2 R and take a stained-glass window with a green design at the top
There are three more stained-glass windows that can be retrieved from this room, but you won't need them
Move R F2 R F2 L F2 L F into a torture chamber
Go behind the chair at right and pick up a chain from its back
Exit the torture chamber, then move L F2 to the double doors at the bottom of the stairs
Click on a door handle to remove it
Move T F L F to enter a side room with a sunlit window
Approach the window and insert the three stained-glass windows you retrieved earlier:
This combination of windows produces a white key-shape, which in turn discloses circular stone steps leading into a subterranean maze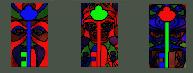
Click on the steps to descend them
Save your game at this point, and close the game control window
At the bottom of the steps, you will be in a stone room with a glowing pool containing green water lilies, purple flowers and a white P-shaped reflection:
With the game screen active (i.e., not put into the background with Alt-Tab under Windows), wait 5 minutes, then re-save your game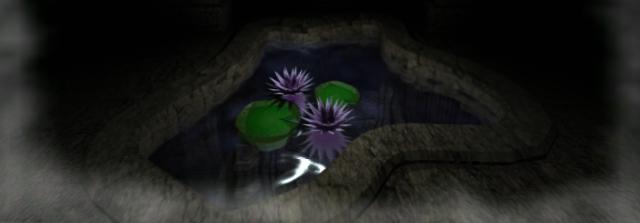
After that time has elapsed, a rat is released elsewhere in the maze
Rotate the viewpoint until the stone steps are offscreen to the right and a series of portals extends into the distance
Move F2 to enter a room with four exits and another pool of floating flowers
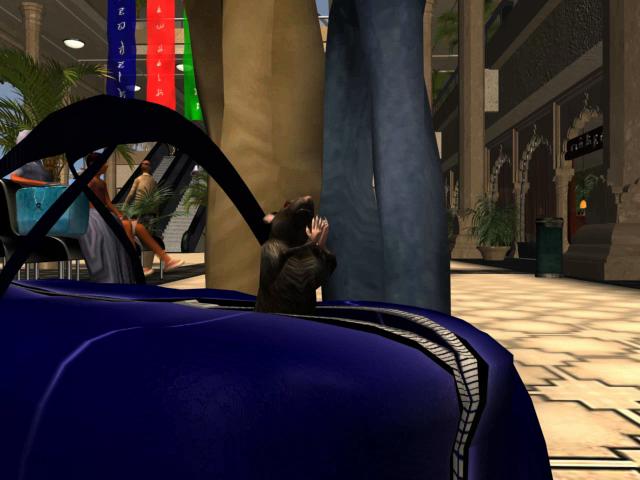
If you waited sufficiently long at the bottom of the stone steps, a twittering rat will appear within a few seconds. Watch him as he wanders around the room. In front of exactly one of the four exits, he will sit up on his haunches and squeak. That is the exit you must take to traverse the maze.
Move F2 into the next room with 4 exits
Repeat the process with the rat until you reach the end of the maze, where a stone wall with a glowing blue spot appears:
Walk forward into this wall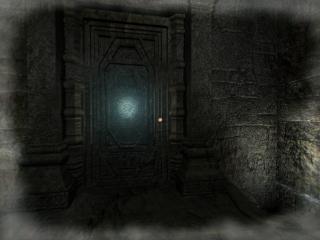
{Cutscene}
Move F2 L and climb the stone steps
Exit the room with the white key in the window and climb the stairs to the top
Move forward to the edge of the firepit
In inventory, combine the chain & door handle to make a grapnel
Use the grapnel on the small lever to the left of the Kali statue to tone down the flames
Move forward across the firepit
{Cutscene}
Sweep the mouse left and right until a faint diagonal line passes along the screen and a hotspot cursor appears. Pan down all the way, then slowly pan to the right until a faint light spot appears above the dot cursor. Move the dot cursor up to that light spot until a hand cursor appears. Click the hand to get a match and matchbox.
To light a match (which lasts for 8 seconds), combine match & matchbox in inventory
While the match is lit, pan up slightly and pick up a blue-and-white cloth from the shelf
Light another match, then quickly turn around and pick up a metal can to the left of some stacked bottles on a shelf
In inventory, combine can & cloth, match & matchbox and finally, lit match & can to create a lamp
Zoom in on the door latch
Click the lock at left, then click the metal circle at right
Move F R F to the top of the cellar steps
Use the screwdriver on both door hinges
Move F L F L F L F L F L F L F R and open the door to an upstairs room
Move F T and take the keys from the table
Exit the room, then move past the sunny window to the door opposite
Open the door and enter the room
Zoom in on the wall picture
Click the picture to disclose a safe behind it
Use the keys to open the safe
Take the music CD from the safe
Move L F and pick up a portable CD player from the nightstand
Combine the CD and player in inventory
Exit the bedroom, then move around the railing to the door in the diagonally-opposite corner
Open that door and enter the room of the woman in red
Move R F and give the player-CD combination to the woman
Select any of the responses{Cutscene}
Select any of the responses
Select any of the responses
Move R F2 R F to the garage window
Move L F R F R and use the keys to unlock the garage door
Move F R F and pick up a key fob from the table
Exit the garage and return to the garage window
Zoom in on the window and use the key fob on the 2001 Jaguar XJR inside
{Cutscene}
Re-enter the garage (now magically cleared of fumes), move R F L F and pick up a cricket bat from the floor
Move L F and pick up a security card lying next to the unconscious thug
Exit the garage again, then move L F L F R F5 to a Kali statue in a corner of the grounds
Use the security card on the red light at the base of the statue
Descend into the hole that appears
{Cutscene}
Take the knife next to the unconscious thug
Move F R and use the knife to open the temple door
Enter the temple, open the circular wooden floor hatch and descend the spiral stone steps
Move F2 and click on the wall hotspot, then move F R
If you are interested in an alternate ending and have a rat in your inventory, pick it up before clicking the "lips" icon on Anusha
After you attempt to talk to Anusha, Dharmesh Shareef will appear
Exhaust all dialog choices with him except the inessential one about the astrologer
{Endgame cutscene}
Before you pay the rickshaw driver, return to the location of the boy, then move L F into the sleeping area with a mattress
Pick up a crate here if you haven't done so already
Turn right, pan up and take a brown-colored stick lying on top of one of the metal crossbeams
Move R F2 R F L F L and pick up a broken bottle underneath the bench
Move R F5 L F and place the crate underneath the decorated window
Zoom in on the window and pick up a piece of cheese from the table inside
Pan down and retrieve the crate
Move T F R F2 and place the crate at the bottom of the pole with the empty clothesline running to it
Pan up and zoom in on the pulley attached to the pole
Use the broken bottle to cut the clothesline and have it added to your inventory
Pan down and retrieve the crate
In inventory, combine stick, rope, cheese & crate to create a rat-trap
Move F4 L F to an area with a rat wandering around
There are three hotspots in the vicinity where you can place the trap and get a rat
The rat will stay in your inventory until the end of the game, but won't appear there during the remaining dream sequence in the Temple of Kali
The alternate endgame dialog is the same, but the whole effect is made comical by Dharmesh's choice of weapon.
If you end the game with the rat in your inventory, there's a bit added to the final scene with Fred and Anusha.
Copyright © 2019 Balmoral Software (http://www.balmoralsoftware.com). Portions copyright © 2001 Microids. All rights reserved. Republication, redistribution or conversion is expressly prohibited without the prior written consent of Balmoral Software.