
Copyright © 2000 Balmoral Software (http://www.balmoralsoftware.com). Portions copyright © 2000 Cryo Interactive Entertainment. All rights reserved. Republication or redistribution is expressly prohibited without the prior written consent of Balmoral Software.
Aztec, or The Sacred Amulet as its U.S release is known, is an interesting little diversion from Cryo Interactive. It plays on just one CD-ROM, and uses Cryo's impressive 3D engine that lets the viewpoint be scanned in every direction at each node position. Game control has none of the shortcomings of Cryo's earlier effort with this interface, Atlantis . Organized into ten Acts, the plot is absorbing, and is played for the most part in a first-person perspective from the viewpoint of the main character, "Little Serpent". Students of the Aztec era will find the game an effective educational resource as well, since all cultural aspects encountered in the game are fully documented in a small database accompanying the game. This feature adds to the believability of the game's premise. Although the locations in the game are relatively few in number, there is an exploration option which allows these areas to be examined in depth outside of the game's plot mechanics. Advancing the game plot itself is usually not terribly difficult - you can sometimes get one or more clues just by wandering around for a while and waiting for your character to talk to himself. There are a few randomized elements in the game plot, and these are relatively minor.
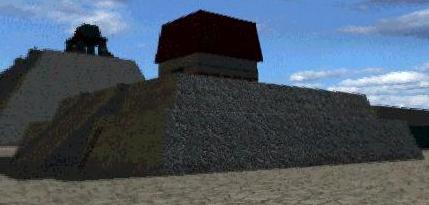
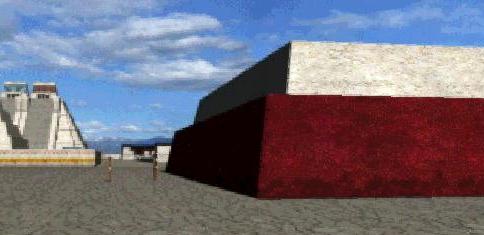
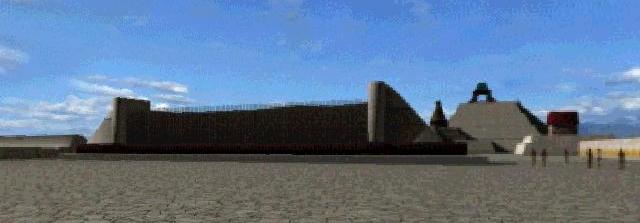
The rendered and texture-mapped graphics in the game are delightful. Particularly enjoyable are the outdoor scenes in which the sky, sunlight and shadows provide a real ambience. Only a few "shortcuts" in the graphics could be found (for example, repetitious plaster patterns on walls), and these were no distraction. There is a strong sense of authenticity in the selection of building materials, plants and costumes.
Ambient sounds and music were satisfactory, nothing more. Environmental elements were apparently added to give depth to the gameplay, but often came across as repetitious or out of place. Examples of this include footstep sounds continuing after movement has stopped, and a strange, constant sound of sword blades in the Center of Ceremonies. We would have preferred to hear the playback of Little Serpent's lines as well as the other characters he interacts with, which would have made gameplay a little more realistic. After all, this capability is available when he talks to himself. Since dialog text does not remain on the screen, there is no way to replay the dialog of characters without restoring a saved game. However, this is not really a shortcoming since the game has a nifty journal function that records the material facts of the plot as it progresses.
The gameplay menu and inventory control method are near-perfect; about the only improvement that might be made would be to add text labels to the control icons that may seem a bit cryptic at first blush. An automatic save-game feature is available, but we found the manual method to give us more control.
Aztec (The Sacred Amulet) is another game suffering from the "title renaming" phenomenon that an increasing number of releases have had when migrating between North American and European markets. In fact, the initial splash screen of the game is an apology for remnants of the original name that may still be encountered in the North American release. One wonders what the reasons were for the title change, since there is really nothing in the game identified as an amulet. But the title change aside, we recommend Aztec to anyone looking for a not-too-difficult game with a historically-accurate theme and outstanding navigation and graphics.
Press Esc twice to skip the introductory sequences on game startup
Right-click the mouse to display or hide your inventory window
Press Esc to skip dialog and video segments
Movement Abbreviations:
F: Forward (Fn for n repetitiions)
L: Turn Left
R: Turn Right
Most turn angles are about 90 degrees; some may be a bit less
Center the pointing-hand cursor in the viewport to identify the Forward
direction
The game begins with video sequences setting up the backstory. You play "Little Serpent", a humble Aztec hunter who has witnessed the murder of a nobleman in the forest by temple guards. You are discovered by the guards and chased. After evading them for two days, you return to your village to find that your parents have been imprisoned. Your first clue is a carved necklace that the murdered nobleman gave you before he died.
After meeting Quilaztli, the village doctor, turn left and approach your parents' house, the one with a red border around the doorway. Enter the house through the red doorway, then turn right and zoom in on the left-hand cage on the floor. Open the cage and take the bag of cocoa beans inside. That will increase your cocoa-bean holdings from an initial count of 14 up to 24. Exit your house and turn left. Enter the doctor's house ahead through the door with yellow pillars and a blue lintel. Note the ill man lying on the ground to the right. Proceed to the statue along the back wall of the house (closest to the altar at left), and open the compartment in its front to obtain some incense. Turn around and talk to the doctor standing in the corner. Give him the incense from your inventory and he will give tell you to see the poet Tlatli from Tlatelolco. You'll also find out that many people are dying from a strange illness.
Exit the doctor's house and you'll be confronted by "Mountain Head", the Otomi warrior who has imprisoned your parents. He's blocking your exit to the other side of the village, so you'll have to turn right and go along a pathway through the huts to reach a boat on the waterway bordering the village. Click on the right-hand boat to escape the village. Mountain Head follows you in the second boat, so you'll have to evade him and his men in the irrigation canals between the cornfields. After getting in the boat, move F2 R F2 R F L F2 L F to the right of a willow tree. This draws away a guard that had been standing by the small house in the cornfield. Move F R F out of the boat, and L F2 into another boat. Move L F2 past another willow tree to escape your pursuers. Head for the merchants' quarter of Tlatelolco.
Approach the blue doorway in the distance, then turn left and enter through the yellow doorway into poet Tlatli's house. Go into the back room of the house to discover a "filth-eating" priest performing last rites on the poet. Pay the priest five cocoa beans and obtain the poet's necklace (incorrectly referred to as a jewel by the priest). Put the necklace, identical to that of the murdered nobleman, into your inventory. Turn around and move the mat on the ground to obtain the poet's jewel. Turn left from the mat and pick up a blood-stained parchment standing at the base of the far wall. Be sure you have paid the priest before picking up any of the poet's items, or you'll get clobbered by a warrior. In your inventory window, if you move the parchment to the eye icon at upper left, you can get a closer look at it. Click the open-hand icon along the border of the parchment to return to the game. Turn around and approach the farther of the two garden plots, then turn right and enter the alcove behind the wall. Turn around and talk to the poet's slave Tototl (Bird). Guards have now blocked the entrance to the poet's house, so you'll have to find another way out. From the slave's alcove, turn right and approach the gap in the back wall of the house, facing an irrigation canal. Click on one of the boats as it passes along the canal from right to left. Move F L F4 R F2 around the building with a yellow doorway and back to the map. Go to the craftsmen's quarter next.
Move F and exhaust the dialog options with the soldier Chimalli. Turn around and follow the narrow passage between the buildings toward an orange-blue doorway. Talk to the redheaded courtesan Turquoise, then prove to her that the poet is dead by giving her the jewel you found under the mat in the poet's house. Talk to her some more and she will give you a puzzle poem from Tlatli.
After an interesting nightfall sequence, return to the craftsmen's quarter on the map. Move toward the tall temple at right, then turn around and enter Chacoatl's house. Talk to Chacoatl's slave, then pay him the two cocoa beans he extorts from you. Move into the backyard of the house and talk to the undulating Chacoatl. Show him the blood-stained parchment from the poet's house. He'll take one of your necklaces so he can investigate. He'll recommend you consult Tlilpotonqui, the Lord Woman Serpent. To see him, you'll need a shield of feathers for a gift. Exit the feather dresser's house and move L F L F2 back to the map.
Return to the merchants's quarter. Enter the marketplace through the bright-yellow doorway in the large building at right with a serrated red roofline. Tell the merchant woman sitting on the ground at lower left that you'd like to buy some merchandise from her. Quickly select light-blue dye for 3 cocoa beans, then repeat the process to buy yellow dye for another 3 cocoa beans. That's all you need from this merchant. Turn right and approach the short merchant in the shadows against the far wall of the marketplace. Look down and tell the merchant that you'd like to buy some merchandise, then select dark blue dye for 3 cocoa beans. Repeat the process to buy red dye for another 3 cocoa beans (you won't need his black dye). If you run out of cocoa beans because you bought something other than dyes from a merchant, you can sell it back. Exit the marketplace, then turn left and return to the map.
Go back to Chacoatl's house in the craftsmen's quarter. Bypass his slave and return to the backyard. The shield puzzle is a hotspot on the ground beneath the feather headdress hanging on the wall. Empty each of your four dye pots into the white block at lower right. The first objective of this puzzle is to continue the pattern of colored feathers along the bottom edge of the shield. Pick up one of the white feathers at upper right and then click the closed-hand icon over the red dye. Position the red feather in the space immediately to the left of the central light-blue feather on the unfinished shield. Pick up a green feather from the basket at upper left and position it immediately to the left of the red feather. Pick up another white feather and dye it light-blue. Position it in the remaining gap in the feathers. This completes the arrangement of feathers on the shield.
The rest of the puzzle is solved by dyeing bits of white cloth from the bowl at the top of the screen and positioning them in the appropriate place on the shield pattern. If desired, back out from the puzzle, turn left and talk to Chacoatl to get his help. He's reluctant, but places some of the colored pieces for you. For additional help, talk to him a second time after returning to the puzzle. You'll have to dye and position the final two red pieces of cloth yourself. The complete shield pattern is:
When the shield is complete, you'll automatically zoom out and the shield will appeared as your icon. Exit the house and get an update from Chimalli. Return to the map and head for Tenochtitlan square.
Move F R F to the far bank of the canal, along the right side of the palace with yellow triangles along its roofline. Turn right and talk to the boatman. Pay him two cocoa beans and take the boat to the palace landing. Turn right and disembark. Approach the tax collector straight ahead. After he's talked to you, turn right and zoom in on the tribute. Move one bale of cotton, two jaguar pelts and one bag of shells to the Texcoco quarter at lower left. Repeat for the Tlacopan quarter at lower right. Move the rest of the items, except for one bag of shells, into the Tenochtitlan half of the square. This distributes the tribute proportionally, with one bag of shells left over for you. In your inventory, the shells translate into 25 cocoa beans.
Move L F5 R F R F into the emperor's palace through the shadowed doorway behind the pillars in the corner of the courtyard. Tell the guard in the doorway that you're looking for Woman Serpent and that you have a precious object for him. Show the guard the shield of feathers in your inventory and he will let you enter. Once past the guard, turn left and approach the blue-robed Lord Woman Serpent in the corner of the room. He'll give you a bag of amarant in exchange for the feather shield. You'll also give him Tlatli's parchment. He'll then throw you into prison "for your own protection".
Inside the prison cell, turn left and pick up a knife lying on the straw. Rotate around and use the knife to cut a bundle of three cords securing the cell door. Use the knife again to cut a bundle of two cords lower down. Return the knife to inventory and exit the cell. Turn right and move to the back of the room to talk to your imprisoned parents. Your father will tell you how to find some treasure in your house back at the village. Move L F and shoot the pacing panther with the blowpipe in your inventory (wait for the circular aiming hotspot to appear). The guard will move away from the right-hand doorway and you can exit the prison through it.
Climb the stairs ahead and obtain a safe conduct object (magic rattle) from Woman Serpent's scribe. Move F R F5 R F R F R F L F L F back into the emperor's palace, up two stairs to a raised walkway and through a red curtain leading to the back of Woman Serpent's room. Show the magic rattle to the Jaguar Knight and he'll let you past. Inside the room, move L F and you'll have another dialog with Woman Serpent. Accept his deal and you'll find yourself out of the palace and back at the map.
Return to your village and approach your house (the one with the red doorway). Just before entering, pick up the digging stick lying against the wall to the right of the doorway. Enter the house and proceed to the courtyard in back. Use the digging stick to excavate twice in the ground to the left of the steam bath entrance. Return the digging stick to inventory and pick up the treasure, a turquoise mask.
Exit your house and move F3 back to the map. Return to Chacoatl's house in the craftsmen's quarter. Chacoatl's slave is now in the backyard - talk to him to obtain a message for you: Green Serpent, Seven Flint. Exit the house and move F2 R. Talk to the wood merchant and buy a bundle of wood from him for two cocoa beans. Turn around and move F to Turquoise's location. Ask her about Chacoatl's message and she will tell you about a craftsman called Seven Flint. Move F2 across the bridge. Turn around and talk to the jeweler. Give him the faggot of wood from your inventory, then show him the necklace of the murdered nobleman. He will direct you to someone else named Seven Flint, a tradesman.
Return to the merchant's quarter via the map, and move L F3 L F. The man standing between the agave plants will tell you where Seven Flint lives. Move L F L F through the white doorway into Seven Flint's house. Proceed into the backyard of his house and enter the storeroom between the two wall hangings. Go to the far left corner, where some lizard skins are hanging on the wall. To the lower left of the lizard skins is a hotspot where a large piece of plaster is missing from the wall. Use your knife on this hotspot to dig out another necklace. After a dialog with the agitated tradesman, give him your parents' treasure and he will tell you that Lord Three Rabbit bought five of these necklaces.
Exit the storeroom and you'll be confronted again by Mountain Head. If you wait too long or try to retreat back into the storeroom, you won't make it. Instead, quickly click on the jar of rattlesnakes in front of the warrior.
Return via the map back to the merchants' quarter. Enter the marketplace at right, then turn right and approach a merchant woman in white kneeling in the shadow. Tell her that you'd like to buy some merchandise. Pick up a gourd of octli alcohol for 5 cocoa beans. Exit the marketplace and move L F R F4 L F back to the man standing between the agave plants. Talk to him and he will direct you to one of Three Rabbit's slaves. Turn around and click on the yellow doorway, then turn left and proceed down the alley ahead.
Talk to the old slave and give him the gourd of octli alcohol from your inventory. Agree to play patolli with him, but skip the training. The slave always gets the first move. Click the four-bean icon on the right center of the mat to "roll the dice" (0-4 white spots). Your available moves (if any) are indicated by glowing red stones. Try to get your pieces past the intersecting squares at center - if your opponent lands on a square you occupy, your piece will be sent back to the beginning. Conversely, you can use this strategy to block or attack your opponent. You need a count of two or better to start out a piece on a clear board (two of your own pieces cannot occupy the same space). Here are the probabilities of each of the dice outcomes:
	No spots	 6%
	1 spot		25%
	2 spots		38%
	3 spots		25%
	4 spots		 6%
You may be able to detect different amounts of delay time as the AI kicks in at various points. For the most part, this Mancala-like game is just a race involving a lot of tedious mouse action, and one game would have been more than enough. You have to either win two games or play three of them in order to get information from the slave. When he finally does open up, he'll give you the clue "my eye, my nose, my mouth" and tell you that Lord Three Rabbit can be found in the temple annex next to the pyramid of Tezcatlipoca in the Center of Ceremonies. Turn around and click the cursor to the right of the half-wall ahead, then move L F3 R F2 back to the map.
Return to the craftsmen's quarter and move F to have a conversation with Chimalli. Talk to him again to learn that Turquoise is at the calmecac. Move R F3 to the map and head for the merchants' quarter. Move R F R and speak to Turquoise. She will give you a sacred drum that will allow you into the Center of Ceremonies. Move R F L F and use the map to return to Tenochtitlan square.
Move F5 toward the entrance to the Center of Ceremonies. If you encounter a beggar, you can help him if you like. Show the drum to the guard, then continue forward past him into the center. You're facing north.
In the Center of Ceremonies, move R F L F2 L F R F2 to the priestess Papatzin and tell her about the drum. Before finding the poet, explore the annex to the Temple of Tezcatlipoca: move R F R and show the murdered nobleman's necklace to the guard. Move F2 L and talk to the guard. Take on his questions; the answers were given by the old slave with whom you played patolli: eye, nose and mouth. Continue F2 R and eavesdrop on the conversation between Lord Three Rabbit and the priestess Papatzin, learning about their use of poison in a plot against Emperor Moctezuma. Move F2 into the vacated room and look down to pick up a stone block. Move L and use the block on the floor in front of the statue. Pick up the obsidian mirror to the left of the statue. Move the statue and take the gourd of poison that is disclosed behind it. To exit the temple annex, move L F L F L F R back up the stairs.
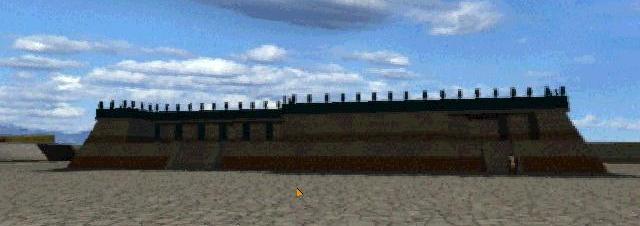
Use the mirror from your inventory on the column hotspot, then wait until Little Serpent says Papatzin and Three Rabbit are gone. Move F R F L F3. A guard blocks further passage to the west, so you'll have to go around him by circling the red-roofed building to the left (south). As you pass the eastern flank of this building, note the ladder leaning up against its side - you'll need that later. Continue clockwise all the way around the red-roofed building until you return to the main avenue running along its northern side. If you face west, the view should be like this. Continue west along the northern side of a building with a red base. Turn left (face south) and continue past the red building and a similar one with a blue base. When you can see a circular building ahead, you can turn slightly to the right and identify the House of Song. On closer approach to it, you'll see that the house has two stairways leading into it. Enter the building through the left-hand stairway (the other one is blocked by a guard), then move R F2 L F down the stairs. Talk to the poet "Flower of Stone", then give her the drum you're carrying. Give her the poem from Turquoise so she can study it. She'll tell you about the poet Ayocuan back at the Emperor's palace.
Exit the building by moving R F2 up the stairs on the far side of the garden. Retrace your steps along the north side of the building with a red base, then recircle the red-roofed building in a counterclockwise direction. Facing east toward the Grand Temple, move F2 R F2 L F R F2 R F L.
Move F2 out of the Center of Ceremonies. You'll meet up with Chimalli and he'll give you an update on court intrigue and tell you that Lord Woman Serpent has left the city. Move R F2 L F L F L F R F L up the stairs to the upper palace walkway. Use your knife to cut the cord securing the drawbridge, then move R F L and gain entrance to the emperor's palace by showing the magic rattle to the Eagle Knight. Move F5 R F R into the palace. Look down and pick up a box at the foot of the column. Move R F L F R F R and put the box on the low wall surrounding the garden. Look up to see a white flower, then click on the box. Take the flower, then move L F to jump off of the box. Continue R F R and give the flower to the poet. He will give you a parchment from Tlatli; if you look at it in your inventory view window, you'll see a reference to a Tzompantli (wall of skulls) and a ladder.
Move R F R F7 L F R F2 R F4 R F out of the palace, across the drawbridge and through the plaza to a construction area adjoining the Center of Ceremonies. The guard won't let you back into the Center, so you'll have to find another way. Look down and pick up a torch lying on the ground to the right of a brazier. Ignite the torch in the brazier, then move L F3 into the canal running under the Center walls. Turn around and you'll see a small alcove on your right. Enter this alcove, turn right and proceed to its furthest extent. Turn around so you're facing the canal and click the torch cursor on the small square ventilation duct at left. This is a "shortcut" into the Center of Ceremonies.
Move F R F and you'll be confronted by a priest. To get past him, you'll have to give him your magic rattle (and your ability to get back into the palace without the boatman). Continue your way back to the red-roofed building by moving F L F R F2 L F2 L F R. Pick up the ladder leaning against the red-roofed building, then circumnavigate the building as before to get around the guard blocking the main avenue. Once you're around the red-roofed building, head for the center of the Wall of Skulls ahead. Use the ladder against the wall to reach the Skulls Puzzle.
The objective of this Towers of Hanoi type of puzzle is to get four skulls on each stake in the same orientations as in the three stakes at left. The bottom skull on the right-hand stake cannot be moved until all the stakes to the left are properly arranged. To rearrange the skulls, they have to be dropped from above the stakes. Numbering the accessible stakes from 1 to 6 left to right, a 37-move puzzle solution is
	4-1   4-6   4-6   3-4   5-4   5-4   5-2   5-3   6-5

	2-5   1-5   3-5   6-3   1-6   1-6   1-2   3-1   3-1

	2-3   2-3   2-1   3-2   3-1   3-2   3-2   6-3   6-3

	2-3   2-3   5-6   2-5   2-6   5-2   6-2   6-5   6-2   6-2
After removing the lowest skull from stake #6, pick up the poem. Turn left and return to the poet "Flower of Stone" in the House of Songs (if your way south is blocked by a guard, you'll have to go around the building with a red base, and possibly the one with a blue base as well). Give the poet the parchment from the wall of skulls. After you've finished the dialog with her, move one of the poems over the "eye" icon in your inventory window, then move the other poem into the close-up window. Line up the two parchments so that the dark-brown lines are aligned and the right-hand parchment is higher than the left-hand one. Show the combination of poems to the poet and she'll direct you to the nearby ball court.
Leave the building as before and retrace your steps past the building with a red base to the vicinity of the wall of skulls. Approach the ball court located immediately to the west of the wall of skulls. Enter the court and move forward to have a dialog with the nobleman playing ball. He'll give you six shots to get the ball through the hoop. Turn around and pick up the ball on the ground, then approach the hoop at the top of the wall. Take the ball from inventory and click it in the center of the hoop. When the ball goes through the hoop, you'll see the star of Queztalcoatl. Return to the House of Song (if your way south is blocked by a guard, you'll have to go around the building with a red base, and possibly the one with a blue base as well). Talk to the poet, and she'll describe two dates she found on the parchment. Turn around and move F R F2 back upstairs into the room with date murals on the walls. Move into the far corner of the room; the murals start near here and increase in numerical order around the room. Observe the lower part of the third (Three House) and fifth (Five Serpent) murals. Go back downstairs and talk to the poet. She'll tell you to go to the spring of Chapultepec.
The next day, you're at the spring. Move R F2 L F to a guard. Don't tell him your name. He'll challenge you to show your skills as a hunter. Turn around and move F R F. Blackbirds can be found one at a time in the two trees bordering your viewpoint. The left tree is at the top of a grassy mound encircled by the path, and the right tree is across the path from the left tree. The first bird appears randomly in one of these two trees, and you may have to wander around a bit before it shows up. To see a bird in the left tree, you must be on its far side, away from the guard. A bird in the right tree can be seen when you are standing on the same side of it as the guard. When you find a bird, take your blowpipe from inventory and knock it down by positioning the circular aiming point on the bird and firing before it jumps. Wander around the paths until you find the dead birds on the ground and can put them in your inventory. Depending on the randomness of the game, it may be possible to shoot a third bird, just in case you're really hungry.
Return with the dead birds to the guard's location and give them to him. Move F R F around the guard to see the entrance to a cave. Move R F R F L to the right of the cave entrance and pick up one of the jars. Move L and feed the parrot the amaranth you have in your inventory so that it will repeat the password for entering the cave. Go back around the shelter to the cave entrance and talk to the guard, using the password "In topco petlacalco".
Inside the cave, move R F L and pick up a stick lying vertically in front of two large horizontal planks. Move R F deeper into the cave and use the stick to break the jars of poison. Apparently the poison is in only a few of the jars because you'll be unable to break any more. Exit the cave and Chimalli will save you from the guards.
Move F2 to the group of figures standing by the spring and you'll have a dialog with Lord Black Flower. When you're given a choice, drink the poison rather than putting it into the aqueduct. As soon as you are facing Black Flower again (though blurred), immediately turn around and jump into the aqueduct. After a weird dream sequence, you'll find yourself back at the doctor's house in the village.
Move L F R and talk to the doctor. He'll direct you to obtain some herbs from the "floating gardens" (cornfields). Move L F R F R F L F L F R F and get into the boat. Continue F2 R F2 L F L F R and use the knife to cut the stems of the brown-flowered herbs outside the small house in the cornfield. Return to the backyard of the doctor's house and give him the medicinal herbs. Go back into the main room of the doctor's house and pick up the antidote from the doctor's workshop on the floor.
Leave the house and move F L F3 back to the map. Head for Tenochtitlan square. Move F R F R and pay the boatman two cocoa beans to take you back to the palace. Turn right and disembark from the boat. Approach Woman Serpent's scribe ahead and obtain a gold bracelet from him (unless you've already gotten one earlier from the beggar in the plaza). Move L F3 into the palace. Your way ahead is blocked by a guard, so turn left and rip the screen open with your knife (even though there is no hotspot at this point). Proceed through the opening and move R F L F2 R. Talk to Ayocuan and mention Lord Black Flower. He'll agree to distract the guard outside Lord Woman Serpent's room. Move R F4 R F2 L F R F into the back of Woman Serpent's room. Give the antidote to Woman Serpent, then watch the endgame sequence and credits.
Copyright © 2000 Balmoral Software (http://www.balmoralsoftware.com). Portions copyright © 2000 Cryo Interactive Entertainment. All rights reserved. Republication or redistribution is expressly prohibited without the prior written consent of Balmoral Software.