Copyright © 2002, 2026 Balmoral Software (http://www.balmoralsoftware.com). Portions copyright © 1999 Casterman/Microids. All rights reserved. Republication or redistribution is expressly prohibited without the prior written consent of Balmoral Software.
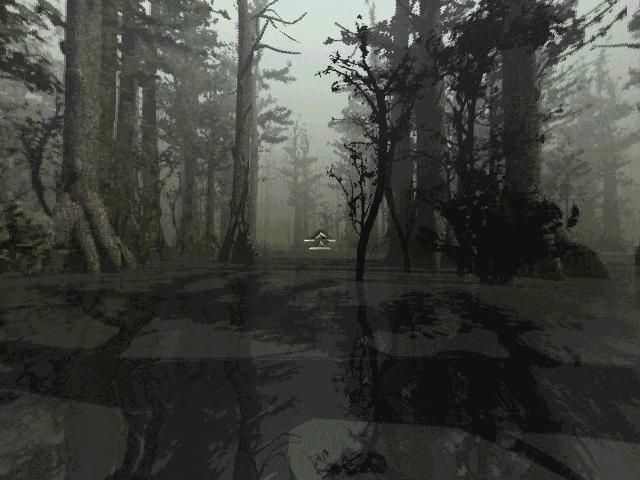
Amerzone is a 1999 release from Casterman/Microids that takes you on an absorbing adventure through the jungles and other destinations of a realistic, though fictitious land. It's a fairly easy game that provides a wide variety of areas to explore. A full backstory for the game is provided through character dialog and written materials that are gradually uncovered as the game progresses. Graphics are pretty good, perhaps a little pixelated in comparison with more recent releases. An interesting digital zoom effect is used to show close-ups or approaches. Video cutscenes are exceptionally well done, providing fantastic sound effects, music and a filmmaker's eye in setting up foreground and background views. Extra effort was put into adding occasional animated sprites to give the rendered backgrounds more believability. No errors in continuity were experienced in scenes which can be altered by the player. The few characters in the game are standard cyberpuppets, and the voice acting is excellent. Navigation is a standard node-based method, with full 360-degree and up/down rotation at each stopping point. This type of navigation seems to lessen the need for movement transitions between individual nodes, with frequent cutscenes providing most of this function.
The point-and-click game interface is fairly standard for the genre. With the exception of a few cutscenes, the entire gameplay is shown from a first-person perspective. A smart cursor indicates available navigation directions and hotspots for inventory interaction or dialog. A few inventory items can be collected along the way, and these are manipulated with a separate display screen. You can only move forward through multiple pages of the written material in this screen, so you will need to reopen the document if you need to move backward. The game is released on four CD's, and can be played with any one of them loaded. Gameplay is fairly linear in most areas, and no CD swapping is required as you use them in sequence. Saved-game slots are limited to only eight, but external files can be manipulated to control this (see the gameplay notes below). Unfortunately, no saved-game overwrite warning is provided.
The story and plot elements in Amerzone are engrossing, and interesting character development is provided in the backstory about the old friends of a former explorer. Most puzzles in the game involve finding and using inventory items, but a couple of difficult pixel-hunting sequences are required to advance the gameplay about halfway through. No timed or arcade sequences are included, so you have plenty of time to explore your surroundings. Music was satisfactory, but rather minimal. Sound effects are atmospheric and very realistic, although many sequences are somewhat short and repetitive.
Amerzone is a relatively-easy and immersive story that many players will enjoy, especially those new to the adventure-gaming experience.
After listening to the postman, move forward twice, then turn left and investigate a telescope in which you can see some birds flying away to Amerzone. Return to the main pathway, turn left and approach the lighthouse gate. Take the letter in the gate's mailslot. If you use your inventory screen to read it, you'll see that it is from the curator of a natural history museum and mentions the questionable standing of Valembois with the museum. Click the cursor on the upper center of the gate to open it. Move forward and open the door to the lighthouse. Turn left and pick up a sledge hammer. Go up the stairs behind the bicycle, and you'll hear your footsteps on wood (even though the floor is stone). Move into the room and talk to the old man seated at the table. He'll tell you an egg is still alive and needs to be returned to the birds of Amerzone.
Zoom in on the telephone on the wall at left. Pick up the receiver and try entering the phone number from the curator's letter (03 46 52 81 79) to hear more on the old man's relationship with the museum. Zoom in on the open drawer to the right of Valembois to obtain letters from his friends Mackowski and Alvarez describing more of the game's backstory. Turn around and go up the spiral staircase to the library. Zoom in on the desk and pick up the old man's Amerzone journal. Inside this journal, note Valembois' birthday on the first page, and a reference to a +5° angle on the fourth page. If desired, turn left and spin the globe or view a couple of slides in the slide projector after turning it on.
Climb the straight ladder to the library balcony and pick up a letter from Valembois that has a ribbon seal on it. Go back down the ladder and ascend the spiral staircase to the top lighthouse level. Zoom in on the drafting table to see a hydrafloat diagram. Click on the TV screen below the dish antenna to watch a film clip of Alvarez, now the dictator of Amerzone. If desired, operate a handle on the low table to turn on a fan and see Valembois' experiment with aerodynamics. Go through the metal door to the lighthouse exterior, then turn around and climb the ladder to the left of the door. Go up the curving stairs to the top of the lighthouse, where a device suggests the entry of a three-digit code.
Return to the entry level of the lighthouse and open the horizontal door in the stone floor. Turn on the light switch at right and proceed through the tunnel to another spiral staircase at the end. Go down these stairs and move forward twice into another tunnel. Immediately before the tunnel descends down some steps, turn right and enter a side chamber.
Click on the wall panel to provide electricity, then turn on the power unit standing next to it. Pick up the gigantic floppy disk on the desk, then turn on the computer monitor. Zoom in on the screen and insert the floppy disk into the slot. Enter Valembois' birthday from his journal: 2 8 0 6 0 4, then press the asterisk (*) button. If you make a mistake, the left-pointing triangle symbol acts like a backspace. Click on Authentication, then on Load. After the computer is finished updating, a door at the end of the tunnel is unlocked.
Exit the computer room, then turn right and descend through the tunnel to a red door at the end. Open the door to enter an elevator chamber. Before moving onto the elevator platform, look to the lower right and pick up a metal rod lying in the corner. Enter the elevator, then look down and place the metal rod in the small receptacle on the wall at lower right. Operate the yellow elevator handle to descend partway, at which point the metal rod prevents you from going further. Turn around and use the sledge hammer to break open the wall. Move forward into the passageway and open a sliding door at the end into a refrigerated chamber. Turn left and move toward the freestanding control panel. Turn right and release the egg by pulling on the large control lever.
Return through the dark passageway to the elevator and use the yellow handle to go back up. Remove the metal rod near the floor so that the elevator can descend further. Operate the elevator handle one more time to go down to the hangar level. Exit the elevator and pass through the red door. Descend the stairs and make your way to the right of the moored hydrafloat vehicle. If you needed a clue about how to release the egg, a blueprint in the office opposite the hydrafloat could be examined.
Go past the hydrafloat's right wing and gangplank and continue down the pathway beyond. After several clicks on this floating pathway, you'll see that the hangar door is closed ahead. At the end of the pathway, turn right and follow the platform into the wall of the cave. Enter another elevator at the end of the passageway, then turn around and close the door by pressing on the red button. Zoom in on the button and press the up arrow. Open the elevator door and move forward twice. Use the telescope and look up to see that the 140° angle is highlighted in red. Go back to the elevator and repeat its control sequence to go up. Exit the elevator at the upper lighthouse level, then go back up the ladder and curving stairs to the top of the lighthouse. Using the 140° from the telescope and an additional +5° from Valembois' journal, zoom in on the three-digit device and enter the code 1 4 5 using the left lever to advance a digit and the right lever to change which digit is being modified.
Return to the hangar level via either the elevator or tunnel passages. Behind the hydrafloat, approach some ladder rungs set into a grey column near the back of the hangar. Climb this ladder to a control platform above the hydrafloat dock. Operate the large lever to load the egg into the hydrafloat. Go back down to the hangar floor and cross the gangplank into the hydrafloat cockpit. Insert the floppy disk into the instrument panel and select the Load command. Select the PLANE mode, then enter 1 4 5 * in the details screen and confirm the destination. The polluting hydrafloat takes off and follows the birds to Amerzone.
After a switch to CD #2 and a cool hydrafloat animation in the Chapter 2 screen, you'll find yourself offshore from an island with two prominent peaks. Click on the control panel and select SAILING mode since you're out of gas. That gets you a little closer to the island, but you're not inside its lagoon. Click on the control panel and select SUBMARINE mode. You'll snag a shipwreck cable on the way in, which will block the undersea exit from the lagoon. Click on the hydrafloat control panel and select GRAPNEL mode, then pull the curved grapnel lever immediately to the right of the control panel to drop the hook into the water. Turn right and exit the hydrafloat. Turn left and talk to the crusty fisherman sitting at the end of the dock. He'll mention a whale trapped in a underwater net in the lagoon. Turn right and move toward shore. The old ship's hull ahead of you has been converted into a bar. Enter the bar and pick up a diving helmet from one of the tables. Go to the back of the bar and also pick up a knife from the dartboard on the wall.
Exit the bar and turn right. Proceed past the windmill on your left and continue along the beach until you come to the next structure, a repair hangar with a gasoline pump out front. Enter the hangar and pick up a gas can. Move farther into the hangar and pick up a wrench from a table in back. Exit the hangar and fill the gas can at the pump.
Return to the windmill you passed earlier. Zoom in on it and operate the handle on the beach side to activate the windmill vanes. Move forward onto the windmill platform. While facing the lagoon, use the wrench to detach the end of a pipe leading into the water. Turn around and zoom in on the circular handle at the left side of the windmill base. Operate the handle to engage the pump gears. Turn to the lower right and attach the diving helmet to the loose hose end. Turn left and pull the copper-colored lever to start the air pump. Turn back to the diving helmet and click on it to enter the water.
Underwater, you can hear the cries of the trapped whale. Move forward once, then use the knife on the rope at lower right to free the whale. Move the cursor diagonally up and left from the post where you cut the rope, then move forward. Move forward again toward a vertical pole visible in the distance. Facing a derelict airplane, turn right slightly and move forward toward the post. At this point you should be able to see the grapnel cable running diagonally across the viewport. Turn right slightly and move forward. Here is the crashed hydrafloat of the previous expedition; click on the grapnel to attach it to its door.
Turn left to the first cursor position, then move forward. Turn right to the first cursor position between a wing fragment and the old airplane, then move forward. Turn left to the second cursor position (to the left of the shipwreck), then move forward twice. Facing a dark stone at the base of some seaweed, turn right slightly and move forward twice to exit the lagoon.
Return to the fisherman on the dock and talk to him again. After he gives you a key, re-enter the hydrafloat cockpit and use the gas can to refill the fuel tank to the left of the egg in the rear. Turn around and pull the grapnel lever to the right of the hydrafloat control panel. Retrace your steps back to the windmill and pick up the diving helmet to return underwater. Go back to the hydrafloat wreck near the vertical pole. Zoom in on the control panel in its cockpit to get its heading ("details") of 227.
Return to the beach behind the windmill, then turn left. Follow the beach around until you see a crashed airplane past the hangar. Continue around the lagoon and follow a path through a cleft in the rocks. Enter a shipwreck at the end of the path and use the key to open a chest you'll find inside. Grab the floppy disk inside and return to the docked hydrafloat. Insert the floppy into the slot below the control panel, then select Load. Select HELICOPTER mode, then enter the code 2 2 7 * and confirm the destination. Click the start lever below the gauges to the right of the control screen for a cool map effect.
After a switch to CD #3, you'll be at your next destination with most of your inventory consolidated. Click on the control panel and select SAILING mode since you're out of gas again. On your arrival at Puebla, exit the hydrafloat and walk up the path toward the village gate. As soon as you pass the gasoline pump, turn right and proceed to a cemetery at the end of the side path paralleling the river. Talk to the old priest David Mackowski in the cemetery and obtain a key. Return to the village gate and use the key to unlock it. Move through the town square past the well and dead cow and approach a schoolhouse with a red flag outside. As soon as you approach a jeep on the far side of this building, you'll get knocked out by a guard and will wake up in a prison cell.
Pick up the cup beneath the window and use it to capture a bug that can be seen as a small white spot to the upper left of the door. Look through the hole in the base of the door and put the cup's contents into the liquor bottle. After the guard collapses, zoom in again on the lower door area and pick up the key from the guard's belt. Zoom back out and use the key to unlock the door. After exiting the cell, turn hard right and approach the parked jeep. Pick up a red gas can and rope from the back of the jeep. Retun to the well in the center of town and use the rope on it. Climb down the rope to a subterranean tunnel.
Move forward through several tunnel chambers and go up the spiral stone stairs at the end. Climb the ladder into a confessional. Exit the confessional past the impressive animated candles and move toward the church altar. After another cutscene with the priest, turn right and open the large brown book on the podium by using the hand cursor on its corner. Leaf through a couple of pages and pick up a key. Turn around and use the key to open a screened compartment on the altar. Pick up a letter and Floppy 3 from inside. Return through the confessional to the subterranean tunnel. Before leaving the room at the bottom of the spiral stairs, pick up a sword standing next to the doorway. Move forward twice. At this point, you can exit the tunnel back up the well rope ahead, or take an alternate exit.
To use the alternate route, turn left and put the sword into the arm of the statue. Touch the sword to unlock the gate behind you. Turn around and go through the gate, tunnel, ladder and crypt beyond to end up in the cemetery outside the village walls.
Return to the hydrafloat and fill it with gas as before. Insert the floppy into the control panel slot and select Load. Choose GLIDER (motorboat) mode to continue a Hearts of Darkness-style ride up the river past a train wreck. An interesting vulture's-eye-view Indiana Jones map effect shows your progress deep into the Amerzone jungle, where some excellent water effects can be seen.
Exit the hydrafloat and walk along the dock until you're facing a jungle path. Zoom in on the right side of this path to see a cutscene showing a "suckerer". Uh-oh! Follow the path to a hut and pick up a gas can inside (there's also a map here you can optionally pick up). Return to the hydrafloat and refill it with gas (the white bird egg now appears nearly black). Turn around and operate the start lever under the gauges to the right of the control panel. You'll proceed upriver until your way through a narrrow cleft in the rocks is blocked by porcopotami. Press the klaxon (horn) button to the right of the control panel to disperse the animals.
Try to move forward through the next gap, which is blocked by tricorn buffalo, and the animals will cause your engine to be damaged. Since you inexplicably cannot access the control panel, turn left and click forward on one of the cockpit windows. This allows you to access the control panel and put the hydrafloat into GRAPNEL mode.
This is one of several sections in the game where you must pixel-hunt to find the correct location for a grapnel-style cursor. Most of these locations are relatively easy to find, but a few can be difficult and you must get your positioning exactly right. To facilitate your navigation, we've included screenshots that show the correct grapnel-cursor locations at each node. To use the grapnel, first place its cursor in the correct position, carefully click the mouse to select that position, then move the cursor down to the curved grapnel lever to the right of the control panel, and click the lever. If you've selected the initial grapnel position correctly, you'll be rewarded with a short cutscene showing the grapnel pulling you forward. Here are the first four grapnel locations:
Location #1The last location is not a rock in the river, but a "rhinopotamus"!
Location #2
Location #3
Location #4
Exit the hydrafloat and follow the grapnel cable through the water to the rhinopotamus at its end. Rotate left to the first cursor position just to the right of a large tree, then move forward. Turn around until the cursor is centered on the trunk of the large tree near the rocks in the stream. Rotate left to the second cursor position, then move forward three times. Facing three dangling vines, turn left slightly and move forward. Turn left to the second cursor position just to the left of a wide tree trunk a few steps away, then move forward. Turn slightly left and move forward. Facing a tree trunk with long grass at its base, turn left to the first cursor position and move forward. Turn slightly right and move forward to the end of the path. Pick up the anesthetic darts lying on the ground, then turn around and move forward twice past an animated pink butterfly on the large rock at right. Turn very slightly left and move forward. Ahead is a fork in the path, follow the right fork forward once. Turn right to the first cursor position and move forward to the position at which you previously saw the dangling vines (they're behind you now). Turn right to the first cursor position and move forward three times. Turn hard left and move to the left of the tree. Turn around and you'll see the rhinopotamus at the end of the stream. Use the darts on him to release the hydrafloat. Don't try using just your bare hands (gears) or he'll knock you silly! Zoom in on the animal and release the grapnel, then return down the stream to the hydrafloat.
From the hydrafloat cockpit, click forward once and you'll begin another grapnel sequence:
Location #5When you're facing the pechosaurs (who will have fun if you try to use your grapnel on them), turn right and exit the hydrafloat. Proceed along the tributary until you hear bees buzzing and can use a trail on the bank at left. Beneath and slightly to the right of the beehives on the canyon wall, you can pick up a small stick lying on the ground. Use this stick with the larger stick to the left to smoke out the bees and drive away the pechosaurs. Return to the hydrafloat and continue upstream using another grapnel sequence:
Location #6
Location #7 (tough!)
Location #8Insert CD #4 at the prompt.
Location #9
Location #10
Location #11
Location #12
Location #13
Location #14
Pick up the egg and exit the hydrafloat. Follow the raised wooden walkway to the left and enter a native village (you may hear a girl laughing at this point). Inside the circular structure, turn left and enter the darkened doorway with a large dark bird figure overhead (more laughter). Exit through the door at the rear of this room onto a jungle path behind the village. Move forward once to a T-intersection in the path, then turn left and move forward twice. At the end of the path, turn around and shake a small tree to dislodge a manka bean. Pick up the manka, then turn slightly right and move forward four times along the path until you can see a cave opening ahead. Turn left and pick up some chico plants growing next to the path. Enter the cave and move forward until you can look down and pick up a red bug. Continue into the cave and climb the ladder at its far end. Outside the cave, follow the raised wooden platform until you reach a control valve and can move it.
Return down the ladder into the cave. Facing the bottom of the ladder, turn around and move forward seven times until you can turn left and see the wall of the village structure. There's a dark grey bug you can pick up from the ground here, but you won't really need it. Re-enter the village structure and zoom in on the table to see a diagram of a boat elevator. Open the drawer in this table and pick up Floppy 4. Go back to the village courtyard and enter the next room to the left, with a skeleton out front. Move to the back of the chopping machine and put the chico plant into the receptacle for the conveyor belt. Go back to the front of the machine and pick up a bowl of chopped greens. Exit to the courtyard and enter the next room to the left, with a bulged entrance. Go to the back of the hammering machine and deposit the manka bean into the large cone-shaped hopper. Pick up a bowl of white liquid at the base of the hammer. Return to the courtyard and cross it to a room with sunbeams that a girl now occupies.
Give the egg, bowl of greens, bowl of white liquid and red bug to the girl and she'll perform a ritual on the egg. Return to the dock and continue one node beyond the hydrafloat to a lever at right guarded by a motionless snake. Click on the snake and the girl will call it away. Move the lever to open the entrance to the boat elevator. Re-enter the hydrafloat and secure the egg in the cargo compartment. Turn around and load the diskette into the control panel. Select BOAT mode and operate the start lever beneath the gauges to the right of the control panel. The control panel display in the foreground now appears in French. When the hydrafloat has entered the boat elevator, turn right and operate the wooden lever at the side of the boat to the left of the egg. Repeat this operation at the top of the elevator.
After an interesting boat ride, you'll crash into a swampy area and the hydrafloat will be ruined. Save your game at this point as it's easy to get lost in this swamp. Swim to the right side of the hydrafloat, then turn around and pick up the egg from a frame sticking out of the water. Enter the hut to your right and pick up a mojo bag from the wall. Exit the hut and move toward the wrecked hydrafloat. At the position of the egg frame, turn right and move toward a tall tree between the hydrafloat and the hut. Facing a post with three holes in its base, turn slightly right and move forward three times to an area with lily pads. Turn slightly right and move over the lily pads. Look up and you'll see a tree at right with a single bare branch pointing to the upper left about halfway up. Position the cursor just to the left of this tree and move forward twice. At a position where there are some reedy plants and floating algae and you can hear frogs, position the cursor at the right edge of the reeds and move forward. Look up and you'll see a tree at right with two horizontal bare branches sticking out opposite from each other. Position the cursor just to the left of this tree and move forward to a position where you can hear bees buzzing.
Look around and you'll see a small black tree with a trunk curving into the water. Position the cursor just to the left of this tree and move forward twice to a position with floating leaves. Continue forward three times to another position with bees buzzing (different from the one you visited earlier). Set the cursor to the right of a leaning tree and move forward twice to a position with an orange butterfly on a tree trunk in the right foreground. Move toward the burial platforms ahead, then turn hard right and use the mojo bag on the holes in the base of the loudspeaker pole. This will call the web-footed giraffes, the closest of which has a saddle on it. Click the hand cursor on this giraffe, then turn around and click on the giraffe's neck to ride away. When the giraffe stops at a large tree, climb the ladders on it and proceed across a rope bridge.
Midway across the bridge, the chapter changes. At the far end of the bridge, continue through a gap in the rocks and climb the steps to the top of the "takeoff temple". Open the door and move forward to hear dictator Alvarez. When he passes out or dies, zoom in on him and take his medals. Turn left and operate a large wheel on the wall, which opens an entrance to the temple interior. Go halfway down the temple steps and enter through the exposed hole. Descend the steps to your left and operate the wooden hoist. Place the medals into the metal crucible to melt them into a key. Zoom in on the key and pick it up. Move past the furnace along the base of the raised platform. Turn left and approach a louver control panel in an alcove. Insert the key into this panel. Click on the key until the louver indicators turn clockwise as far as possible, then return to a horizontal position. This provides the proper airflow along the glider ramp above. Approach the glider at the top of the wooden steps. Click on the glider to ride it into the caldera of a volcano.
Move counterclockwise around the volcano five times, then turn left and pick up a metal bird figurine lying at the edge of the lava pool. Turn right and move forward. Turn right and move into a chamber built into a low mound. Go to the end of the walkway and place the egg on top of the chair-shaped structure. Retrieve the egg and go back to the volcano. Turn right and continue counterclockwise around the volcano three more times. Turn left and move out onto the rocky platform projecting above the lava. Deposit the egg at the end of the platform, then crack it open with the metal bird figurine and watch the endgame sequence.
Copyright © 2002, 2026 Balmoral Software (http://www.balmoralsoftware.com). Portions copyright © 1999 Casterman/Microids. All rights reserved. Republication or redistribution is expressly prohibited without the prior written consent of Balmoral Software.